A Linear garage door opener is among the most popular choices because of its reliability and ease of use. Whether you have a remote that seems to disappear into thin air or one with a few buttons that can be tricky to navigate, I’m here to help. Let’s get into the nitty-gritty of installation so you can enjoy your newly automated garage door in no time.
Gather Your Tools and Supplies
Before you dive into the installation process, you’ll want to make sure you have everything on hand. Trust me; there’s nothing worse than getting halfway through, only to realize you’re missing a crucial component. Here’s a quick list of what you’ll need:
- Tools: Ladder, drill, screwdriver, tape measure, level, and a socket wrench.
- Supplies: Linear garage door opener kit, mounting brackets, and safety sensors.
Make sure your garage door is in good condition before beginning the installation. Are there any visible issues with the door itself? If so, tackle those first! A faulty door can complicate the installation and could lead to problems later on.
Understand the Instructions
Now that you’ve got your tools and supplies, let’s dig into the installation manual that comes with your Linear garage door opener. You might be thinking, “Do I really need to read all of this?” Honestly, yes. Manuals are like treasure maps—they guide you through the process and ensure you don’t get lost along the way.
Take the time to thoroughly read through each section. Familiarize yourself with terms like “motor unit” and “mounting brackets.” This step will prevent confusion during installation. Plus, you might discover tidbits about features you didn’t even know you had!
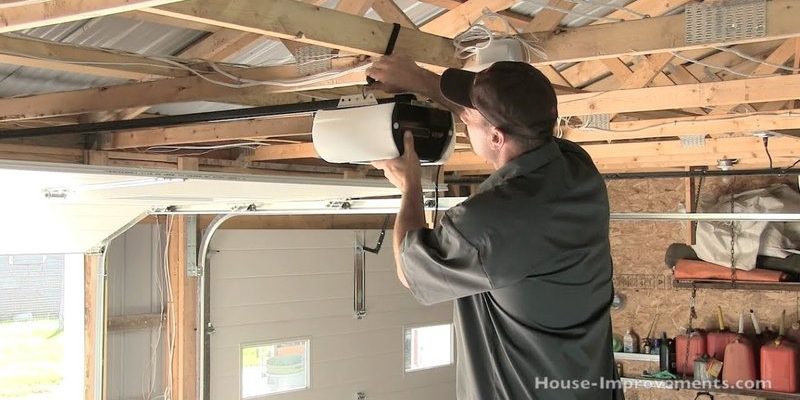
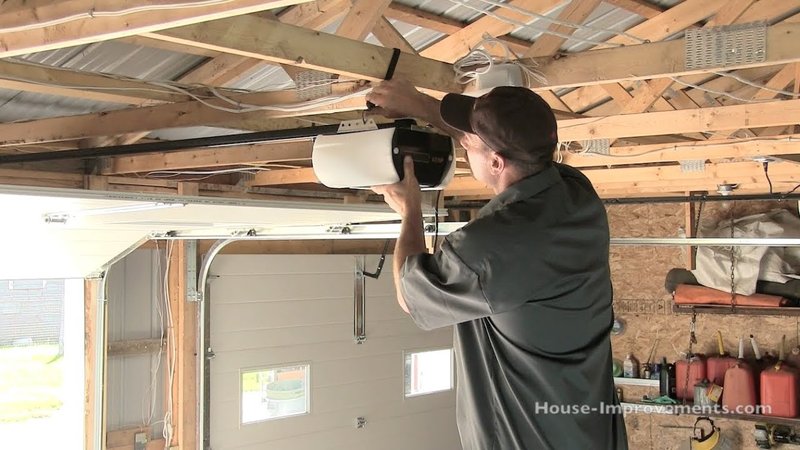
Installing the Motor Unit
Alright, it’s time to get your hands a bit dirty. The motor unit is the heart of the garage door opener. Here’s the step-by-step on how to install it:
1. Choose Your Location: Most people install the motor unit on the ceiling or the wall above the garage door. Make sure it’s centered and within reach of a power outlet.
2. Attach the Mounting Bracket: Using the provided screws and your drill, secure the mounting bracket to the chosen location. It should be at least 7 feet above the ground, and make sure it’s level.
3. Hang the Motor Unit: Carefully lift the motor and secure it to the mounting bracket. This can be a bit tricky, so don’t hesitate to ask a friend for a hand.
4. Connect to Power: Before attaching any other components, plug the opener into the nearest power outlet. Ensure there are no frayed wires; safety first!
Once you have the motor in place, you’re already halfway there!
Installing the Door Bracket and Rail
Next up is connecting the rail and door bracket to your Linear garage door opener. It might feel like you’re assembling a Lego set, but this step is vital for functionality. Here’s how to do it:
1. Attach the Door Bracket: This bracket connects the garage door directly to the opener. Close the door and position the bracket at the top of the door, ensuring it’s centered. Mark your drill points.
2. Secure the Rail: Attach the rail to the motor unit first, then extend it toward the back of the garage. Make sure it’s aligned correctly, as improper alignment could cause issues later on.
3. Test for Smoothness: Manually open and close the door a couple of times to ensure everything moves smoothly. You know what they say: measure twice, drill once!
Setting Up Safety Sensors
Your Linear garage door opener is equipped with safety sensors that prevent accidents, especially if you have little ones or pets. Installing these is super important, and the process is fairly simple:
1. Locate the Sensors: You’ll find two sensors, one for each side of the garage door frame. Ensure they are positioned about 6 inches above the ground.
2. Mount the Sensors: Use screws to secure each sensor to their designated spots. Ideally, they should face each other across the door’s opening.
3. Connect Wires: Run the wires along the door frame and connect them to the motor unit as per the instructions. Make sure there are no loose connections, as they can cause the opener to malfunction.
Let’s be real: safety is key here. Double-check that the sensors are working properly by manually triggering the door. If you mught not have thought about this before, that’s okay—better late than never!
Pairing Your Remote Control
Now that the heavy lifting is done, it’s time to pair your remote control with your new opener. This step is usually straightforward but can feel a bit like trying to sync Bluetooth devices—frustrating at first, but oh-so-rewarding when it works.
1. Locate the Learn Button: On the motor unit, find the “Learn” button. Press it once, and you should see a light flash. This means it’s ready to accept a new signal.
2. Press the Remote Button: Within 30 seconds of pressing the Learn button, press and hold the button on your remote you plan to use. If it’s successful, you should see the sensor light blink again.
3. Test the Remote: To confirm everything’s working, press the remote button to open the garage door. Success! If it doesn’t work, power cycle the opener and repeat the process.
Final Adjustments and Testing
You’re almost at the finish line! Before wrapping up, let’s make some final adjustments to ensure everything runs smoothly. Testing is crucial here:
1. Adjust the Force and Travel Settings: These settings ensure the door stops at the right point and doesn’t use too much force when closing. Follow the manual for the recommended settings.
2. Test the Safety Features: Wave something like a broomstick under the door as it closes. If it reverses, the safety feature is working! If not, revisit the sensor installation.
3. Secure Loose Cables: Ensure all wiring and cables are neat and secure to avoid snags.
That’s it! After a few adjustments and safety checks, your installation should be complete, and your Linear garage door opener should be functioning beautifully.
Wrapping Up Your DIY Journey
Installing a Linear garage door opener isn’t just about convenience; it’s about adding a new touch of efficiency to your home. With a little effort, you now have a neatly functioning garage door at the push of a button. Remember, if you ever run into issues, refer back to the user manual or consider consulting with a professional.
Take pride in your accomplishment—who knew DIY could feel this rewarding? Now go ahead, grab that remote, and enjoy the seamless operation of your garage door!