Whether you have a Chamberlain, LiftMaster, or any other brand, the process is similar across many models. So, grab your tools and let’s get started on making your overhead door even safer. Honestly, the peace of mind you’ll gain from having properly installed safety sensors is worth the effort.
Understanding Overhead Door Safety Sensors
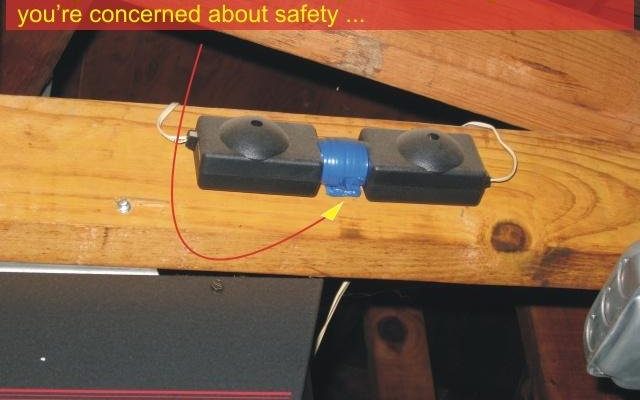
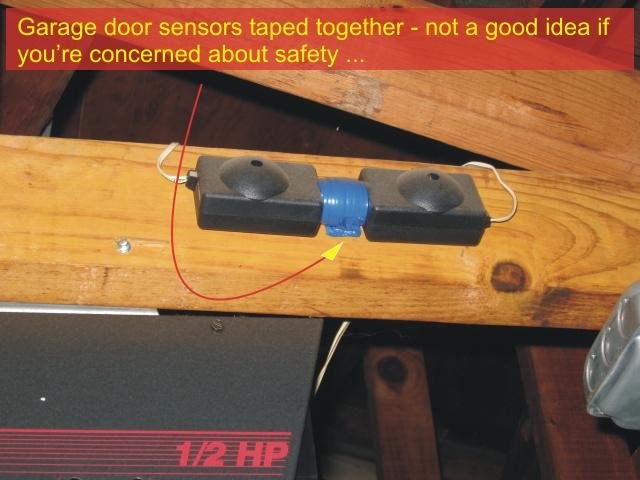
Before jumping into the installation process, let’s cover what safety sensors do. These little devices are located on either side of your garage door, about six inches off the ground. They send out a continuous signal between them. If something breaks that signal while the door is closing, it automatically reverses. It’s like having a guardian at the gate, always on duty to prevent accidents, whether it’s a person, pet, or car.
Using safety sensors adds a layer of security and functionality. Imagine you’re backing out of the garage and you realize your bike is in the way. With a functioning safety sensor, your door wouldn’t crush it—an invaluable feature for anyone with a busy household or frequent guests.
Components of Overhead Door Safety Sensors
To get your safety sensors up and running, it’s essential to know the components involved. Usually, you’ll find two sensors (one for each side of the door), mounting brackets, connecting wires, and screws. Depending on your specific model, you might also have a power supply, usually connected to the garage door opener system.
Make sure you have everything ready before starting. Check your installation manual for any additional pieces you might need. Having a trusty friend around can also help; sometimes, an extra set of hands makes a big difference!
Gathering Your Tools and Supplies
Having the right tools at your disposal is crucial for a smooth installation. Here’s a simple list of what you’ll need:
- Drill and drill bits
- Screwdriver
- Pliers
- Measuring tape
- Level
- Wire cutter/stripper
If you don’t already have these tools, don’t worry! Most home improvement stores have them available for purchase or rent. If you’re wondering why you need a level, it’s because your sensors need to be aligned perfectly to maintain that uninterrupted signal. A small adjustment can make a big difference in performance.
How to Install Overhead Door Safety Sensors
Now, let’s dive into the installation steps. Though it’s a straightforward task, one small mistake could lead to sensor misalignment, causing issues down the line. Take your time, and let’s go step-by-step.
1. Choose the Right Location
Start by deciding where to mount the sensors. Ideally, they should be about six inches above the ground, positioned directly across from each other. Make sure there aren’t any obstacles in the way such as light fixtures or hoses.
Using your measuring tape, mark the spot on each side of the door where you’ll be installing the sensors. You can use a pencil or chalk for clear markings. Once you’ve ensured they’re at the same height, it’s time to move on to the next step.
2. Mounting the Sensors
Using your drill, carefully create holes for the mounting brackets. If you’re working with a concrete garage, you might need a masonry bit. Once the holes are in place, secure the brackets with screws. Make sure they’re tight but avoid over-tightening.
After securing the brackets, clip the sensors into them. Use a level to ensure that they are perfectly aligned. This alignment is crucial; if they’re not level, the sensors may not work properly.
3. Wiring the Safety Sensors
Next up is wiring the sensors. Start by cutting the appropriate lengths of wire needed to connect each sensor to your garage door opener. First, strip the ends of the wires to expose the copper core.
Carefully connect the wires from each sensor to the corresponding terminals on your opener. Most connectors are color-coded: black or red for positive and white or blue for negative. If you’re unsure, check your owner’s manual. Once connected, make sure the wires are secured, and there are no exposed areas to short circuit.
4. Testing the Sensors
Now the moment of truth: testing your installation. Close your garage door without anything in its path. You should see the door reverse as soon as it breaks the safety sensor’s signal. If it doesn’t work, check your connections and alignment.
You might need to reset the garage door opener if it doesn’t seem to respond. Look for a reset button on the motor unit or consult your manual for specific instructions. Once everything works, you can feel confident that your garage door is operating safely.
Troubleshooting Common Issues
If you run into problems during or after installation, don’t fret! Here are some common issues and simple fixes:
- Misalignment: If the sensors aren’t aligned, the door might not function properly. Just readjust them using your level.
- Blocked Sensors: Ensure there’s nothing blocking the sensor’s line of sight, like debris or spider webs.
- Wiring Issues: Check connections if the sensors aren’t responding. A loose wire can disrupt the signal.
Honestly, troubleshooting is just part of the process. Take it step by step, and you’ll figure it out.
Final Thoughts
Installing overhead door safety sensors significantly enhances the safety of your garage door. It may sound daunting at first, but with the right tools and a bit of patience, you can do it yourself! By following these straightforward steps, you not only save money but gain confidence in your DIY skills.
So, take a deep breath, roll up your sleeves, and let the installation begin. Trust me; you’ll be relieved to have those sensors up and running, ensuring a safer space for you, your family, and your belongings. Happy installing!