Overhead door openers, such as the ones from brands like Chamberlain or Genie, are not just for convenience; they make your life a lot easier. Imagine rolling up to your house after a long day, and with just a click from your remote, your garage door smoothly opens for you. No hassle, no fuss. If you’re ready to tackle this project, grab your tools—let’s get started.
Before diving into the installation process, you need to gather a few essential tools and materials. Think of this step as gathering all your paints before starting your masterpiece. You wouldn’t want to realize midway that you’re missing a crucial color!
Tools you’ll need:
- Drill and drill bits
- Screwdriver (both Phillips and flathead)
- Level
- Measuring tape
- Wrenches
- Safety glasses
Materials:
- Your chosen overhead garage door opener
- Mounting brackets
- Hardware kit (nuts, bolts, and screws)
- Buddy to help—you’ll thank yourself later!
If you don’t have some of these tools, don’t worry. You can often rent or borrow them, which is perfect if you’re not planning to take on many DIY projects in the future.
Before you even think about hanging up the opener, make sure your garage door is in good shape. Just like you wouldn’t paint over a wall with peeling paint, it’s important to ensure your door works smoothly and is free of any obstructions. Get down to basic checks:
1. Inspect the Garage Door: Check for any damages such as dents or cracks. If it’s old and creaky, it might be time for an upgrade.
2. Clear the Area: Make sure there’s nothing blocking the way. A tidy workspace is always safer and more productive.
3. Disconnect the Manual Opener: If your garage door has a manual operation system, disconnect it. This will make the installation smoother and prevent any unexpected surprises.
With everything cleared and checked, you’re setting the stage for a successful installation.
Next up is the header bracket installation. This is the part where your garage door opener will hang from—so it’s crucial to get it right.
Steps to install the header bracket:
1. Find the Center of the Door: Measure the width of your garage door and mark the center. This is where you’ll install the header bracket.
2. Determine the Right Height: Most headers are installed about 6 inches above the door. Mark that spot too.
3. Mount the Bracket: Use your drill and install the header bracket securely with screws. Make sure it feels strong—nobody wants a crashing door!
4. Double-Check with a Level: Use your level to make sure everything is aligned properly. This step is something you’ll thank yourself for later!
If you’re feeling a bit stuck, refer to the instruction manual that came with your opener. Each opener can have slight variations in installation.
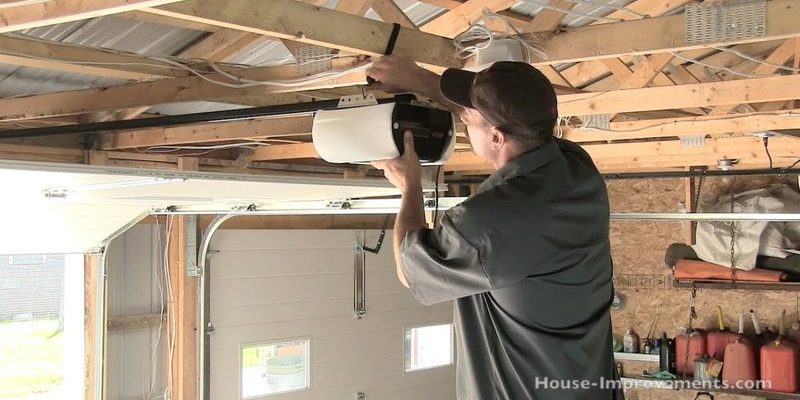
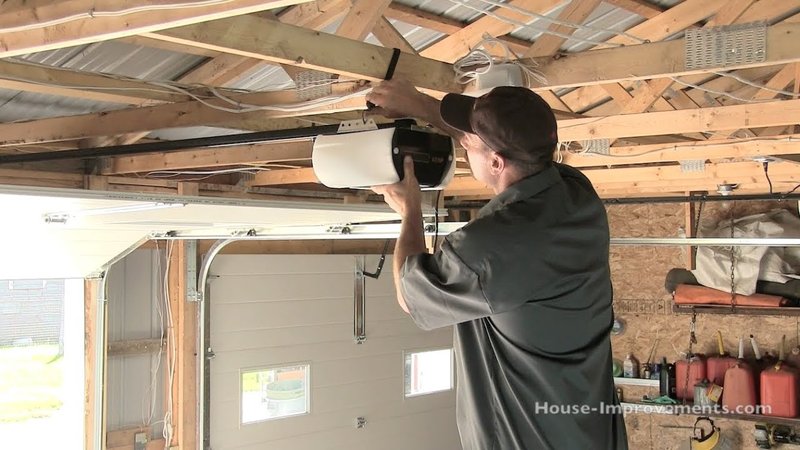
Now it’s time for the real heavy lifting. Attaching your garage door opener to the ceiling is a crucial step to ensure it operates smoothly and securely.
Here’s how to do it:
1. Locate Ceiling Joists: Use a stud finder to locate the ceiling joists. This will keep your opener securely in place.
2. Use Mounting Hardware: Your opener should come with specific mounting hardware. Attach it to the joists using bolts and screws, ensuring it’s tightly secured.
3. Remember the Angle: Most openers need to have a slight tilt towards the door, so check your instructions for specific angles.
4. Use a Friend for Support: Don’t hesitate to ask for help here—holding up the opener while securing it can be tricky!
Once the opener is in place, you’re closer to having that automatic garage door you’ve been dreaming of!
The drive system is like the engine of your garage door opener; it’s what makes everything work. Depending on your opener type, this could be a belt, chain, or screw drive. Let’s break it down!
Steps to connect:
1. Consult Your Manual: Your specific model’s instruction manual will have detailed steps on how to connect the drive system.
2. Attach it to the Door Arm: Secure the door arm to the drive mechanism. It’s usually a straightforward process involving screws.
3. Adjust for the Right Length: You might need to adjust the length of the door arm. Again, your manual will guide you here. If it’s too long, your door may not open fully—and that’s a headache we’d all like to avoid.
4. Check for Smooth Operation: Before moving on, manually lift your garage door a bit to test if everything is functioning. You want it to move smoothly with no resistance.
This step is crucial in ensuring you won’t run into any problems later when you start using the opener regularly.
Wiring might sound intimidating, but it’s usually the simplest part of the installation process. Honestly, it’s just like connecting a few colored wires—think of it as rearranging a puzzle.
Here’s how to wire it:
1. Follow the Color Codes: Your opener’s wiring system will typically have color-coded wires. Match them up like you’re pairing socks—red with red, white with white.
2. Connect the Power Source: Always ensure you turn off the power supply before you start working with wires! Then, connect wires according to your manual’s instructions.
3. Attach Safety Sensors: These sensors help prevent the door from closing on objects (like your car!). Make sure to place them about 6 inches off the ground and connect them to the opener.
4. Test the Connections: Once you’ve connected everything, check for any loose wires. A quick flick to see if everything is secure can save you a lot of hassle down the line.
Don’t rush through this step. Getting wiring right is essential for the safety and functionality of your garage door opener.
The last part of your installation saga is syncing the remote control. This is when you truly start to see your hard work pay off, so let’s get into it!
To sync your remote:
1. Locate the “Learn” Button: This button is usually found on the back of the opener. Press and hold it until the indicator light blinks.
2. Press the Remote Button: After you’ve activated the “Learn” button, press the button on your remote. The indicator light will usually blink and turn off, indicating a successful sync.
3. Test the Remote: Try using the remote to see if it opens and closes the door smoothly. If it doesn’t work, you might need to reset and repeat the steps.
4. Final Adjustments: You might want to program multiple remotes if you have them, allowing family or friends to access the garage.
This step is what transforms your manual garage door into an automatic one.
Now that everything’s set up, it’s time for the moment of truth. Testing your garage door opener is the fun part, like revealing your finished piece of art!
To test it properly:
1. Safety First: Stand clear of the door and ensure no objects are in the way.
2. Open and Close the Door: Use the remote to test both opening and closing. Pay attention to any unusual noises or resistance.
3. Check Safety Features: Wave your hand or place an object in the path of the door while it’s closing. It should reverse automatically if the sensors work in good order—this is a crucial safety feature!
4. Adjust as Necessary: If the door doesn’t operate as it should, revisit connections, and make adjustments as outlined in the manual.
Taking these steps at the end of your project ensures that you and your loved ones can enjoy that new garage door opener in peace.
Installing an overhead door garage door opener doesn’t have to be a chore. By breaking it down into simple steps and taking your time, you can achieve a smooth installation and enjoy the convenience that comes with it. Remember, if you run into any problems, your manual is your best friend. And hey, once you get this done, you can proudly say you tackled a DIY project like a pro!