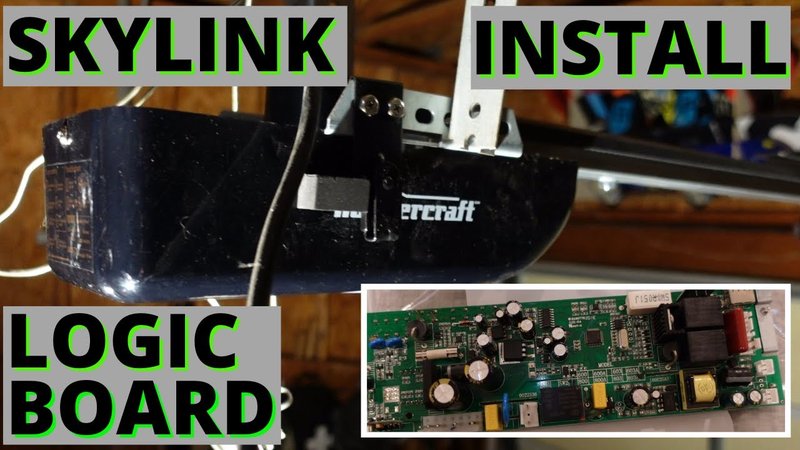
Now, before we dive into the details, let’s acknowledge what a Skylink remote is. This nifty little device controls your garage door opener wirelessly, making your life convenient—not to mention it keeps you dry when it’s pouring outside. But like any tech gadget, sometimes things need a bit of attention. Understanding how to replace the circuit board is an essential skill every homeowner should have under their belt. Let’s get into it step by step.
Gather Your Tools and Supplies
Before you even think about cracking open your Skylink remote, you’ll want to gather a few essential tools. This isn’t an intricate surgery, but it will help to be organized. Here’s what you’ll need:
- A small screwdriver (preferably Phillips).
- A new Skylink circuit board that’s compatible with your model.
- A pair of scissors (just in case you need to trim any wires).
- A flashlight to help you see what you’re doing.
- Safety glasses to protect your eyes; you know, just in case.
Having these tools handy will streamline the process. There’s nothing worse than getting halfway through a project just to realize you’re missing a screwdriver. Think of this as your little toolbox of readiness—it sets you up for success.
Safety First: Power Down
Now that you have your tools, let’s address the most crucial step: safety. You wouldn’t dive into a pool without checking how deep it is, right? In the same way, you don’t want to start working on your circuit board while everything is powered on.
Follow these simple steps to ensure you’re safe while working:
1. Unplug the garage door opener from the wall outlet to avoid any electrical mishaps.
2. If your Skylink is connected to a battery, remove the battery to eliminate any power source.
3. Don your safety glasses—this isn’t just for show. You want to prevent any debris from getting into your eyes while you’re working.
By taking a moment to prioritize safety, you’re ensuring your DIY project doesn’t turn into a horror story. Once you’ve powered down, you’re all set to proceed.
Open Up the Skylink Remote
With your safety precautions in place, it’s time to get down to business and open up your Skylink remote. This part might feel a little awkward if you’ve never done it before, but stick with me.
1. Locate the screws: Look for the screws on the back of the remote. Using your small screwdriver, carefully remove these screws and set them aside in a small cup or container—trust me, you’ll want to keep them safe.
2. Pry the case open: Once the screws are out, gently pull the two halves of the remote apart. You may need to wiggle it a bit, but avoid using too much force.
3. Observe the internals: Take a moment to look at how everything fits together. You’ll see the old circuit board and potentially some wires. Having this visual can help you when you plug the new one back in.
By opening up the remote, you’re one step closer to addressing that circuit board issue. Just remember, take your time—there’s no rush.
Removing the Old Circuit Board
Now that you have access to the innards of your Skylink remote, it’s time to carefully remove the old circuit board. Think of this as conducting an orchestra; you need to ensure each piece is in harmony.
1. Disconnect any wires: Carefully note where all the wires are connected. You might want to take a picture or write down what goes where. This will come in handy when you’re installing the new board.
2. Unscrew the circuit board: Typically, the circuit board will be held in place by screws. Carefully unscrew these and lift the old circuit board away.
3. Examine for damage: Before you toss the old board, have a quick look. You might notice burnt connections or melted areas. This knowledge can help you troubleshoot if something goes wrong with the new board.
Removing the old circuit board might feel like a delicate operation, but take it slow and you’ll do great.
Installing the New Skylink Circuit Board
Great job on getting that old board out! Now, here comes the fun part—installing your shiny new Skylink circuit board. You’re almost there!
1. Align the new board: Position the new circuit board where the old one used to be and make sure the mounting holes line up.
2. Reconnect the wires: Carefully reconnect each wire according to the notes or photos you took earlier. This is like connecting dots—make sure you get each one in the right spot.
3. Secure with screws: Use your screwdriver to securely fasten the new circuit board in place. Don’t over-tighten, but ensure it’s snug.
Once everything is in position, give yourself a little pat on the back! You’ve just made significant strides in your DIY garage opener project.
Testing Your New Circuit Board
You did it! Now it’s time to see if your efforts paid off. But wait! Before you plug everything back in, let’s ensure you’ve done everything right.
1. Double-check connections: Before you power it on, trace through each connection one last time. Make sure none of the wires are frayed or improperly connected.
2. Reconnect power: Plug the garage door opener back in and, if you have a battery, reinstall it too.
3. Test the remote: Try pressing the button on your Skylink remote. If everything went smoothly, your garage door should respond. If not, don’t panic—sometimes it just needs a little *pairing* or *resetting*.
Testing your installation is like the final exam after all that studying. If the door works, congratulations—you nailed it!
Troubleshooting Common Issues
Even the best DIYers run into bumps in the road sometimes. If your garage door isn’t responding after you’ve installed the new circuit board, don’t throw in the towel just yet. Here are some common troubleshooting steps to consider:
1. Check the battery: Ensure your remote’s battery is fresh and installed correctly. These little power sources can pack a surprising punch when it comes to functionality.
2. Re-syncing the remote: Sometimes, you need to run the sync process again to connect the new circuit board and the remote. Look at your manual for specific instructions on how to do this.
3. Inspect for further damage: If your circuit board was faulty, there’s a chance other components may be damaged too. Open the remote again and check for visible issues on adjacent circuits.
With a bit of patience and some detective work, there’s a high chance you can work through any issues that arise. After all, tackling challenges is part of the fun!
In closing, learning how to install a Skylink circuit board doesn’t have to be complicated, and you’re now equipped with all the steps to do it right. By understanding your tools, practicing safety, and taking things slow, you can confidently troubleshoot and maintain your remote. So, the next time your garage door seems to have its own mind, remember that a little DIY know-how can go a long way!
