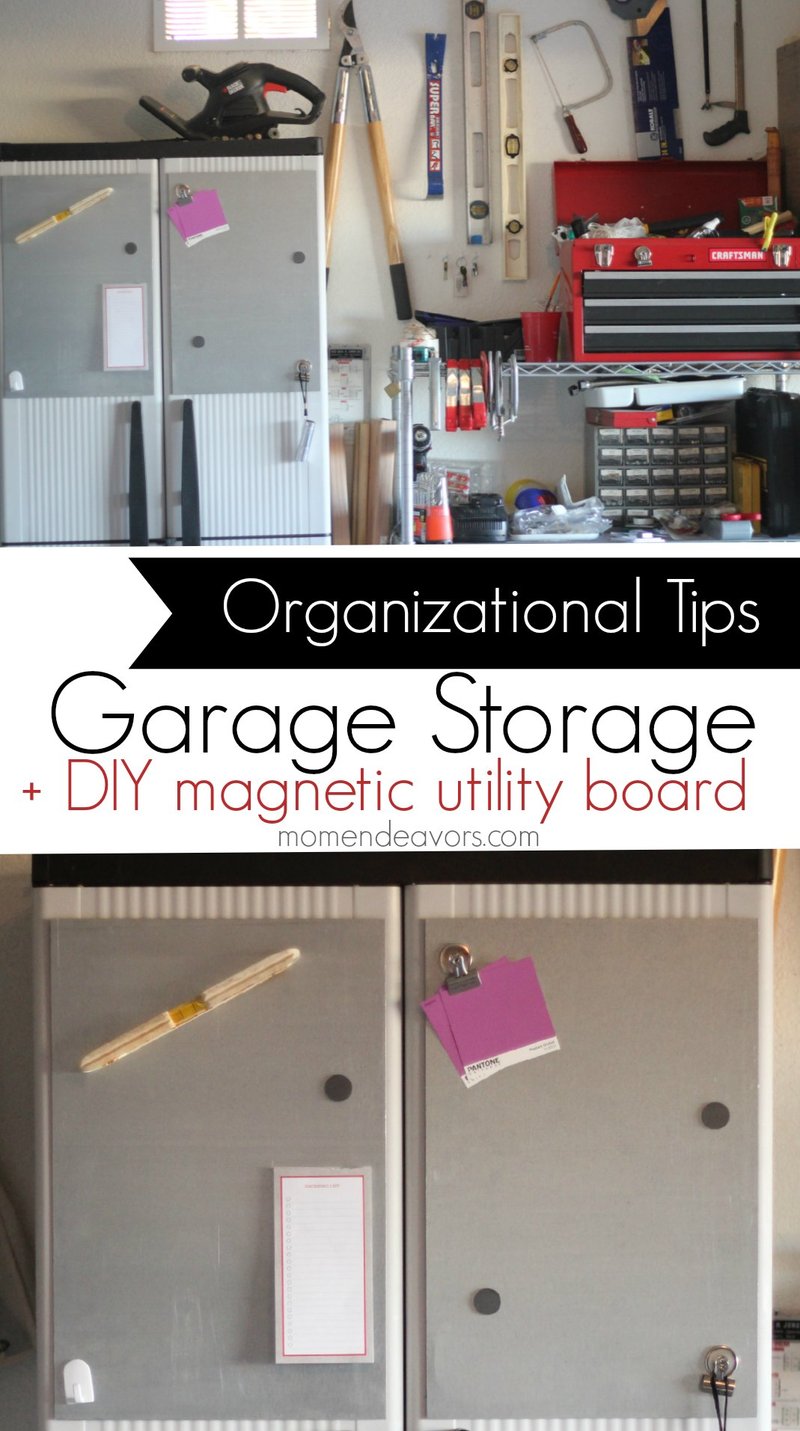
Creating a magnetic board isn’t as complicated as you might think. It’s a fun DIY project that can help turn your chaotic garage into an organized space. The best part? You can customize it to suit your needs. Let’s break it down into easy steps, so you can map out a system that really works for you.
Why A Magnetic Board Is A Game-Changer
When it comes to organization, sometimes simple solutions are the best. A magnetic board offers a versatile and functional way to keep your garage looking tidy. It’s not just about aesthetics; it’s about creating an accessible space.
You might be wondering, “What can I actually use this board for?” Well, think of all the odds and ends that get lost in the clutter. From screws and nails to safety gloves and even your kids’ sports equipment, a magnetic board keeps everything visible and easy to grab.
Another advantage is that it’s adaptable. Need to switch things up? Just rearrange your magnets or tools without any hassle. This flexibility means you can continuously tweak your organization system as your needs change. It’s like having a customizable canvas right there on your garage door!
Gathering Your Materials
Before diving into the project, you’ll need a few supplies. Here’s what you should gather:
- Magnetic paint or a sheet of metal: This is essential for creating the board.
- Paint roller: If you’re using magnetic paint, a roller makes application easier.
- Magnets: You can use regular magnets or get creative with magnetic strips.
- Measuring tape: Measuring ensures you know how much space you’re working with.
- Level: To make sure everything is straight, a level is your best friend!
Gathering these materials might seem minor, but they play a crucial role in ensuring your project goes smoothly. Plus, investing in good-quality supplies means your board will last longer, making it a worthwhile project.
How To Prepare Your Garage Door
Get your garage door ready before applying the magnetic surface. Start by clearing the area; you’ll want to have a clean slate. Make sure to wipe the door down with a damp cloth to remove any dirt or grease. This step may seem trivial, but it helps the paint or metal adhere better.
Next, measure your door with a measuring tape. This helps you determine how much magnetic paint or how large a sheet of metal you’ll need. If you plan to cover the entire door, it’s essential to have accurate measurements. Remember, too much paint means wasted material, and too little can leave you with an unfinished look.
Once you’re happy with the measurements, it’s time to get started on the magnetic surface itself!
Applying Magnetic Paint
If you’re using magnetic paint, stir it well before starting to ensure even distribution of the iron particles within the paint. Then, using a paint roller, apply the magnetic paint in even strokes. You should aim for at least two coats for optimal results, allowing each coat to dry as instructed by the manufacturer.
After you’ve applied your coats, you’ll want to let the paint cure for the recommended time. This might seem like a waiting game, but trust me, it’s essential for the paint to reach its full magnetic potential. Once it’s set, you’re on your way to a functional magnetic board!
Using A Sheet Of Metal Instead
Some folks prefer using a sheet of metal, especially if they want a more immediate solution. If you go this route, a piece of galvanized steel is an excellent choice due to its durability. You’ll need to measure and cut the metal to fit your door ideally.
Affix the metal sheet to the garage door using appropriate screws or strong adhesive, depending on the door’s material. A quick note: if you don’t want to permanently attach the metal, consider hanging it using brackets. Just remember to maintain balance, so everything stays even!
Choosing The Right Magnets
Once your magnetic surface is ready, the next step is picking the right magnets. You can opt for simple round magnets, but getting creative can add a personal touch. Consider using:
- Clip magnets: Perfect for holding papers, notes, and other lightweight items.
- Industrial-strength magnets: Great for storing heavier tools safely.
- Magnetic strips or hooks: These can create convenient storage solutions.
Choosing the right type of magnets is critical. You want to ensure they’re strong enough to hold up your items but not so strong that they become a hassle when you need to take something off.
Organizing Your Board Like A Pro
Now that you’ve got the board set up, it’s time to think about organization. Go with something that makes sense to you. You might want to group items by category, such as:
- Tools: Hammer, screwdrivers, etc.
- Garden supplies: Gloves, small pots, etc.
- Sports gear: Any small items your kids use, like goggles or mouthguards.
Also, think about visibility. Items you use frequently should be easy to reach. Consider adding labels if you have multiple similar items, like hooks or small storage bins, to streamline your setup.
Maintenance Tips For Longevity
Just like any organization system, keeping your magnetic board functional requires some maintenance. Regularly check the magnets to ensure they still hold securely. If you notice anything slipping, it might be time to replace the magnets or rearrange the layout.
Additionally, clean the board and magnets periodically. A quick wipe down with a damp cloth will help maintain the board’s *magnetic effectiveness* and keep everything looking fresh. After all, the last thing you want is a dirty board when you’re trying to grab tools quickly.
Adapting Your Board Over Time
Over time, your needs may change. Maybe you’ve taken up a new hobby, or your kids have outgrown certain sports. The beauty of your magnetic board is its adaptability. Feel free to rearrange or add new items as necessary.
If you find a certain spot isn’t working for you, don’t hesitate to try a new location for that tool or item. You have control over the organization, so make it work for your life!
Creating a magnetic board on your garage door isn’t just about organization; it’s about reclaiming your space and making your life a little easier. By turning clutter into a clear, manageable setup, you’re taking a step toward a more efficient daily routine.
Remember, every time you walk into your garage, you should feel a sense of ease knowing where everything is. So, grab those magnets, unleash your creativity, and embrace the organized chaos that a magnetic board can bring! Happy organizing!