Let’s think about your garage door opener for a second. It’s a bit like the friend who always gets to the door first—ready to greet you with a smile (or a beep) whenever you arrive home. You want to make sure it works smoothly. A Genie garage door opener is a reliable choice that combines performance with ease of use. Once you have it installed, that quiet rumble as the door opens will be music to your ears. So, grab your toolbox, and let’s dive into the world of garage door opener installation!
Gather Your Tools and Materials
Before you start your installation journey, it’s essential to gather all the necessary tools and materials. Think of this as your toolbox for success. Here’s what you’ll need:
- Tools: A power drill, a screwdriver, pliers, a level, and a ladder.
- Materials: The Genie motor unit, mounting hardware (usually included), and safety goggles.
You might be wondering why something as simple as safety goggles made the list. Well, anytime you’re working above your head or using power tools, it’s better to be safe than sorry. Having everything on hand means fewer trips back and forth, which is crucial when you’re trying to keep the installation process smooth and efficient.
Prepare Your Garage Door
Next, let’s prep your garage door itself. This step is vital because you want to ensure everything aligns perfectly for optimal performance. Before you start working with the Genie motor unit, check these items:
1. Inspect the door: Look for any signs of wear or damage. Make sure the door opens and closes smoothly.
2. Clear the area: Remove any obstacles that might get in the way during installation, like bikes or boxes.
3. Disconnect the old opener: If you’re replacing an existing opener, make sure to unplug it and detach it from the door and the ceiling.
This foundational work will make the installation of your new Genie motor unit much easier. Imagine trying to streamline a computer setup while the desk is cluttered. A clean workspace is vital for clarity!
Install the Genie Rail Assembly
Now that your garage door is prepared, it’s time to assemble the Genie rail. This part can be a bit challenging, but don’t worry! Here’s how to do it step-by-step:
1. Unpack the rail: Start by taking the rail section out of the box. Lay it flat on the garage floor to make it easier to piece together.
2. Connect the sections: Most Genie motor units come in two or three sections. You’ll want to join these sections together using the provided hardware. A power drill is handy here; just ensure you don’t overtighten the screws, as it can misalign the unit.
3. Attach the motor unit: Following the instructions, attach the motor onto the rail assembly. Make sure this is snug and secure since this is the heart of your system.
Installing the rail assembly is like building the foundation of your house. If you get this part right, everything else will fall into place more smoothly.
Mount the Motor Unit
With the rail assembly ready to go, we can turn our attention to mounting the Genie motor unit itself. Here’s how to make it happen:
1. Choose the right spot: The motor unit should be mounted on the ceiling, directly above the door opening. Use a stud finder to locate ceiling joists for a secure hold.
2. Securely mount it: Use the provided bracket to secure the motor unit to the ceiling. This part should feel firm—this is where it gets its strength.
3. Ensure it’s level: Before you tighten everything down, double-check that the motor is level using your handy level tool. An unlevel motor can cause the door to jam or even malfunction.
Here’s the thing—getting this step right is crucial because a misaligned motor can lead to headaches down the road, like needing to troubleshoot or reset the unit more often than you would like.
Connect the Garage Door Bracket
Now that the motor unit is ready, it’s time to connect the garage door bracket that attaches to the lifting arms on your door. This step is vital for proper functionality and smooth operation.
1. Install the door bracket: Follow the instructions to attach the bracket to the top of the garage door. Make sure it’s secure, so it can handle the tension when the door opens and closes.
2. Connect the arms: Attach the lifting arms from the motor unit to the door bracket. Make sure this connection is tight, as it’s what allows your garage door to lift smoothly.
3. Test the connections: Double-check that everything feels secure before proceeding. A loose connection can lead to a malfunction down the road.
Think of this step as giving your garage door its “arms.” It needs these connections to lift and lower seamlessly.
Wiring and Remote Setup
The next step is all about wiring and syncing your remote. This might sound complicated, but it’s really just like following a recipe—follow the steps, and you’ll get there!
1. Connect the wires: Most Genie motor units will have color-coded wires. Connect these following the manual instructions. This wiring is what gives your motor unit power and allows it to communicate with the remote.
2. Plug it in: Once the wiring is complete, plug the motor into an electrical outlet. Make sure the outlet is functioning by testing it with another device if you’re unsure.
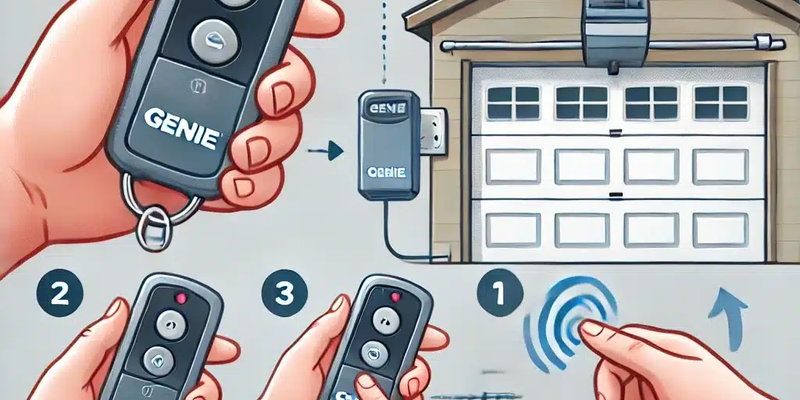
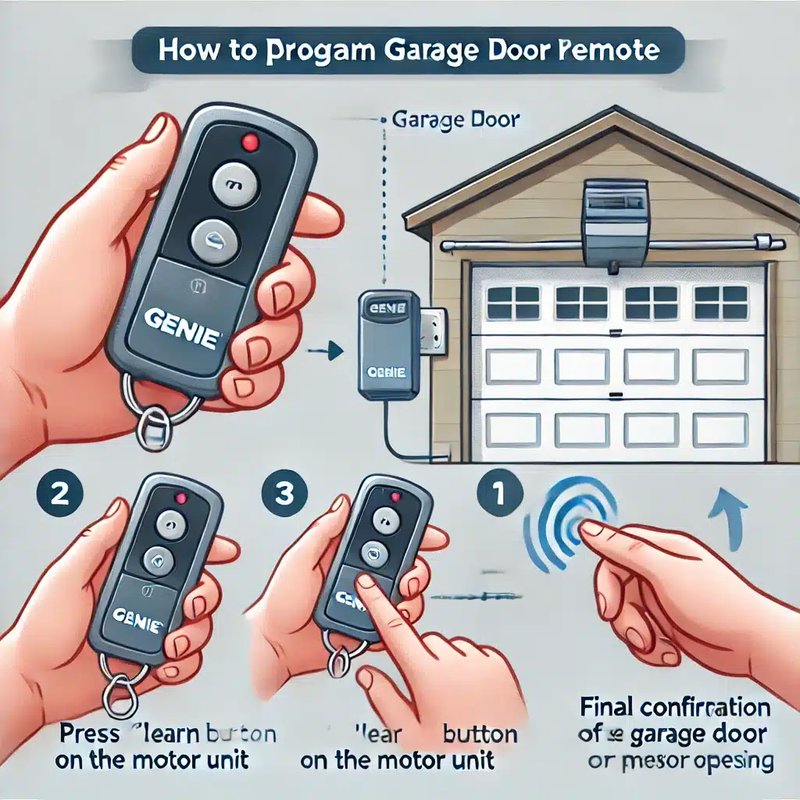
3. Sync the remote: Now, let’s get your remote working. Press the ‘Learn’ button on the motor unit, then press the button on your remote. You should hear a beep, signaling they’ve paired successfully.
Honestly, syncing the remote can feel like a magic trick—a little push here and there, and voila! Your remote is talking to the motor now.
Testing the Garage Door Opener
Great job! You’re almost at the finish line. Now’s the time to test your installation and ensure everything works perfectly.
1. Open the garage door: Use the remote to open the garage door. It should glide up smoothly without hesitation. If it struggles, you might need to double-check your connections.
2. Close the garage door: After opening, test to see if the door closes properly. This ensures the system is responsive.
3. Check safety features: Most Genie units come equipped with safety features, like auto-reverse. Make sure these are working by placing an object in the door’s path during closure to see if it reverses.
When you’re testing the opener, think of it as the final rehearsal before a big performance. You want everything to be just right before the curtains go up.
Troubleshooting Common Issues
Even with all your hard work, you might run into a few hiccups. Don’t worry! Here are some common issues and how to solve them:
1. Door not opening: If the door won’t open, double-check your power connections. Make sure your motor is plugged in and functioning.
2. Remote not working: If the remote isn’t responding, try replacing the battery. A simple fix can sometimes save the day.
3. Unusual sounds: Strange noises could indicate that the rail isn’t aligned correctly or that something is obstructing the door—check for any physical blockages.
Most of these issues can be resolved quickly. Remember, the troubleshooting process is just another opportunity to learn about your system—and it helps you feel more confident as a DIY installer.
Wrap Up and Final Thoughts
Congratulations! You’ve successfully installed your Genie motor unit! Just like that, you’ve transformed your garage experience, making it not only more convenient but more enjoyable. Regular maintenance, like checking the battery in your remote and lubricating the moving parts, will ensure your garage door operates smoothly for years.
Remember that knowledge is power. Each time you handle a home project, you’re gaining skills and confidence. Whether you’re opening the garage with a click of a button or troubleshooting a glitch, you’re now equipped to tackle any future installations. Enjoy the simplicity and ease that comes with your new setup!