So, when do you grab your toolbox and tackle the project yourself? And when should you dial up a professional, maybe sipping coffee in the comfort of your home while they do the hard work? Let’s explore the ins and outs of DIY garage door spring replacement. We’ll cover everything you need to know, from understanding the springs to knowing when it’s time to call in the pros. Whether you’re using a LiftMaster, Genie, or Craftsman opener, there’s important information here for you.
Understanding Garage Door Springs
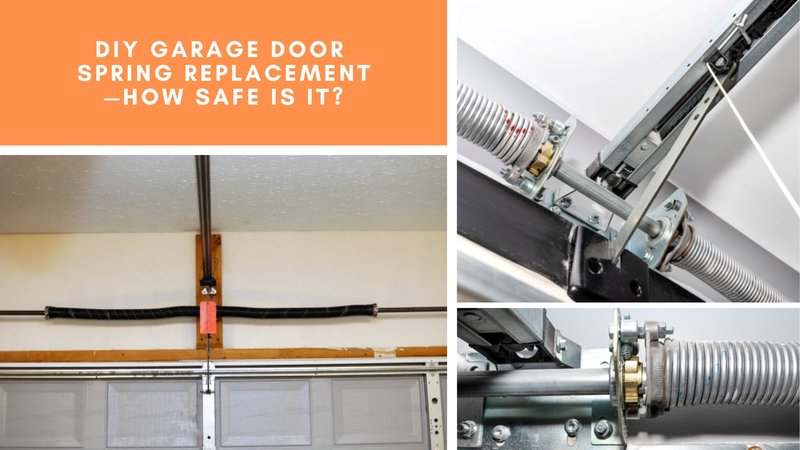
Garage doors typically have one of two types of springs: torsion springs or extension springs. Torsion springs are mounted above the door and do most of the lifting. They’re wound tightly to create torque, which helps lift the heavy door. On the other hand, extension springs are located on either side of the door and extend when the door opens. They’re simpler devices but can still take a beating over time.
Knowing your spring type is crucial for DIY replacements. Each type has different handling methods and safety precautions. For instance, torsion springs are under significant tension and can be dangerous if not handled properly. Extension springs, while perhaps less dangerous, can still snap back with substantial force. Recognizing which type you have will guide your approach and help you determine how much care and caution you’ll need to take.
Signs You Need a Spring Replacement
So how do you know if your garage door springs are on their last legs? A few common signs can help you figure this out:
- Uneven Door Movement: If one side of your garage door moves up slower or faster than the other, it’s likely a sign of a broken spring.
- Door Won’t Open: If your door stops moving altogether, check to see if the springs are broken or if something is obstructing it.
- Strange Noises: Listen for squeaky or loud popping noises when the garage door operates. This often indicates worn-out springs.
- Visible Wear and Tear: Look for gaps, rust, or any signs of wear on the springs themselves.
If you notice any of these symptoms, it’s time to assess whether replacing the springs is a DIY job or a task for a pro.
Gathering the Right Tools and Safety Equipment
Before you even think about getting your hands dirty, make sure you have the right tools and safety gear. Here’s a basic list of what you’ll need to get started:
- Safety Glasses: Protect your eyes from any flying debris while you work.
- Gloves: Heavy-duty work gloves can save your hands from cuts and scrapes.
- Socket Wrench Set: You’ll need this to remove the old springs.
- Ladder: Depending on your garage door setup, you may need a ladder to reach higher areas.
- Winding Bars: For working with torsion springs, these are essential tools to release and wind the springs safely.
Having the right tools not only makes the job easier but also keeps you safe. The last thing you want to deal with is an injury that comes from being underprepared.
The Steps for DIY Spring Replacement
If you plan to go ahead with the replacement, here’s a straightforward step-by-step guide:
Step 1: Prepare the Area
Start by clearing the area around the garage door. Make sure there’s enough room to work, and remove any obstructions. It’s important to have a clean workspace not only for efficiency but for safety.
Step 2: Disconnect the Garage Door Opener
Unplug your garage door opener from the power source to prevent accidental activation while you’re working. It’s like turning off the lights before you play hide-and-seek – safety first!
Step 3: Release Tension from the Springs
If you’re dealing with torsion springs, carefully use winding bars to release the tension. You want to do this slowly and deliberately to avoid injury. For extension springs, disconnect them from the track and the door.
Step 4: Remove Old Springs
Once there’s no tension, use a socket wrench to safely remove the old springs from their mounts. Make sure to remember where everything goes—taking pictures can help!
Step 5: Install New Springs
Reverse the removal process by installing the new springs. Tighten all bolts securely and check your work multiple times. Remember, a garage door is heavy, so you want everything sturdy!
Common Mistakes While Replacing Springs
You might think it’s just a straightforward swap, but there are a few common errors people make that can turn a simple job into a hassle:
- Not Releasing Tension Properly: Attempting to replace springs without properly releasing their tension can lead to injury. Always take this step seriously.
- Using Wrong Size Springs: Make sure the new springs match the specifications of the old ones. Using the wrong size can cause further issues with your garage door.
- Skipping Safety Gear: It’s tempting to forgo gloves or goggles, but protecting yourself is essential, especially when dealing with high-tension systems.
Avoiding these mistakes can save you time and trouble—trust me!
When To Call a Professional
Despite your best intentions, there are times when it’s better to leave spring replacement to the pros. Here are a few scenarios where calling for help makes sense:
- Limited Experience: If you’ve never worked with garage door springs before, their potential for danger can outweigh any potential budget savings from doing it yourself.
- Injury Concerns: Handling high-tension springs can be risky. If you’re unsure about your safety, professionalism can be worth the peace of mind.
- Complex Systems: If your garage door has a complex mechanism or multiple torsion springs, it’s wise to consult a professional who knows the ins and outs.
Here’s the thing: sometimes it pays to call in an expert. They not only have the experience but also the right tools and safety techniques, which can save you a lot of time and frustration down the line.
Cost Considerations for Spring Replacement
The cost of garage door spring replacement will vary based on whether you choose DIY or hire a professional. On average, you can expect to pay around $200 to $300 for both springs, including installation. If you’re tackling it yourself, springs alone may run $50 to $100.
You might consider a few factors here:
- Brand Quality: Brands like LiftMaster or Genie offer quality springs, but make sure you’re balancing cost with durability.
- Your Time: Think about how much your time is worth. If replacing the springs takes you an entire weekend, a pro might make more sense.
- Insurance Factors: Some homeowners’ insurance policies may cover repairs or injuries related to the project, so check with your insurer.
Being aware of these factors can help you make an informed decision and potentially save you money.
Replacing garage door springs is not just about knowing how to swap them out; it’s about recognizing your limits and understanding the risks involved. Don’t shy away from DIY if you’re feeling confident, but also don’t hesitate to call in a professional if the task seems too daunting or risky. It’s all about weighing the pros and cons.
Take your time, follow the steps, and if you do proceed with the DIY route, prioritize safety above all else. A smooth-operating garage door can make life a lot easier, and whether you tackle the project yourself or not, you’re one step closer to having it fixed. Happy DIY-ing!