Installing your Genie battery backup is a straightforward process, but like assembling IKEA furniture, it can be a bit daunting without guidance. The Genie brand offers several models, and each comes with its quirks. Let’s dive into the step-by-step world of installation, making sure you’re ready to tackle this project with confidence and maybe even a little fun along the way.
Understanding Your Genie Battery Backup System
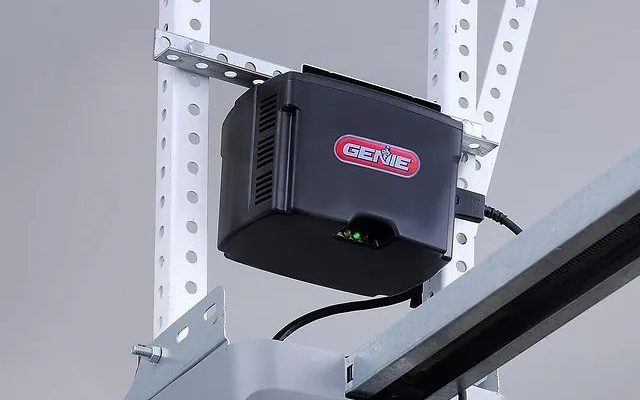
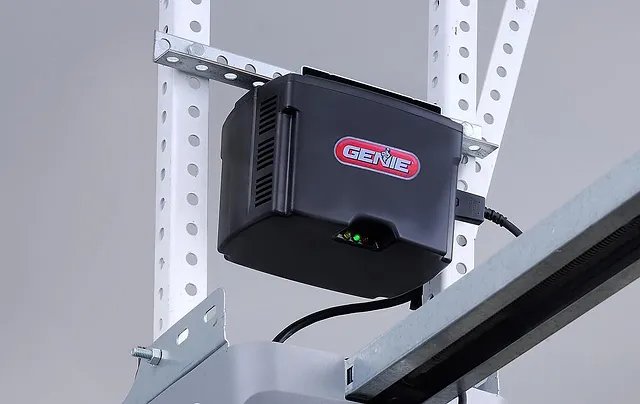
Before you pull out your tools, it’s crucial to get familiar with your Genie battery backup system. Generally, these models are compatible with many Genie garage door openers, but there are specifics you need to know. The battery is designed to provide power during an outage, allowing you to operate your garage door without fuss.
The backup battery typically comes in a box that includes the battery itself, a set of instructions, and all the necessary wiring and connectors. It’s a little like receiving a gift—once you unwrap it, it’s all about figuring out what to do with it! Be sure to check that you have a compatible model, as not all Genie openers will work with any battery, much like how not every peanut butter pairs well with every jelly.
Gather Your Tools and Materials
Let’s set the stage. Before you start the installation, you’ll want to gather the necessary tools. These are the things that will make the process smoother—like butter on warm toast. Here’s a list of items you should have on hand:
- A Phillips screwdriver
- A flathead screwdriver
- Wire cutters or strippers
- Your Genie battery backup
- The garage door opener you’ll be installing it on
Having everything ready will save you from the all-too-familiar “Where did I put that?” moment halfway through installation. Trust me; a well-prepared workspace is half the battle won, and it’ll keep frustration at bay.
Safety First: Disconnect Power Before You Start
Here’s the thing: working with electrical components means you need to think safety first. Just as you’d unplug a toaster before you dive in to clean it, you must disconnect your garage door opener’s power supply. This will help you avoid any unexpected surprises—like shorts or shocks—while you’re hard at work.
To do this, simply unplug the opener from the wall outlet. If you’re feeling extra cautious, you can also flip the circuit breaker that controls your garage outlet. Take a moment to ensure that it’s truly off; nobody wants to mess with live wires! Once you feel secure, you’re ready to move on.
Opening Up the Garage Door Opener
Now that you’ve ensured safety, it’s time to pop the hood on your garage door opener. This generally involves removing a cover on the motor unit. Use your Phillips screwdriver to locate and remove any screws holding the cover in place. This can sometimes be tricky, especially if the screws are in tight. A little elbow grease may be required!
Once you’ve taken off the cover, you’ll see the inner workings of your opener. Familiarize yourself with this environment. You’ll typically find a place designated for the battery backup connection, often marked and easy to spot. This is your next destination.
Installing the Battery Backup
With everything exposed, it’s time to install the Genie battery backup. Locate the battery compartment in your opener—this may require some gentle maneuvering to reach. Typically, it can be found near the circuit board.
You’ll want to connect the battery wires to the designated terminals. Usually, this involves matching the colors (red to red, black to black). Make sure that the connections are secure; loose wires can lead to malfunction later. If you’re unsure, a little extra time spent checking connections can save you a lot of frustration down the line.
Once the battery is wired in, place it into the compartment snugly. Then, replace the cover of your garage door opener, securing it with the screws you removed earlier. It’s like putting the lid back on a jar—everything inside is nice and safe now.
Testing Your Installation
Before you celebrate your success, let’s ensure everything works as intended. Reconnect the power supply to your garage door opener. Now’s the time to test the battery backup! You can do this by unplugging the opener again. Grab your remote and press the button to operate the door. If everything is wired correctly, the door should open and close smoothly.
If the door doesn’t respond, don’t panic. It could be a simple issue, such as the battery needing to sync with your opener or a loose connection that you overlooked. Take a moment to double-check all connections and ensure the battery is in the right setting.
Common Issues and Troubleshooting
Even the best installations can run into hiccups. If your Genie battery backup isn’t working as expected, here are a few common issues to consider:
– Check the Battery Charge: Sometimes, the battery might not be charged, especially if it’s new. Ensure it’s connected properly and give it time to charge.
– Look for Error Lights: If your garage door opener has diagnostic lights, they can tell you what’s wrong. Refer to your manual for what different light patterns mean.
– Resetting the System: If things still aren’t working, perform a reset on your garage door opener. Often, this involves unplugging it and plugging it back in after a minute.
If these steps don’t resolve your issues, it might be time to consult the manufacturer’s customer support for more detailed guidance. Remember, troubleshooting is just part of the journey!
Final Thoughts
Installing a Genie battery backup is a smart move, ensuring your garage door opener stays functional even when the power goes out. With these steps, you’ve transformed a seemingly complex task into a manageable project. And trust me; there’s a definite sense of accomplishment that comes from seeing that door open smoothly when the lights are off.
So, next time you hear a storm brewing outside, you can rest easy knowing your garage door won’t leave you stranded. You might even consider it a rite of passage—the day you took control of your garage door’s future. With a little bit of patience and the right tools, you’re now equipped not just to install a battery backup but to troubleshoot it too, if ever the need arises. Happy installing!