By the end of this guide, you’ll be well-equipped to swap out that old circuit board for a shiny new one in your Genie garage door opener model. Whether you have a Genie Intellicode, a standard remote, or another compatible type, knowing how to install the circuit board will save you time and money. Let’s dive into the process step by step, making sure you understand everything without the techstress.
Why Replace the Circuit Board?
You might be wondering why replacing the circuit board in your Genie garage door opener is necessary. Over time, circuit boards can fail due to age, moisture, or faulty connections. Imagine if your brain were sending mixed signals—sometimes, it just doesn’t work right! Here are a few reasons you might need to replace the circuit board:
- Frequent Malfunctions: If your door opens or closes erratically or stops suddenly, the board might be the culprit.
- Poor Remote Response: Sometimes the remote fails to sync, or the buttons just stop responding. It’s like trying to talk to someone who can’t hear you!
- Age: Just like any technology, circuit boards have a lifespan. If you’ve had your opener for years, it might be time to consider an upgrade.
Installing a new circuit board is a great opportunity to prevent further problems down the line, ensuring your garage door will operate smoothly and efficiently.
Gathering Your Tools
Before diving into the installation, gathering your tools is crucial. This way, you won’t spend half the time searching for that screwdriver. Here’s what you’ll need:
- Flathead and Phillips Screwdrivers: These will help you remove the cover and disconnect the old board.
- Replacement Circuit Board: Ensure it’s compatible with your Genie model. Check the model number on your existing unit for accuracy.
- Electrical Tape: This ensures safe connections as you work.
- Safety Goggles: A little extra protection never hurts!
Once you’re armed with the right tools, you’re ready to tackle this project head-on!
Safety First: Power Down
Before you even think about taking apart your garage door opener, the first rule is safety—always power down! Disconnecting the power will keep you safe from electrical shocks and other mishaps. Here’s how:
1. Unplug the Garage Door Opener: Find the power cord—let’s eliminate the risk of incorrect signals while you work.
2. Turn Off the Circuit Breaker: If your garage door opener is hardwired, switch off the corresponding breaker in your electrical panel.
3. Test with a Voltage Tester: If you have a voltage tester, give the outlet a quick check. It’s always better to be safe than sorry!
Taking these safety precautions is crucial for a smooth installation.
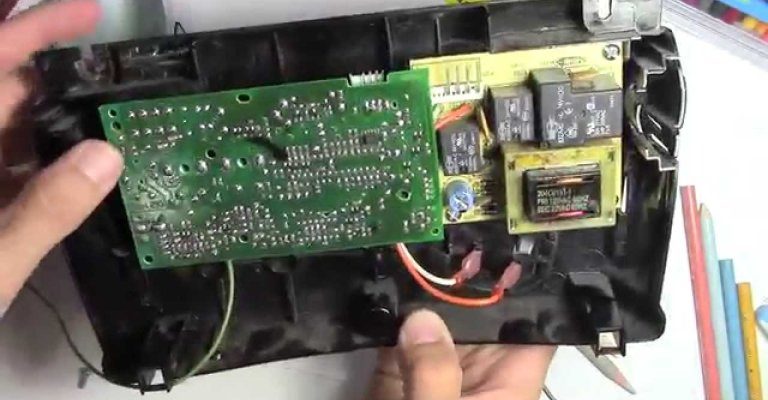
Removing the Old Circuit Board
Now, it’s time to tackle the old circuit board. Here’s how you can do it step-by-step:
1. Remove the Cover: Use your flathead screwdriver to gently pry open the cover of your garage door opener. If you encounter resistance, double-check for any screws you might have missed.
2. Disconnect the Wires: Carefully take note of where each wire connects to the circuit board. It’s a good idea to snap a picture for reference. Disconnect the wires by gently pulling them from the terminals.
3. Unscrew the Circuit Board: Typically, the circuit board will be fastened with screws. Remove these screws, and slowly lift the board out of its housing.
4. Inspect for Damage: Before moving on, take a moment to inspect the old board. Look for burnt components or broken connections—this will help you understand what went wrong in the first place.
By systematically removing the old circuit board, you’ll ensure a clean transition to the new one.
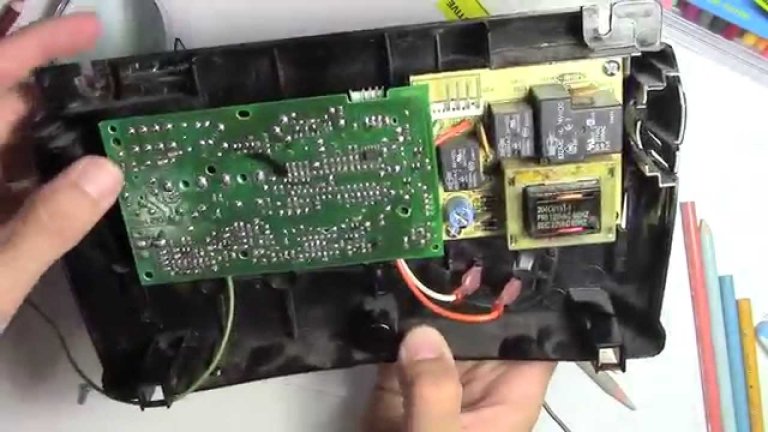
Installing the New Circuit Board
With the old board out, it’s time to install the new one. Don’t worry; this part is a lot easier! Follow these steps:
1. Position the New Board: Place the new circuit board into the housing carefully. Make sure it aligns with the screw holes.
2. Secure It Down: Use the screws you removed earlier to fasten the board into place. Don’t overtighten; just enough that it’s snug will do!
3. Reconnect the Wires: Refer to that picture you took! Carefully reconnect each wire to its respective terminal on the new circuit board. Make sure you’re connecting them back in the same positions as before to ensure everything syncs properly.
4. Seal It Up: Once everything is connected, place the cover back on. Again, use your screwdriver to secure it, but don’t get too aggressive.
Powering Up & Testing
You’re almost there! Now it’s time to power the garage door opener back up and test it out. Here’s what to do:
1. Reconnect Power: Plug in the unit or flip the circuit breaker back on. You should hear a click indicating that it’s receiving power again.
2. Sync the Remote: If necessary, follow the steps to sync your remote with the new circuit board. This usually involves pressing a button on the board and then the desired button on your remote.
3. Test the Garage Door: Finally, use the remote to open and close the garage door. If it operates smoothly, congratulations! You’ve successfully installed the new circuit board.
If it doesn’t work as expected, double-check all wire connections. You may also want to reset the board, following the manufacturer’s instructions.
Common Troubleshooting Tips
If the garage door isn’t cooperating after you’ve installed the new circuit board, don’t stress! Here are a few common troubleshooting steps to try:
1. Double-Check Connections: Sometimes wires look secure but may not be making full contact.
2. Reset the Opener: Consult the manual for reset instructions—this can clear up minor glitches.
3. Replace Batteries: If your remote isn’t responding after installing the new board, check or replace the batteries. A weak battery can often be mistaken for a circuit issue.
4. Customer Support: If you’ve tried everything and it’s still not working, don’t hesitate to reach out to Genie customer support for troubleshooting help.
Installing a Genie circuit board might seem intimidating at first, but with these steps, you can get through the process like a pro!
Zipping It All Up
Making repairs to your garage door opener on your own can feel empowering. Not only does it save you money, but you also gain handy skills along the way. By understanding how to replace the circuit board, you’re ensuring your garage door functions just as it should for years to come. Remember, a little patience goes a long way. So take your time, stay safe, and enjoy the satisfaction of a job well done! Your hard work will surely pay off the next time you pull into the driveway.