This handy device is a game-changer for many homeowners. Imagine not having to dig around in your pockets while standing in the rain just to get inside. Not only does it add convenience, but it also enhances security. With the Genie keypad, you can easily let family and friends in without giving away your remote or keys. So, whether you’re a tech-savvy individual or a complete novice, I’m here to walk you through every step of the installation process.
Gather Your Tools and Materials
Before diving into the actual installation, it’s important to get everything you’ll need within arm’s reach. This will make the process much smoother and prevent you from running back and forth. Here’s a basic list of what you’ll require:
- Genie keypad
- Drill with drill bits
- Screwdriver (usually Phillips-head)
- Tape measure
- Level (to ensure it’s straight)
- Battery (check if included with the keypad)
- Step ladder (if needed)
Having these tools ready means you won’t get stuck halfway through wondering where your drill went. Honestly, the worst situation is when you’re all set to attach the keypad, and you find yourself searching through a toolbox. Take a moment to double-check that you’ve picked up the right kind of battery, as some models may require specific ones.
Choose the Ideal Location
Finding the perfect location for your keypad is crucial. Ideally, it should be close to your garage door but easily accessible. Most folks opt for a spot that’s around 5 to 6 feet off the ground. This height makes it comfortable for both adults and kids to reach, plus it keeps it out of reach from potential tampering.
When you choose the spot, make sure it’s free from obstructions, like plants or furniture. You want your keypad’s signal to be strong and not interfered with. Additionally, think about how you’d like your keypad to face. You wouldn’t want to stand awkwardly to press the buttons, so a direct line of sight to your garage door is ideal.
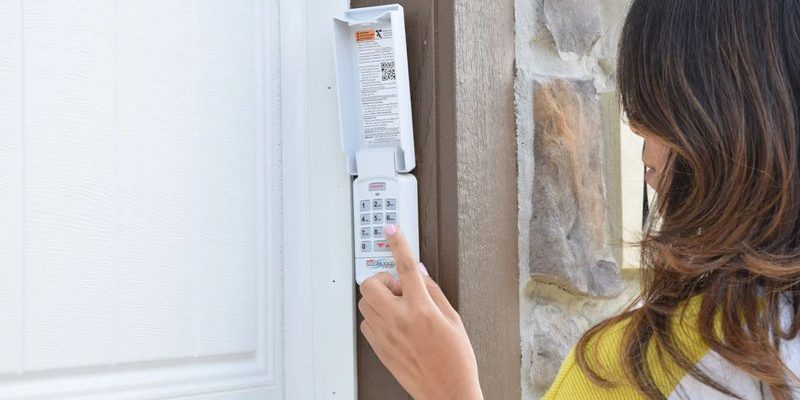
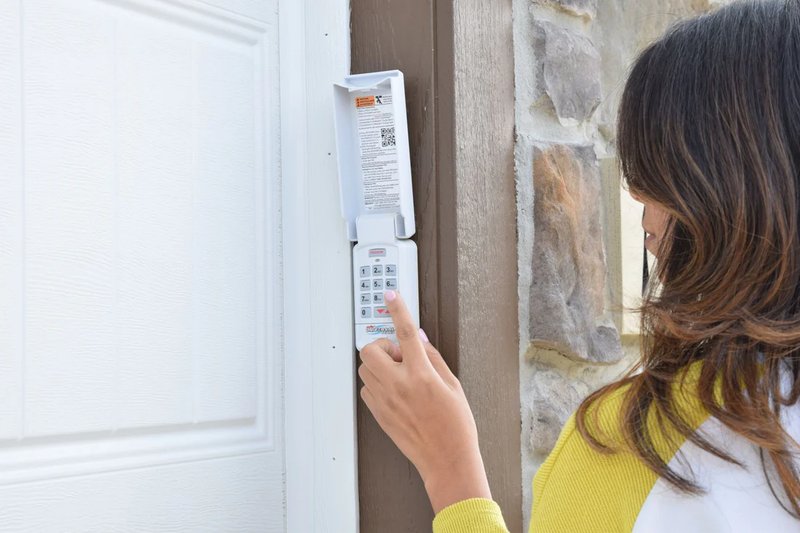
Installing the Keypad
Now that you’ve picked the perfect spot, it’s installation time. Here’s how it typically goes:
1. Mark the Placement: Use a pencil to mark where your keypad will sit. Most keypads have a template in the packaging, which should make this step easier.
2. Drill Holes: Use your drill to create holes based on the marks you made. If you’re mounting it on wood, standard wood screws should be enough. For brick or concrete, you might need to use wall anchors, which help secure the screws firmly in place.
3. Attach the Keypad: Once the holes are ready, align the keypad and secure it with screws. Use your level to check that it’s straight—you don’t want a lopsided keypad!
4. Insert the Battery: Open the keypad cover and insert the battery. This step can be easy to overlook; just make sure it’s done so the keypad can function properly!
Pairing the Keypad with Your Garage Door Opener
After you’ve installed the keypad, it’s time to sync it with your Genie garage door opener. Here’s how to do it:
1. Locate the Learn Button: Open your garage door opener motor unit. Look for a button labeled “learn” or “set.” This tiny button usually has a color or an LED indicator.
2. Press and Hold the Learn Button: Press the learn button until the light next to it turns on and stays lit.
3. Enter Your Code on the Keypad: Now go to your keypad and enter a unique code (usually a 4-digit code). Hit the enter button after that.
4. Confirmation: If everything went smoothly, the light on the opener should blink or turn off, confirming that the keypad is successfully paired. If not, you might need to repeat the process or check battery placement.
Testing Your Keypad
Once your Genie keypad is paired, testing it is essential. Approach the garage door, type in the code, and press the enter button. You should hear a soft click, and the door should begin to move. If it doesn’t work immediately, don’t worry; troubleshooting is part of the installation process.
You might be wondering, “What if it doesn’t open?” Well, double-check that the keypad has power and that you’ve entered the correct code. Sometimes, it can help to reset the keypad by following the same pairing steps mentioned earlier.
Common Troubleshooting Tips
Issues may pop up from time to time, but most can be easily resolved. Here are a few common problems and their solutions:
- Keypad Not Responding: Check the battery first! If it’s dead or inserted incorrectly, the keypad won’t work.
- Incorrect Code Reset: You might need to repeat the pairing steps if the code isn’t recognized by the opener.
- Garage Door Doesn’t Move: Ensure that the door isn’t blocked, and the opener needs power. If your remote works but the keypad doesn’t, it’s likely a pairing issue.
Having these troubleshooting tips in mind can save you time and frustration down the road. Just remember, patience is key!
Final Thoughts
Installing a Genie keypad can seem intimidating at first, but it’s manageable and rewarding once you get started. Think of it as a little project that gives your life an upgrade in convenience and security. With a few tools, some instructions, and a little patience, you’ve now got a system that makes entering your home a breeze.
When you’ve got everything set up and it’s working smoothly, take a moment to appreciate the change! You’ve just installed a handy device that not only simplifies your life but also enhances your home’s security. Enjoy the ease of access and the peace of mind that comes along with it. Happy installing!