Garage door openers, like those from brands such as Chamberlain or LiftMaster, can be finicky. It’s not just the remote batteries that can fail. Sometimes, the signal is weak, or there’s a more complex issue at play. A bait and switch camera can help you pull back the curtain on the problem. With the right setup, you can check the connection and see exactly what’s going on, turning an everyday annoyance into a simple troubleshooting exercise.
Understanding How Garage Door Openers Work
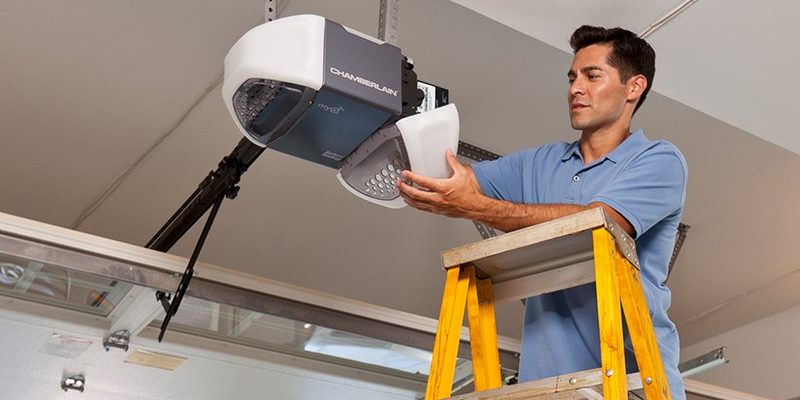
Before diving into troubleshooting, it’s essential to get a clear picture of how your garage door opener actually functions. At its core, most garage door openers operate through a series of mechanisms that work together seamlessly. The process starts when you press the remote. It sends a coded signal to the opener unit. This signal tells the motor to either open or close the door.
You might picture the opener as a tiny control room for your garage door. When the opener receives the signal, it activates a chain drive, screw drive, or belt drive system to move the door. It’s a beautiful dance of gears and technology, but like any performance, problems can crop up. That’s where your troubleshooting journey begins.
Identifying Common Garage Door Opener Problems
Garage door openers can encounter several issues, which can lead to various types of malfunctions. Here’s a rundown of common problems that many homeowners face:
- Remote not working: This is often the first sign something is amiss. It could be battery-related or something more complicated, like a signal blockage.
- Noisy operation: If your door sounds like it’s auditioning for a horror movie, it could mean worn-out parts or misalignment.
- Inconsistent opening/closing: This might manifest as the door only partially opening or closing, often linked to sensors or programming issues.
Understanding these issues first gives you the foundation for what to look for when troubleshooting.
Using A Bait And Switch Camera For Troubleshooting
So, how does a bait and switch camera come into play? This kind of camera can be super handy for monitoring your garage door opening and closing process in real time. By recording the action, you can see if there are any bumps along the way—literally.
You can set up the camera to face the garage door and the opener—from a distance, of course. Then, when you press the remote, you can watch what happens on your screen. This helps you pinpoint what the issue might be: if the door doesn’t respond, if there’s an obstruction, or if something is blocking the sensors.
Steps To Set Up Your Bait And Switch Camera
Setting up your bait and switch camera is easier than you might think, and here’s how you do it:
1. Choose a location: Place the camera in a spot where it has a clear view of the garage door and the opener. Make sure it’s steady and secured.
2. Adjust the angle: Depending on the design of your garage door opener, you might need to angle the camera so it captures both the door’s movement and the area in front of the sensors.
3. Test recording: Before you dive into troubleshooting, do a quick test run. Activate your garage door a couple of times and ensure the camera is capturing everything clearly.
You might be wondering what to do after you have your footage. Don’t worry, I’ll explain that next!
Analyzing The Footage
Now that you’ve recorded your garage door’s performance, it’s time to analyze the footage. Watch for several key elements:
– Door Movement: Is it moving smoothly? If it hesitates, that might indicate a blockage or mechanical issue.
– Remote Response: Check if the door opens immediately after you press the remote. A delay can signal a weak signal or interference.
– Sensor Functionality: If the door tries to close and then reverses, your safety sensors might be misaligned or dirty.
After closely inspecting the footage, you should have a better idea of where the issue lies.
Common Diagnostic Solutions
Once you pinpoint the issue, you can start the actual troubleshooting. Here are common solutions:
1. Check the Remote Battery: Yep—sometimes the simplest solution is the best one. Replace the batteries and see if that resolves your issue.
2. Inspect the Antenna: Ensure the antenna on the garage door opener isn’t damaged or obstructed.
3. Realign the Sensors: If you notice any misalignment in your footage, gently adjust the sensors until they’re facing each other correctly.
Let’s expand on sensor problems—these can be tricky.
Troubleshooting Garage Door Sensors
Your garage door opener usually has photo eye sensors that help it know when to stop. Here’s how to troubleshoot when they’re not working:
– Clean the Sensors: Dirt, dust, or spiderwebs can cause them to malfunction. Use a soft cloth to gently clean the sensors and check their alignment.
– Tighten Connections: Ensure that the wiring connected to the sensors is secure and not frayed.
– Test the Sensors: To do this, block one sensor temporarily and see if the door reacts appropriately. If it doesn’t, you might need to look closer at the wiring or the sensors themselves.
Reprogramming Your Garage Door Opener
Sometimes, your opener just needs a little reset to get back in sync. Here’s how to reprogram your opener:
1. Locate the Learn Button: Most new models have a learn button on the motor unit (check your manual for specifics).
2. Press and Hold: Press and hold the learn button until you see a light blink. This usually takes a few seconds.
3. Reprogram Remote: Next, press and hold the button on the remote for about 30 seconds until the light on the motor unit blinks again, indicating it’s paired successfully.
You might have to repeat this process if you have multiple remotes.
When To Call A Professional
If you’ve tried all these troubleshooting steps and still haven’t solved the problem, it might be time to reach out for professional help. Common reasons to call a technician include:
– Motor Issues: If the motor isn’t operating despite everything else working, it might need professional replacement.
– Advanced Wiring Problems: Sometimes the wiring can get complicated. If you’re not familiar, it’s safer to let an expert handle it.
Talking to a professional can often save both time and frustration.
Troubleshooting a garage door opener using a bait and switch camera can turn a maddening experience into a manageable challenge. With a clear setup and some patience, you can track down the issue and take steps to fix it. Whether it’s a simple battery change or a slightly more complicated adjustment, these handy tools and steps will help you understand your system better.
By familiarizing yourself with the key elements of your garage door opener and knowing when to seek help, you’ll be better prepared to tackle any future issues that might arise. After all, a smooth-running garage door is a small victory in the rhythm of daily life!