Replacing the circuit board may sound daunting, but it’s more manageable than you think. With a little patience and some basic tools, you can tackle this project yourself. In this guide, I’ll walk you through each step, breaking things down in a way that’s easy to follow. So, if you’re ready to resurrect your garage door opener, let’s dive in!
Why You Might Need to Replace the Circuit Board
Before jumping into the installation, it’s essential to understand why replacing the circuit board is necessary. Circuit boards can wear out due to a variety of reasons. Maybe your garage door opener has been giving you trouble for a while, or perhaps there was a power surge that caused it to fail. Here are common indicators that your circuit board needs replacing:
- Door won’t open or close: If pressing your remote or wall button doesn’t work, the circuit board may not be sending signals to the motor.
- Unresponsive remote control: Sometimes the issue lies in the remote, but if it’s syncing problems persist after troubleshooting, the board might need a check.
- Flashing LED lights: If the lights on your opener are flickering or showing error codes, this often points to circuit board troubles.
It’s worth noting that while there could be various reasons behind these symptoms, the circuit board is frequently the culprit. Understanding this makes the prospect of installation more manageable since you know what to look for.
Gathering Your Tools and Supplies
Alright, let’s gear up! Before you dive into the installation process, make sure you have all the necessary tools and supplies. This avoids any last-minute trips to the hardware store, which can derail your progress. Here’s a list of what you’ll need:
- Screwdriver set: Most likely a Phillips head and flathead.
- Replacement circuit board: Be sure to purchase the correct model for your Chamberlain opener.
- Wire cutters: In case you need to trim any wires.
- Safety gloves: Protect your hands during the process.
- Voltmeter: Optional, but handy for testing connections.
Having these tools ready will streamline the process. You’d be surprised how a missing screwdriver can turn a 20-minute job into an hour-long venture.
Preparing for Installation
Now, let’s make sure we’re set up correctly for the installation. It’s essential to prioritize safety before diving into the technical aspects. Start by unplugging your garage door opener from the wall outlet. This is a crucial step—dealing with electrical components while powered can lead to shocking experiences, and not the good kind!
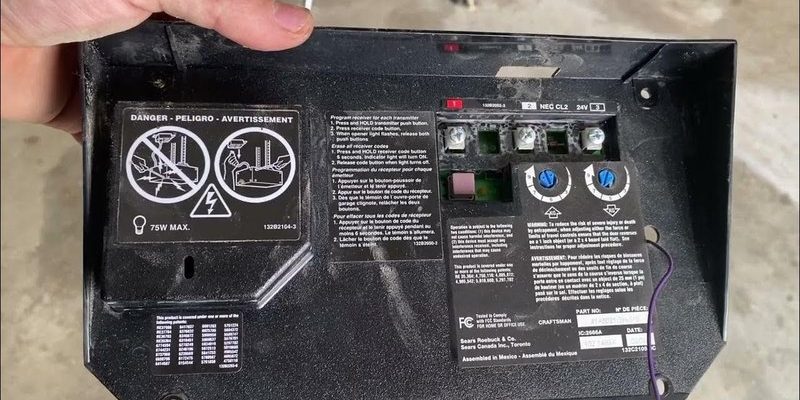
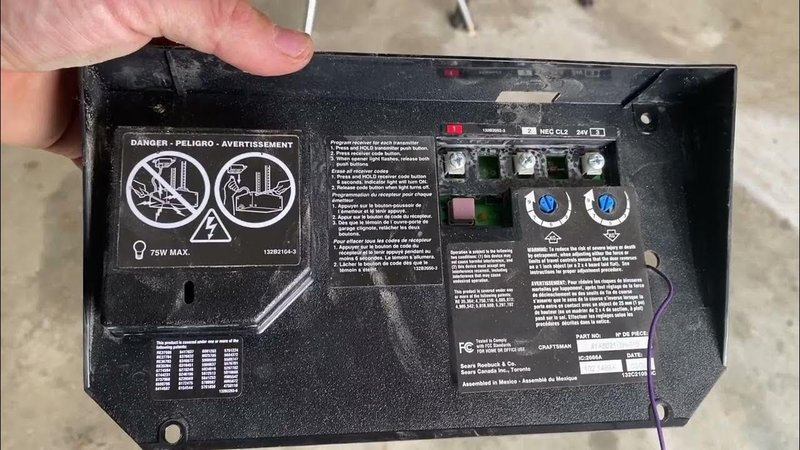
Next, grab your flashlight and inspect the motor unit for any previous signs of damage. Take note of the wire connections. It’s a great idea to take a picture of how everything is connected for easy reference when you install the new board. This small step can save you a ton of headaches!
Removing the Old Circuit Board
Ready to dive in? Let’s remove that old circuit board. Begin by unscrewing the cover panel of your garage door opener. Typically, you’ll find a few screws holding it in place. Once the cover is off, you’ll see the circuit board. Make sure to handle it gently; you don’t want to break any connections.
Now it’s time to disconnect the old board. Pay close attention to where each wire is attached. If you took a photo earlier, now’s the time to refer back to it. Carefully remove each wire from the old board, using your screwdriver if necessary. A good tip? Label the wires if you didn’t get a good picture. This will help prevent confusion later.
Installing the New Circuit Board
With the old board out of the way, it’s time to install the new circuit board. Start by aligning the new board in the same position as the old one. This part is straightforward but demands careful attention. Ensure that all connectors match up where the old ones were.
Once positioned, reconnect each wire one by one. This is where that picture or note-taking pays off! Make sure the connections are secure—loose wires can lead to functionality issues later on. Once everything’s reattached, double-check your work.
Testing the Garage Door Opener
With the new circuit board installed, it’s time for the moment of truth—testing it! First, carefully put the cover panel back on, securing it with screws. Then plug the opener back into the wall outlet.
Before you try the remote, take a breath. Fumbling with the remote is a common reaction, but let’s keep it cool. Press the wall button first to see if the garage door responds. If it works, give your remote a shot next. If you’ve done everything right, congrats! You’ve just successfully installed a new circuit board.
If the garage door doesn’t respond, don’t panic! Check your connections again and ensure everything is snug. If there’s still an issue, consider inspecting other components like the power supply or consult the user manual for more troubleshooting advice.
Final Thoughts
Installing a Chamberlain circuit board may sound intimidating at first, but with the right tools and instructions, it can be a straightforward task. Whether you’re a first-timer or a seasoned DIYer, knowing your way around circuit boards can save you both time and money.
Taking the time to troubleshoot and fix issues not only gives you a sense of accomplishment but also ensures your garage door works smoothly for years to come. Be sure to keep an eye on the signs of wear and tear, and don’t hesitate to jump in if issues arise again. Your garage door is a vital part of your home—keeping it in working order is worth every effort!