Think of the rail extension kit as an important accessory that enhances the functionality of your garage door opener, whether you’re using a Chamberlain, LiftMaster, or Craftsman model. It’s not just a fancy gadget—it’s a solution for those dilemmas you face every time you struggle to get your car inside. Installing this kit might seem daunting, but with a little guidance, anyone can do it. So, grab your tools and let’s dive into how to properly install a rail extension kit for your taller garage door.
What Is a Rail Extension Kit?
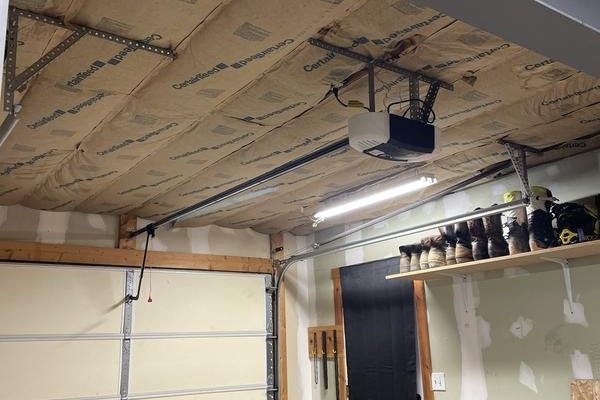
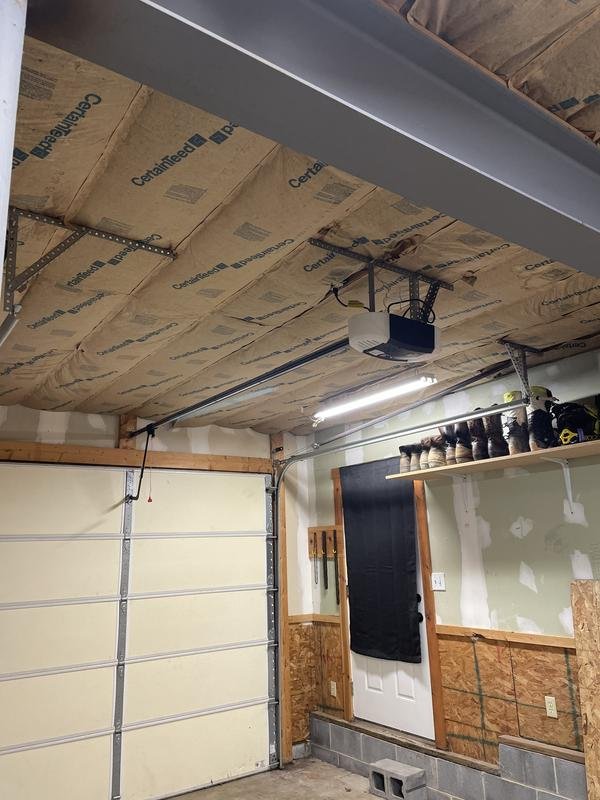
A rail extension kit is a set of components specifically designed to help your garage door opener work with taller garage doors. Standard garage doors typically measure 7 feet in height, which is perfect for most residential situations. However, if you have an 8 or even 10-foot door, you’ll quickly discover that your opener rail isn’t long enough.
Here’s the thing: a proper installation is key. If your opener doesn’t reach the upper sections of the door, you risk it beginning to struggle or, worse, malfunction. A rail extension kit adds the necessary length to your existing opener’s rail system. It’s essentially like getting a new pair of shoes that fit better—in this case, it helps your opener do its job more effectively.
Each rail extension kit will often include additional parts like reinforcements or guide brackets. Depending on your garage door opener brand, you might find slight variations, but the core purpose remains the same: to provide the support needed for taller doors.
Compatibility Is Crucial
Not all rail extension kits are made equal, and compatibility is key. Before making a purchase, double-check if the kit you’re considering matches your specific garage door opener model. Using the wrong kit can lead to a range of problems from installation issues to inefficient performance.
Here are some things to consider when checking compatibility:
- Brand: Ensure your kit is designed for your opener brand, like Chamberlain or LiftMaster. Different brands often have distinct specifications.
- Model Number: Look for the exact model number on your existing opener. Most manufacturers will list recommended extension kits.
- Door Height: Make sure the extension kit supports your taller garage door height, whether it’s 8 feet or even higher.
If you’re unsure which kit fits your door, reach out to the manufacturer or check online resources. You want to avoid a scenario where you’ve bought a kit that doesn’t quite work because that can lead to wasted time and money.
Gather Your Tools for Installation
Before you roll up your sleeves, make sure you have everything ready. Installing a rail extension kit isn’t rocket science, but being prepared will save you time and frustration. Here’s a handy list of tools you will likely need:
- Screwdriver: A regular and a Phillips screwdriver are usually sufficient for this job.
- Wrench: You’ll need a wrench for any bolts that require tightening.
- Level: To ensure your rail is aline after installation.
- Tape Measure: A must for measuring heights and placement angles.
- Stud Finder: In case you need to make sure you’re securing everything to a sturdy location.
Having these items ready will make the project smoother. Honestly, there’s nothing worse than realizing halfway through that you’re missing a crucial tool, right?
Safety First!
Before diving into the installation, let’s talk safety. Working with garage doors can be dangerous, especially if you’re new to it. Always prioritize your safety and make sure to take the following precautions:
1. Disconnect Power: Unplug your garage door opener or flip the circuit breaker to avoid accidental movements during the process.
2. Secure the Door: Use clamps or blocks to secure the garage door in place while you’re working. You don’t want it unexpectedly swinging open!
3. Get a Helping Hand: It’s also a great idea to have someone assist you. They can hold parts in place or hand you tools, making the job easier.
Taking these precautions will help ensure the installation goes smoothly. Better safe than sorry, right?
Removing the Old Rail
Now that you’re equipped and ready, it’s time to tackle the installation. First up is removing the existing rail. Here’s how you can do that:
1. Start by Detaching the Opener: Depending on your model, you’ll need to unhook the garage door opener from the existing rail. This may involve unscrewing a few bolts or clips.
2. Remove the Existing Rail: Locate the bolts or screws holding the rail in place and carefully remove them using your screwdriver or wrench.
3. Inspect and Clean: It’s a good idea to inspect the area for any signs of wear and tear, and clean off any debris before proceeding with the new rail.
Once you’ve cleared the way, you’ll be ready to make way for your rail extension kit!
Installing the Rail Extension Kit
With the old rail out of the way, it’s time to install the new rail extension kit. Here’s how to get started:
1. Read the Instructions: Each kit comes with a set of instructions. Make sure to read through them to familiarize yourself with the installation sequence.
2. Assemble Components: Begin assembling the new rail extension according to the instructions. This usually involves connecting the extension to the existing rail.
3. Secure Everything: Once assembled, position the new rail extension in the same location where the old rail was removed.
4. Tighten Bolts: Use your screwdriver and wrench to tighten all screws and bolts so that everything feels stable and secure.
A tip? Use your level to ensure everything is aligned properly before fully tightening. You want to avoid any issues with alignment during operation later on!
Connecting the Garage Door Opener
Now that your rail extension kit is securely installed, it’s time to reconnect your garage door opener. This step is crucial for ensuring your new setup works smoothly and correctly.
1. Reconnect the Opener: Make sure the opener is lined up with the new rail. Most models have specific points for attachment; follow your kit’s instructions.
2. Check the Connections: After reconnecting, closely inspect and make sure the connections are snug. Any loose parts here can lead to issues down the line.
3. Run the Opener: Before testing directly, plug the opener back in and slowly jog the motor a few times without a door attached. This helps check if it’s running smoothly.
You might be wondering if everything is as it should be. It’s a great time to troubleshoot any last-minute snags before finishing the installation.
Test, Test, Test!
After all the hard work, it’s time for the fun part—testing it out! Here’s how to make sure everything runs smoothly:
1. Reattach the Garage Door: Once you’re confident in your assembly, carefully reconnect your garage door.
2. Test the Opener: Use your remote control to operate the opener. Watch it closely as it raises and lowers the door to detect any unusual sounds or irregular motions.
3. Adjust If Necessary: If the door isn’t closing or opening completely, you might need to make minor adjustments. Most models allow you to adjust the limit settings; check your manual for details.
Testing serves as your final peace of mind, making sure your hard work pays off.
Common Troubleshooting Tips
Even after a perfect installation, you might encounter some common issues. Here are a few troubleshooting tips to have handy:
- Door Doesn’t Open Completely: Check if the rails are aligned properly. Make necessary tweaks to metal brackets or supports if they appear off.
- Strange Noises: If you hear grinding or squeaking, ensure all parts are well-lubricated and that nothing is obstructing the rail.
- Remote Issues: If your remote isn’t syncing, try resetting it according to instructions in the manual. This might involve removing the battery and pressing a reset button.
Being aware of these potential hiccups will save you time and stress down the line.
Maintaining Your Garage Door Opener
Once you’ve successfully installed your rail extension kit, it’s also crucial to maintain the system. Here are some key maintenance tips:
1. Regularly Lubricate the Rails: Keep the rails well-lubricated with garage door-specific grease to avoid unnecessary wear and tear.
2. Inspect Hardware: Make it a habit to check bolts and screws regularly. Tighten them if they become loose over time.
3. Check Safety Features: Ensure that the safety sensors are clean and free from debris. They play a critical role in the safe operation of your garage door.
Staying on top of maintenance will help extend the lifespan of your garage door opener and keep it operating safely and efficiently.
Final Thoughts on Your Rail Extension Kit Installation
Installing a rail extension kit for your taller garage door may seem like a daunting task at first, but breaking it down into manageable steps makes it a breeze. With the right tools, safety precautions, and careful attention to detail, you’ll find yourself confidently enhancing your garage door opener’s functionality.
Remember, every time you press that remote and see your garage door operate smoothly, it’s a testament to your hard work. And if troubles arise, now you know how to troubleshoot them efficiently. So go ahead, enjoy your newly installed garage door setup, and take pride in tackling DIY projects that add real value to your home!