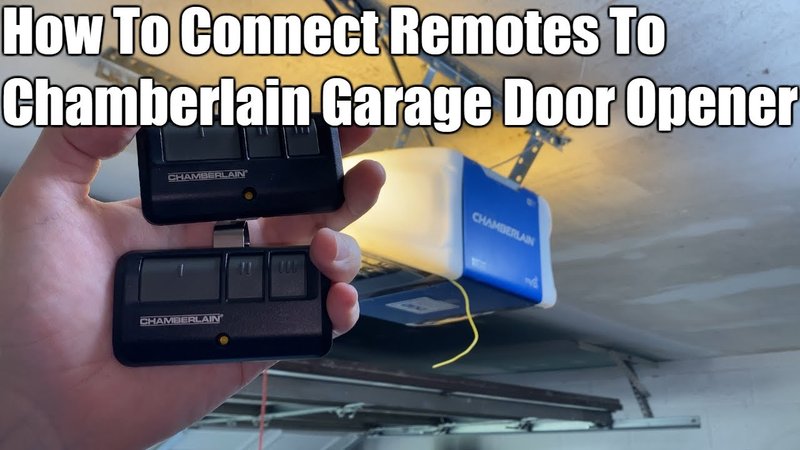
Chamberlain remotes are popular for garage door openers, offering a blend of functionality and comfort. They come in various models, but the installation process is generally the same across the board. Think of it like putting together a puzzle; once you align the pieces just right, the bigger picture comes to life. Let’s dive into the steps together and get that remote working for you!
Gather the Necessary Tools
Before you get started, let’s make sure you have everything you need at your fingertips. You’ll generally require:
- Your Chamberlain remote
- A ladder (if needed)
- A Phillips screwdriver
- Access to your garage door opener
- Fresh batteries for your remote
Having these items nearby will make the installation process smooth and straightforward. Just picture yourself standing confidently ready to tackle this task, rather than searching for tools once you’re already in the middle of trying to pair the remote. That would only create confusion!
Understand Your Chamberlain Remote Model
Not all Chamberlain remotes are created equal. It’s essential to identify your specific model, as the installation steps can vary slightly. Check the remote for a model number, usually printed on the back or inside the battery compartment. You might be wondering, why does this matter? Well, knowing your model helps you find the correct instructions, ensuring you don’t end up lost in irrelevant guidelines.
For instance, if you’re working with a Chamberlain 950CD, the button layout and programming sequence will differ from a Chamberlain 975LM. This is like learning different dance moves for different songs—once you know the rhythm, it all comes together!
Insert the Batteries
Once you have your remote and tools ready, it’s time to power it up. Start by opening the battery compartment, usually located on the back of the remote. This can often be done with a small screwdriver, so grab that Phillips screwdriver if needed.
Insert the new batteries, making sure to follow the plus (+) and minus (-) symbols. Installing batteries correctly is crucial; it’s the first step that gets the device ready to communicate with your garage door opener. If you don’t get this right, you’re just pressing buttons without any results—definitely not the outcome you want!
Locate the Learn Button on Your Garage Door Opener
Now that your remote is powered, it’s time to connect it to your garage door opener. Locate the Learn button on your opener. Usually, this button is on the back or side of the motor unit, and it’s often a bright color like yellow or purple, making it easier to spot.
This Learn button is essential: it’s what your remote will sync with to control your garage door. Think of it like a handshake—once the two devices acknowledge each other, they can work together seamlessly. If you miss this step, your remote might just sit there looking pretty instead of doing its job!
Program the Remote
Once you find the *Learn* button, you’re almost there! Here’s how to pair your remote with your garage door opener:
1. **Press and hold the *Learn* button** until the indicator light turns on, then release it.
2. Within 30 seconds, press and hold the button you want to use on your remote (usually the large button) until the garage door opener lights blink or you hear a click.
That’s it! Just like that, you’ve established communication between the remote and the opener. It’s like turning on the lights after a dark room—the magic happens!
Test Your Chamberlain Remote
With everything installed, it’s time to test your handiwork. Stand a safe distance from the garage door and press the button on your remote. If all went well, your garage door should respond by opening or closing smoothly. If it doesn’t work, don’t worry! Sometimes, troubleshooting is part of the process.
If the door doesn’t budge, check:
– Battery connection: Ensure the batteries are properly installed.
– Programming steps: Go through the pairing steps again.
– Distance from the opener: Sometimes, walls or obstructions can affect the signal.
With a little patience, you’ll get it all sorted. Remember, troubleshooting is like figuring out a stubborn puzzle piece; sometimes it just takes a fresh perspective to make it fit!
Safety Features and Considerations
Once you’ve got your remote working, let’s talk about safety. Chamberlain remotes are designed with safety features, such as auto-reverse technology. This means if something obstructs the door while closing, it should stop and reverse. Always keep this in mind, especially if kids or pets are around.
Additionally, ensure that your garage keeps up with the latest safety standards. Keep an eye out for regular maintenance—like checking the alignment of safety sensors—because this helps keep everything in tip-top shape. Investing a little time in these checks can save you from accidents down the road.
What to Do if You Encounter Issues
So, what happens if your Chamberlain remote still isn’t functioning after all this? First, take a deep breath! Issues are a common part of learning something new.
1. Check the Batteries: If your remote isn’t responsive, try changing the batteries again. It’s simple but an easy oversight.
2. Reset the Remote: Some remotes allow for a factory reset. Refer to the manual or the Chamberlain website for specific instructions.
3. Consult Customer Support: If all else fails, reach out to customer support. They can provide troubleshooting steps tailored to your situation.
Honestly, having a reliable support system can ease frustration. Remember, you’re not alone! There are resources available—think of them as your guiding light in a tech-based darkness.
Wrap-Up: Enjoy Your New Chamberlain Remote
By following these steps, you’ve successfully installed your Chamberlain remote, unlocking the convenience it offers for years to come! There’s a certain satisfaction in completing a task that makes everyday life a little easier. Whether it’s rolling up to your garage and hitting that button, or keeping your remote handy for those chilly winter mornings, you’re equipped with a tool that enhances your daily routine.
Remember, a little patience and practice go a long way. Enjoy the newfound ease that comes with modern technology, and don’t hesitate to revisit this guide if you need a refresher down the line. Happy remote controlling!
