Getting into this job requires some basic tools and an understanding of the components involved. LiftMaster specializes in various models, so knowing if your opener is a chain drive, belt drive, or wall-mounted unit matters. Don’t worry if this sounds confusing; I’ll walk you through everything you need to know, step by step, to make this installation as smooth as possible.
Gathering Your Tools and Materials
Before you dive into the actual installation of your LiftMaster circuit board, you’ll need to gather a few essential tools and materials. This preparation phase is like laying out your ingredients before you start cooking; it makes everything go more smoothly.
- Screwdriver: A Phillips head screwdriver is typically required, but having a flat head on hand can help too.
- Safety Glasses: Protecting your eyes is crucial, especially if dust or debris gets stirred up.
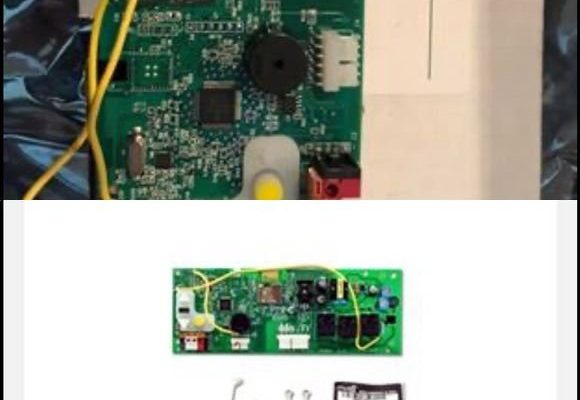
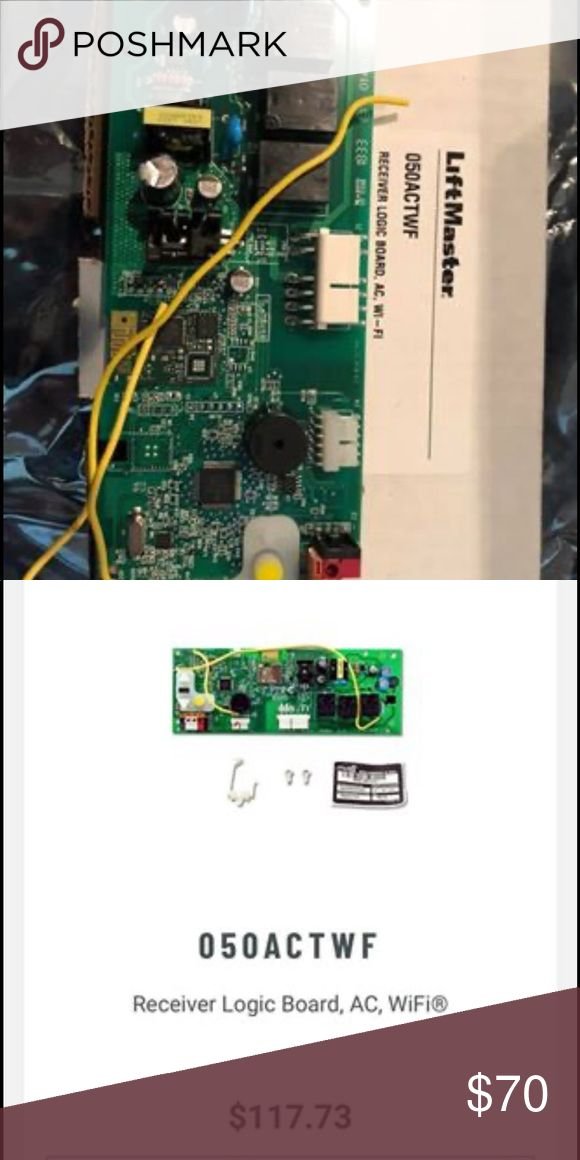
- New Circuit Board: Make sure to get the correct board for your specific LiftMaster model. Using the wrong one can create further problems.
- Wire Cutters: These will come in handy if dealing with any frayed wires or tying new ones together.
It’s always best to consult your user manual for specific details related to your model. If you can’t find it, LiftMaster’s website has a wealth of resources. Having everything ready will help you work more efficiently and with less frustration.
Safety First: Disconnecting Power
Before you start with the installation, one of the most important steps is ensuring your safety. Imagine trying to do surgery on a live electrical circuit—it’s a no-go! In this case, safety first means disconnecting the power to the garage door opener.
To do this, locate the power cord connecting your LiftMaster to the wall outlet and unplug it. If your model has a battery backup, make sure to remove the battery as well. This precaution prevents any chance of electric shock and gives you peace of mind while you work.
Once the power is disconnected, take a moment to visually inspect the opener. Look for any signs of damage or wear. If everything looks good, you’re ready to move on to the next step!
Removing the Old Circuit Board
Now it’s time to get your hands dirty and remove the old circuit board. Don’t worry, if you follow the steps, it’ll be straightforward.
1. Open the Cover: Using your screwdriver, gently remove the screws securing the cover of the garage door opener. Keep these screws in a safe place as you’ll need them later.
2. Locate the Circuit Board: Once the cover is off, identify the circuit board. It will be a rectangular piece with various wires connected to it.
3. Disconnect Wires: This is where your wire cutters might come in handy. Carefully disconnect the wires from the old circuit board. Make sure to note which wires go where or take a picture for reference when installing the new one.
4. Remove the Board: Finally, unscrew any screws securing the circuit board to the opener and gently lift it out.
By the end of this process, you should have the old circuit board safely removed. Here’s a quick tip: if you find any corrosion or loose connections, it might be a sign of bigger issues that require additional attention.
Installing the New Circuit Board
With the old circuit board out, it’s time to install the new one. This part is like putting together a puzzle: each piece has its place, and when you find it, everything fits seamlessly.
1. Insert the New Board: Place the new circuit board in the same position as the old one. Ensure it’s lined up correctly with any screw holes.
2. Reconnect the Wires: Refer back to your notes or picture as you carefully reconnect the wires to their original spots. Tightly secure them to ensure good conductivity.
3. Secure with Screws: Once everything is connected, use the screws you removed earlier to hold the new circuit board in place.
4. Close the Cover: Finally, place the cover back on your garage door opener and screw it into position.
This process should take no longer than a few minutes if you follow each step carefully.
Powering Up Your LiftMaster
With the new circuit board installed, the next step is to reconnect the power. This is the moment of truth to see if your work has paid off!
1. Reconnect the Battery: If your model has a battery backup, reinstall that first. Make sure it’s seated correctly.
2. Plug It Back In: Find the power cord and plug it back into the wall outlet.
3. Test the Remote: Grab your LiftMaster remote and press a button to open or close the garage door.
You’ll want to pay attention to any unusual sounds or behaviors. If the door operates smoothly, congratulations—you’ve successfully replaced the circuit board!
Troubleshooting Common Issues
Even with careful installation, you might run into some issues. If the garage door won’t operate as expected, don’t panic! Many common problems are easily fixed.
– Remote Not Working: If your remote doesn’t respond, check the batteries first. New batteries can do wonders.
– Circuit Board Compatibility: Ensure the new board is compatible with your LiftMaster model. If it’s not, it might not work at all.
– Loose Connections: A loose wire can lead to malfunctions. Go through the connections again to make sure everything is tight and secure.
Often, these little tweaks can solve the issue. If not, reaching out to LiftMaster’s customer support can provide a professional touch.
Final Thoughts on Circuit Board Installation
Installing a LiftMaster circuit board may feel intimidating, but with a little patience and the right tools, you can do it! Think of it like a small home project where the reward is a garage door that works perfectly again.
Remember to always prioritize safety, double-check your connections, and if you’re stuck, don’t hesitate to seek help. With this guide, you’re equipped with the knowledge and confidence to tackle circuit board installation yourself. Happy installing!
Originally posted 2025-03-05 10:27:04.