You might be using a popular brand like Chamberlain or LiftMaster, or a different model altogether. Regardless of the brand, your sensors are vital. Problems with their wiring can lead to all sorts of headaches, but troubleshooting those issues doesn’t have to be a daunting task. In this guide, we’ll dive into how to pinpoint sensor wiring problems step by step. Ready? Let’s roll up our sleeves!
Understanding Your Garage Door Sensors
Every garage door opener relies on sensors to function properly. These sensors help to detect obstacles in the door’s path, preventing accidents and damage. Typically, you’ll find two sensors mounted on either side of the door track. When they’re working correctly, a beam of light travels between them. If something interrupts that beam—like a car, a pet, or even a rogue garden tool—the sensors signal the garage door opener to stop and reverse.
Here’s the thing: if there are issues with the wiring, your sensors may not communicate effectively. This can lead to the frustrating situation where the door refuses to budge or even closes on its own. Knowing how they work is your first step in troubleshooting problems.
Common Wiring Issues to Look For
There are several typical wiring problems that can prevent your garage door sensors from functioning. Understanding these can save you a lot of time and headache. Here are some common issues:
- Frayed or Damaged Wires: Over time, wires can become frayed or break, especially in harsh weather.
- Loose Connections: Sometimes, a connection can come loose, particularly if the installation wasn’t solid.
- Corrosion: Exposure to moisture can lead to rust or corrosion, impacting connectivity.
- Misalignment: If your sensors are even slightly misaligned, they won’t function well.
Each of these can cause a failure in the communication system of your garage door opener. Now, let’s dig deeper on how to identify and fix these problems.
Tools You’ll Need for Troubleshooting
Before diving into the troubleshooting process, gather your tools. Having everything on hand can make a big difference. You’ll likely need:
- Screwdriver: For checking and tightening connections.
- Wire Strippers: If you need to fix any frayed wires.
- Multimeter: This handy tool will help check if your wires are conducting electricity properly.
- Level: To ensure your sensors are aligned correctly.
Having the right tools makes your job easier. Plus, it’s always nice to be prepared!
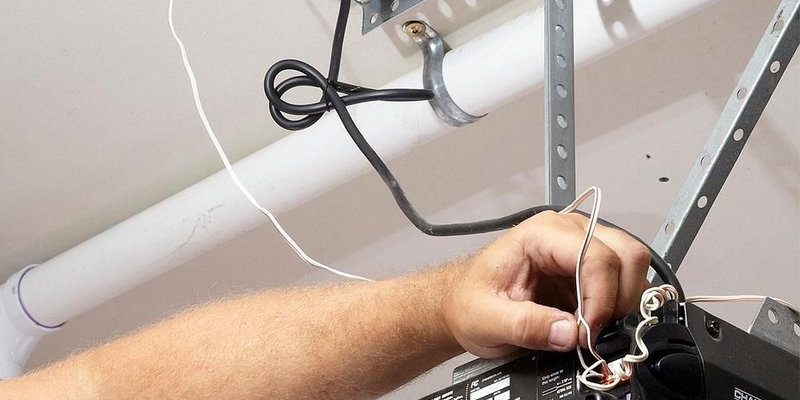
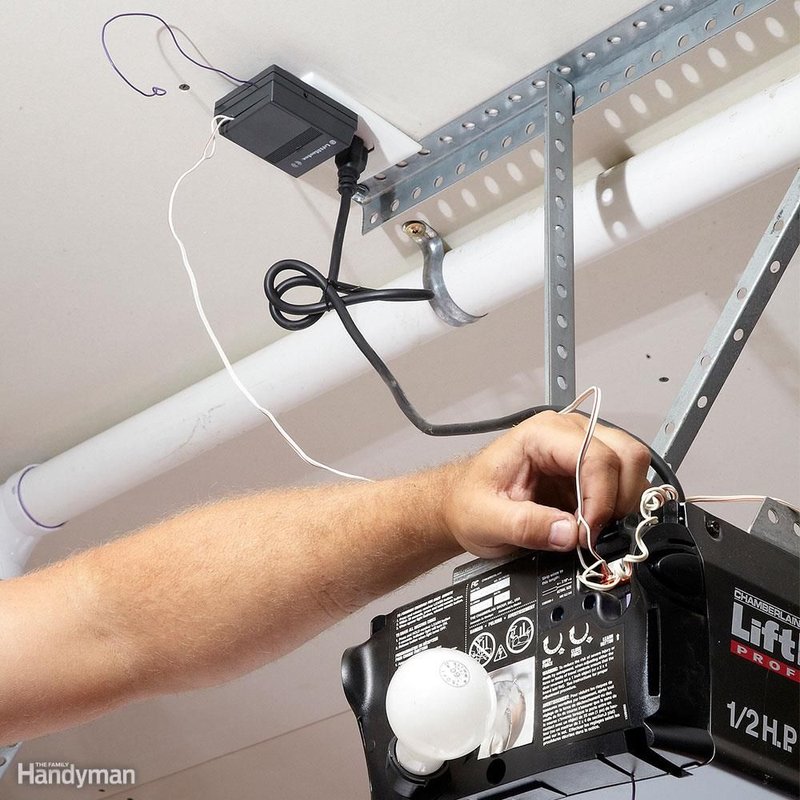
How to Check Wire Connectivity
Now that you’ve got your tools, it’s time to check those wires. Follow these simple steps:
1. Power Off: Start by unplugging your garage door opener. Safety first!
2. Inspect the Wires: Look for any visible signs of damage, such as fraying or breaks.
3. Use the Multimeter: Set your multimeter to test continuity. This will let you see if the wires are conducting electricity.
4. Test Connections: Starting from the opener unit, check each wire connection along the way to the sensors. If the multimeter doesn’t beep or show continuity, you’ve found your culprit.
This method will help you identify if the issue lies within the wiring itself or somewhere else.
Fixing Frayed or Damaged Wires
If you discover that one of your wires is frayed or broken, don’t worry! It’s a straightforward fix. Here’s how you can fix it:
1. Strip the Wire: Use your wire strippers to remove the damaged insulated part from both ends of the broken wire.
2. Twist Connect: Take the two ends of the wire and twist them together. You can add a wire connector for better security.
3. Re-insulate: Wrap the connection tightly with electrical tape to prevent moisture from entering.
4. Test the Connection Again: Plug in your garage door opener and see if everything is working. You should be good to go!
This small repair can often solve the problem, bringing your garage door back to life.
Resolving Loose Connections
Loose connections can be a sneaky little problem. They might not always show up as damaged wires, but they can create annoying issues. Here’s how to tackle them:
1. Check Each Connection: Use your screwdriver to tighten any loose screws on the terminal blocks connected to the sensors.
2. Inspect Junctions: Look at the wiring junctions that may be connected to the motor unit or control panel. Make sure everything is secure.
3. Re-test After Adjustments: Once you’ve tightened everything, plug the opener back in and attempt to operate the door again.
Sometimes, a little tinkering is all it takes to solve the issue.
Addressing Alignment Issues
Misaligned sensors are surprisingly common and can cause all sorts of troubles. Here’s how to check and fix alignment:
1. Visual Check: Look directly at the sensors. They should be facing each other, with a clear path between them.
2. Adjust as Needed: If they are off, you might need to loosen the mounting brackets slightly. Move the sensors gently until they align properly, then tighten them back down.
3. Use a Level: If you have one, use a level to ensure they’re perfectly aligned. You might find that just a slight adjustment makes a world of difference.
Re-aligning misaligned sensors can be an easy fix that reinstates proper function.
Determining if Replacement is Necessary
If you’ve gone through all these troubleshooting steps and still have issues, it may be time to consider replacing either the sensors or their wiring. Here’s what to keep in mind:
1. Cost: Replacement sensors usually aren’t too expensive, but it pays to shop around.
2. Brand Matters: If you’re using a specific brand like Genie or Craftsman, try to use their parts. They tend to work best for their systems.
3. DIY or Professional Help?: If you’re comfortable, you can replace them yourself. However, if you’re unsure or uneasy, don’t hesitate to call a professional.
Replacing the faulty components can be the final step to bringing your garage door back into working order.
Preventative Measures for the Future
Now that you’ve tackled the problem, let’s think ahead. Preventing wiring issues is easier than you might think. Here are some simple tips to keep your sensors in top shape:
- Regular Inspections: Take a moment to check your sensors and wiring every few months.
- Keeps Debris Away: Clear any leaves, dirt, or snow around the sensors to avoid obstructions.
- Guard from Weather: If possible, consider protecting your sensors from harsh weather with covers.
Taking a little time now can save you from bigger headaches later on.
Final Thoughts
Troubleshooting garage door opener sensor wiring problems may seem a bit overwhelming, but it doesn’t have to be. By understanding your sensors, examining the wiring, and fixing issues step by step, you can often bring your garage door back to life without much hassle.
With just a bit of patience and the right tools, you can manage these common repairs. And remember, regular inspections and a proactive approach can help prevent these issues from cropping up in the future. Whether you’re a DIY enthusiast or prefer to call in the pros, you’ve got this. Your garage door will be working like a charm before you know it!