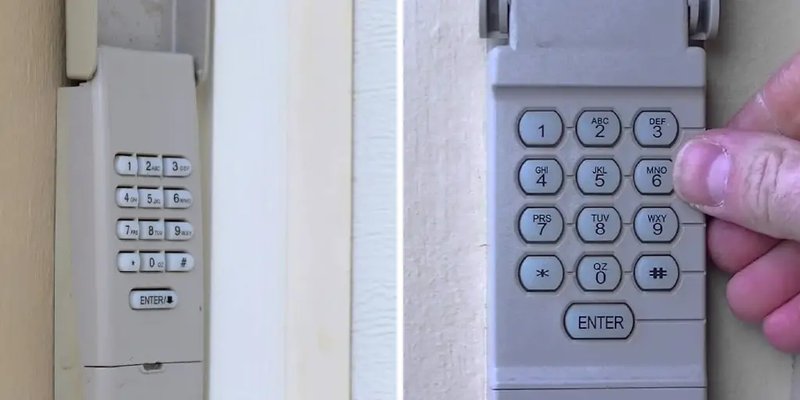
Think of your keypad as a tiny control center for your garage. When it misbehaves, it can mess with your routine, keeping you from getting in or out smoothly. Whether it’s forgotten codes or a temporary glitch, knowing how to reset your Sears keypad can return order to your daily garage access. So, grab your favorite drink, settle in, and let’s walk through the easy steps to get your keypad back in working order.
Why You Might Need to Reset Your Keypad
There are several reasons you might need to reset your Sears keypad. The most common situation is forgetting your code, which can happen to anyone. Maybe you set a code years ago and can’t recall it now. Or perhaps you recently moved into a new home and want to set your own personal code for security reasons.
Another reason could be a glitch in the keypad itself. This can happen if the batteries die, causing it to lose its programmed codes. Resetting the keypad can help correct any temporary issues, ensuring it responds correctly to your input again. Whenever there’s a hiccup in communication between your keypad and the garage door opener, resetting is often the solution.
Gathering Necessary Tools
Before you start the reset process, it’s a good idea to gather all the necessary tools. Thankfully, you won’t need much. Here’s what you’ll want to have handy:
- Owner’s Manual: This guide will provide specific steps for your keypad model.
- Fresh Batteries: Having a new set of batteries is crucial, especially if the keypad isn’t responding.
- Pencil and Paper: You might want to jot down any codes or information while you work through the process.
Imagine you’re making a sandwich; you want all your ingredients laid out before you start so you don’t miss anything. The same goes for resetting your keypad. Being prepared makes the process smoother and faster.
Steps to Reset Your Sears Keypad
Let’s dive into the steps for resetting your Sears keypad. This isn’t rocket science, but following each step carefully will help ensure everything works as it should. Here’s how to do it:
1. Locate the Reset Button: On many Sears keypads, there’s a small reset button on the back or inside the battery compartment. Look for a tiny hole and press it with a pen tip or similar object.
2. Clear Existing Codes: After pressing the reset button, all previous codes should clear. This means you’ll need to reprogram a new code.
3. Reinsert Batteries: If you took the batteries out while resetting, put in fresh ones now. Ensure they’re seated correctly to avoid any connection issues.
4. Enter a New Code: Choose a secure code of your liking—ideally four digits. You’ll press the *C* or *Program* button (depending on your model), followed by the new code, and then hit *Enter*.
If done correctly, your keypad will beep, confirming the new code is accepted.
Testing the New Code
Once you’ve reset and programmed the new code, it’s time for the moment of truth: testing it.
Simply walk to your garage door, enter your new code on the keypad, and press *Enter*. Here’s a quick guide on troubleshooting if things don’t go as planned:
- If the door doesn’t open, make sure your keypad has power—fresh batteries help here.
- Double-check that you’ve entered the code correctly, including any necessary * or
- If it still doesn’t work, try resetting it again—sometimes technology just needs a second chance!
By mastering this testing phase, you’ll ensure your keypad isn’t just for show.
Common Problems and Their Solutions
Even after a reset, you might face some issues. Here are a couple of common problems and how to fix them:
1. Keypad Not Responding: If your keypad isn’t responsive after you think you’ve reset it, check the batteries again. Dead batteries are one of the main culprits.
2. Code Not Working: If your new code doesn’t work, ensure you’ve saved it correctly. Sometimes a missed step can confuse the keypad.
Here’s the thing: tech can be temperamental sometimes, just like getting your shower temperature just right. If problems persist, consulting a professional is a good option.
Keeping Your Keypad in Good Shape
Once your keypad is working, you’ll want to keep it in good shape to avoid future headaches. Here are some handy tips:
- Regularly Check Batteries: Make a habit of checking batteries twice a year, similar to checking your smoke detectors.
- Clean the Keypad: Dust and grime can gather over time, so gently wipe the surface with a soft cloth.
- Limit Exposure to Elements: If your keypad is outside, ensure it’s weatherproofed as much as possible.
These simple steps can help extend the life of your keypad, ensuring you have reliable access to your garage.
Resetting your Sears keypad might feel like a daunting task, but we’ve broken it down into manageable steps. Just remember: even when technology fails us, there’s usually a solution at hand. Whether it’s a forgotten code or a glitch, you have the tools and know-how to tackle the reset process with confidence.
By being proactive about maintenance and replacement, you can avoid issues down the line. With this knowledge, you can keep your garage secure and your access easy. So go ahead—give that keypad a fresh start!