If you’re having trouble with your Raynor remote, resetting it might be the answer you’re looking for. Don’t worry; this isn’t rocket science! Just think of resetting your remote like recharging your phone’s battery when it’s acting up. In this guide, we’ll cover everything you need to know to effortlessly reset your Raynor remote. Ready? Let’s dive in!
Understanding Your Raynor Remote
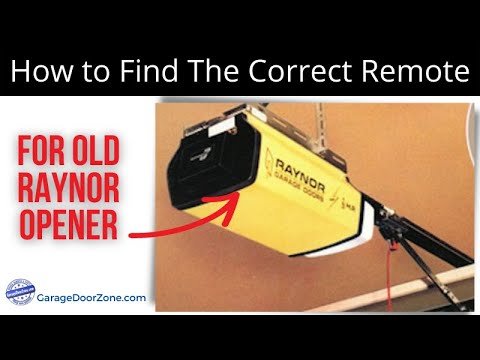
First, let’s talk about what you’re working with. Raynor manufactures a variety of garage door openers that come equipped with their own remotes. These are designed to make your life easier by allowing you to open and close your garage door from a distance—no need to wrestle with a large, heavy door manually. So, how does this little gadget work?
Your Raynor remote communicates with the garage door opener using a radio frequency. When you press the button on the remote, it sends a coded signal to the opener, telling it to open or close the door. If something goes wrong—like a dead battery, interference, or simply a glitch—the remote may stop responding. But don’t lose hope; you can usually fix these issues with a reset.
Why Resetting Your Remote Is Important
You might be wondering why you even need to reset your Raynor remote. Well, similar to your smartphone needing a restart to resolve issues, your remote might benefit from a little refresher. Resetting the remote can help clear out minor glitches and syncing issues. Plus, it’s a simple solution that doesn’t require any fancy tools or wizardry.
Here’s the thing: frequent resets can save you time and money. Instead of rushing to a repairman at the first sign of trouble, a reset could do the trick. It’s all about taking a proactive approach to maintenance. Imagine only calling tech support for your computer after trying to fix the issue yourself first—that’s the spirit!
Step-by-Step Guide to Reset Your Raynor Remote
Now, let’s get into the actual process of resetting your Raynor remote. This might seem daunting at first, but it’s straightforward. Here’s a simple step-by-step guide you can follow:
Step 1: Locate the “Reset” Button
Most Raynor remotes have a reset button located inside the battery compartment. You’ll want to open that up first. Gently slide the back cover off and take out the batteries.
Step 2: Press the Reset Button
With the batteries out, find the reset button. Press and hold it for about 10 seconds. This is like giving your remote a quick reboot, shaking off any confusion it might have been experiencing.
Step 3: Reinsert the Batteries
Once you’ve released the reset button, it’s time to put the batteries back in. Make sure they’re oriented correctly. You wouldn’t want to start over again because the batteries were upside down!
Step 4: Test Your Remote
Now that you’ve reset the remote, give it a go! Stand a few feet away and push the button to see if the garage door responds. If it does, congratulations—you’ve successfully reset your Raynor remote!
Troubleshooting Common Issues
What if your remote still isn’t working after the reset? No worries! This happens sometimes. Here are a few troubleshooting steps you can try:
- Check the Batteries: Make sure they’re fresh and properly installed. Sometimes, it’s just a matter of good batteries.
- Look for Interference: Other devices, like wireless routers, might interfere with the remote’s signal. Try moving the remote around to see if this fixes the issue.
- Reprogram the Remote: If resetting doesn’t work, you may need to reprogram the remote to sync it back with the garage door opener.
If all else fails, it might be time to consult the manual or reach out to customer support. Remember, there’s no shame in asking for help!
Reprogramming Your Raynor Remote
So, what happens if your remote is still out of sync after a reset? In many cases, reprogramming is the next logical step. Don’t panic; this process is pretty simple as well.
To reprogram your Raynor remote, you generally need to follow these steps:
1. Locate the Learn Button on your garage door opener; it’s usually on the back or side of the unit.
2. Press and Hold the Learn Button until the light turns on, indicating it’s ready to learn.
3. Press the Button on Your Remote that you want to program. The light on the opener should blink or turn off, indicating a successful programming.
4. Test the Remote to ensure it works properly.
Consistency is key, so make sure you perform these steps within 30 seconds to ensure the programming goes smoothly.
Alternatives to a Raynor Remote
In case you find that your Raynor remote isn’t working out after all your troubleshooting, you might consider alternatives. There are universal garage door remotes that can be programmed to work with a variety of openers, including Raynor.
This might be a more versatile option if you have multiple garage doors or tend to switch things up frequently. Plus, many universal remotes come equipped with additional features—like rolling code technology—adding another layer of security.
That said, it’s usually best to stick to the manufacturer’s remote for optimal performance. But if you’re looking for options, don’t hesitate to explore!
Final Thoughts
A malfunctioning garage remote can feel like trying to open a door with no key, but resetting your Raynor remote is usually a quick fix. By following the steps laid out here, you can troubleshoot issues, reset, or even reprogram your remote without breaking a sweat.
Ultimately, understanding how to maintain and troubleshoot your remote can save you time and unnecessary visits to the repair shop. Just remember that sometimes, a small reset can make a big difference! Keep your garage door accessible and your life hassle-free—because nobody has time for a stuck door. Keep enjoying the convenience your Raynor remote brings you, and don’t hesitate to reach out for help if you hit a roadblock!