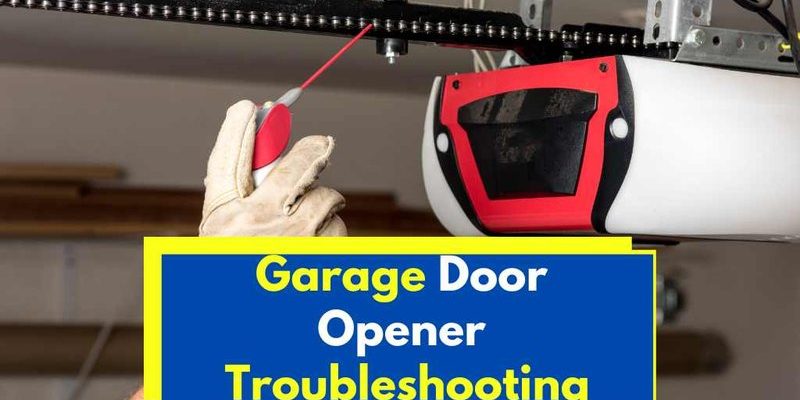
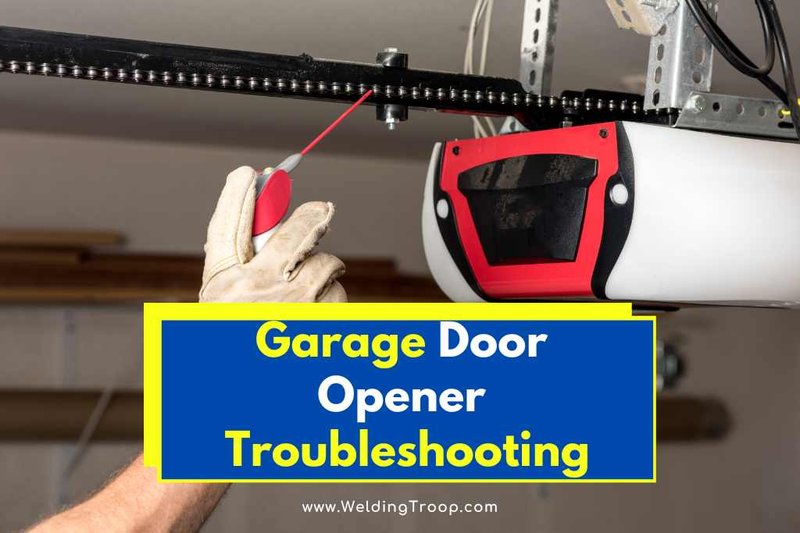
Brittle plastic parts can cause a lot of frustration. They’re like that friend who always brings snacks to the party but forgets the main dish—great for a quick fix but not reliable in the long run. Understanding how to troubleshoot these issues can save you time, money, and maybe even an embarrassing moment when you realize you’re stuck outside your own garage.
Let’s take a deep dive into the world of garage door openers with brittle plastic components. We’ll explore causes, solutions, and tips to ensure your garage door functions smoothly.
What Makes Plastic Parts Brittle?
Understanding why plastic parts become brittle is key in troubleshooting your garage door opener. Over time, exposure to the elements can take a toll. Think of your garage door opener like a favorite toy left out in the sun—it loses its flexibility and might even crack. The most common factors include:
- Weather Exposure: Sunlight, heat, and cold can make plastics degrade faster.
- Aging: Even the best materials have a lifespan; older parts can lose integrity.
- Poor Quality: Sometimes manufacturers cut corners, using subpar materials that break easily.
So, why does this matter? A brittle component can lead to significant malfunctions, like your garage door failing to open or close properly. You might be wondering what exactly to look out for.
Identifying Brittle Parts
Identifying which parts of your garage door opener are brittle can save you a lot of headaches. Here’s how to inspect your opener effectively:
1. Visual Inspection: Open the cover of your opener and take a good look at the plastic components. Look for cracks, chips, or discoloration.
2. Flex Test: Gently press or flex the plastic—if it feels rigid and doesn’t give at all, it might be too brittle.
3. Functionality Check: Test the remote or wall button. If it’s slow or unresponsive, brittle parts may interfere with the motor.
Doing this step-by-step will help pinpoint the problem areas faster. And trust me, knowing where the breakdown occurs is crucial for effective troubleshooting.
Common Troubleshooting Steps
Now that you can identify brittle parts, it’s time to tackle the problem head-on. Here are some familiar troubleshooting steps to follow:
- Check the Power Source: Ensure that your opener is plugged in and receiving power. Sometimes, the issue is as simple as a disconnected cord.
- Reset the System: Unplugging the opener for a minute can refresh the system, just like giving your computer a reboot.
- Inspect Remote Batteries: Weak batteries can lead to intermittent issues. Change them and see if the problem persists.
It’s like navigating a maze—you need to check each path before figuring out the best way out. Sometimes the problem lays elsewhere, despite the brittle part indicating an issue.
Replacing Brittle Parts
If you’ve pinpointed brittle parts, you may need to replace them. Start by checking your owner’s manual for specific replacement instructions. Here are the steps for a successful DIY replacement:
1. Unplug the Opener: Always safety-first! Unplug the opener before starting any work.
2. Remove the Cover: You’ll need to take off the casing to access the internal components. Use a screwdriver to loosen any screws.
3. Swap Out the Damaged Parts: Carefully remove the brittle pieces and replace them with new ones. Make sure they’re compatible with your brand—universal parts might not always fit.
4. Reassemble & Test: After replacing, plug everything back in and test your garage door opener.
Doing this will restore functionality and ensure safety. You might be surprised how much a small replacement can improve performance.
Using a Universal Remote
If your garage door opener has brittle parts, consider investing in a universal remote. This can be especially handy if your original remote is damaged or unreliable due to wear and tear. Here’s why a universal remote might be the answer:
– Compatibility: Most universal remotes can sync with a variety of brands like Genie and LiftMaster.
– Cost-Effective: Replacing the entire opener can be pricey; a universal remote offers a budget-friendly fix.
– Ease of Use: These remotes often come with easy programming instructions, making it simple even if you’re not tech-savvy.
Honestly, it’s a practicality that can save you some hassle. If you’re struggling to pair your new remote, follow the instructions carefully.
Maintaining Your Garage Door Opener
Once you’ve dealt with the brittle parts, maintenance is vital to keep everything in check. Here are a few simple maintenance tips to extend the life of your garage door opener:
– Regular Inspections: Conduct monthly checks for any signs of wear or brittleness.
– Lubrication: Keep moving parts lubricated to prevent friction and wear.
– Clean Components: Dust and debris can hinder performance, so clean the areas around the opener and tracks.
It’s like regular oil changes for your car—consistent upkeep prevents bigger issues down the road.
When to Call a Professional
Sometimes, troubleshooting might reveal larger issues that need an expert’s touch. If you find:
– Extensive damage or brittleness that compromises safety
– Electrical issues that you’re unfamiliar with
– Persistent reliability problems after troubleshooting
It’s best to call a professional. They have tools and insights that can pinpoint problems you might miss. Plus, if they determine it’s time for a complete opener replacement, they can guide you through options suited best for your needs.
Wrapping It Up
Troubleshooting a garage door opener with brittle plastic parts need not be daunting. By understanding what to look for, taking common troubleshooting steps, and knowing when to replace parts or call in the pros, you’ll keep your opener in tip-top shape. Remember, regular maintenance is key to avoiding future irritations. So let’s keep those garage doors rolling smoothly, one trouble at a time!