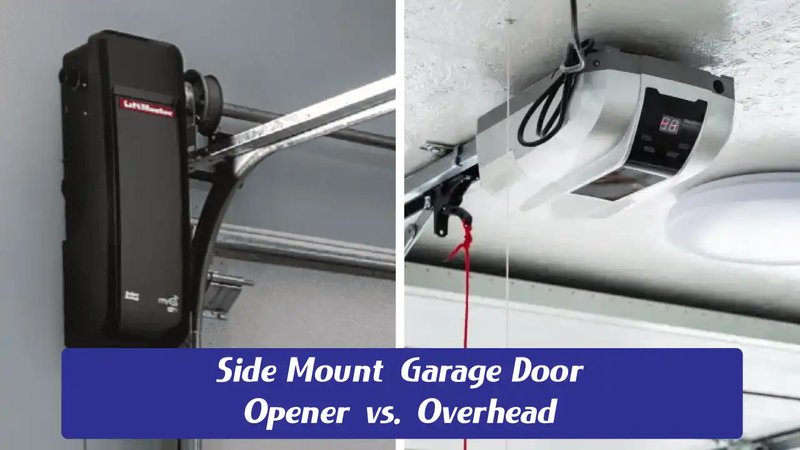
Standard mounting brackets are typically the most common choice. They work well in most garages and provide sufficient headroom for standard door openings. But what if your garage ceiling is on the lower side? That’s where low ceiling options become handy. These brackets are designed for tighter spaces, allowing you to make the most of your limited room. In this article, we’ll take a deep dive into these two configurations, helping you figure out which option might be the best fit for your needs.
Why Mounting Brackets Matter
Before diving into the specifics, let’s discuss why you should even care about the mounting bracket at all. A mounting bracket is what keeps your garage door opener securely fastened and aligned, ensuring it opens and closes smoothly. If it’s not mounted correctly, even the best opener can struggle, leading to premature wear and tear—or worse, a malfunction. Think of it like a car needing a sturdy frame; no matter how good the engine is, it won’t run well without a solid platform.
Plus, the type of bracket can affect how well your opener performs over time. With a suitable choice, your opener will work more efficiently, saving you both headache and money in repairs later on. Here’s where understanding the differences between standard and low ceiling brackets comes into play.
Standard Mounting Brackets: Overview
Standard mounting brackets are designed for typical garage heights, usually around 8 to 12 feet. These brackets provide a solid fit for most garage door opener systems, which means you won’t have to worry about unnecessary adjustments. They offer a great balance between stability and accessibility, making them a popular choice among homeowners.
Think about it: if you have a standard-sized garage, these brackets work well without much fuss. They typically allow for a seamless installation process, needing just a few basic tools. So if your garage was built with normal headroom, this is likely your go-to option.
Installation Process for Standard Brackets
Installing standard brackets is generally straightforward. Here’s a quick rundown of what you’ll need to do:
1. Gather your tools: You’ll need a drill, screws, a level, and a wrench.
2. Locate the beams: Identify where to mount the bracket on the ceiling.
3. Attach the bracket: Use screws to fasten the bracket securely to the beam—make sure it’s level!
4. Connect the opener: Follow your garage door opener’s instructions to link it with the bracket.
With these simple steps, your standard bracket installation can be completed in a couple of hours, allowing you to enjoy the convenience of your new opener.
Low Ceiling Mounting Brackets: Overview
If you have a garage with limited ceiling height, then low ceiling mounting brackets are worth considering. These brackets are specifically designed for garages with ceilings lower than 8 feet. They offer modifications to make it possible for your opener to function without taking up too much vertical space—kind of like a compact car for your garage opener’s needs.
Low ceiling brackets usually feature a more angled configuration, enabling the opener to operate without interfering with the door’s movement. This design helps you maximize your space while still ensuring that your opener works reliably, even in tight confines.
Installation Process for Low Ceiling Brackets
The installation process for low ceiling brackets can be slightly different compared to standard ones. Here’s how to go about it:
1. Check the compatibility: Make sure your garage door opener works with low ceiling brackets.
2. Gather necessary tools: You’ll need a drill, screws, a level, as well as spring clamps or other stabilizing tools.
3. Position the bracket: Carefully plan where to mount the bracket to maximize both height and accessibility.
4. Secure the features: Make sure everything is tightened and aligned properly before connecting the opener.
Overall, the installation takes a bit more planning, but it’s still doable as a DIY project if you follow the instructions closely.
Comparison Table: Standard Vs. Low Ceiling Mounting Brackets
| Feature | Standard Mounting Bracket | Low Ceiling Mounting Bracket |
| Height Compatibility | 8 to 12 feet | Below 8 feet |
| Design | Vertical alignment for ease of use | Angled design for tight spaces |
| Ease of Installation | Straightforward | More planning required |
| Best for | Standard garages | Low ceiling garages |
Key Considerations for Both Bracket Types
When choosing between standard and low ceiling mounting brackets, consider a few important factors:
1. Garage Ceiling Height: This is the most significant aspect to factor in. Measure your ceiling height and see where you fall in the bracket ranges.
2. Door Type: Depending on whether you have a sectional or one-piece door, the mounting bracket may need to vary. Some designs may affect how a low ceiling bracket performs.
3. Weight of the Door: Heavier doors might require additional support. Always refer to the specifications provided by the manufacturer.
4. Local Regulations: Depending on where you live, there may be specific codes governing garage door installations. It’s worth checking before making a choice.
By keeping these aspects in mind, you’ll be able to shoot straight towards the bracket that’s perfect for your garage.
Troubleshooting Common Issues
Even with the best mounting brackets, there may still be hiccups along the way. Here’s a look at some common issues and how to troubleshoot them:
– Inconsistent Door Movement: If your garage door hesitates or starts to make weird noises, it could be a misalignment in the bracket. Check the installation and ensure everything is tightly secured.
– Remote Syncing Issues: You might sometimes struggle to sync your remote with the opener. Check the battery in your remote, and make sure you follow the resetting process in the user manual.
– Limited Space: If you find that your low ceiling bracket is still obstructing the door’s movement, you may need to reevaluate the position or seek guidance on alternative configurations.
Each of these issues can typically be resolved with a little patience and basic troubleshooting techniques.
When it comes to choosing between standard and low ceiling mounting brackets, it primarily boils down to your garage’s height and specific needs. While standard brackets offer ease of installation and suitability for most garages, low ceiling options ensure functionality in tighter spaces. Both designs have pros and cons.
Ultimately, taking the time to choose the right mounting bracket will not only improve your garage door opener’s performance but also extend its lifespan. So, whether you’re working on a standard setup or navigating the challenges of a low ceiling, understanding the differences will help you make an informed decision. Here’s to secure, hassle-free garage doors!
