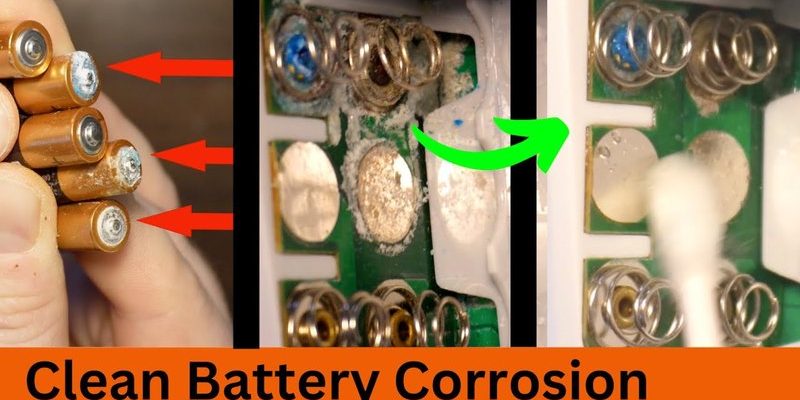
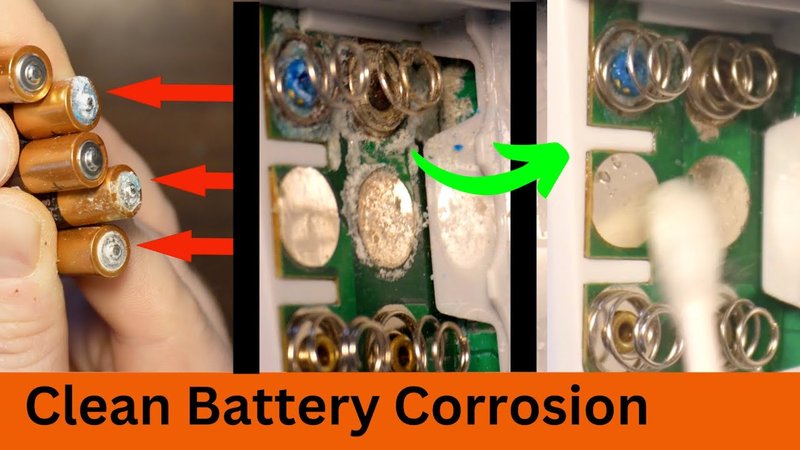
If you own a garage door opener remote, like those from Chamberlain, LiftMaster, or Genie, you might come across corrosion on the battery contacts. This buildup may cause poor connections and can lead to a frustrating situation when you need your garage door to cooperate. So, let’s dive into how to clean corrosion from those battery contacts so your garage door opener can keep working like a charm.
What Causes Corrosion on Battery Contacts?
Corrosion usually occurs when metals like copper or nickel in the battery contacts react with moisture and oxygen. Picture this: if you’ve ever left a soda can out in the rain, you would notice rust forming on its surface over time. The same thing happens with battery contacts, only this time, the reaction is between battery acid and the metal of the contacts.
Humidity and temperature changes in your garage can accelerate this corrosion. If your garage tends to be a bit damp or if it experiences large temperature fluctuations, your battery contacts are more prone to corrosion. Keeping the environment in mind is crucial since it affects how often you’ll need to tackle this clean-up job.
Gathering Your Tools
Before you dive in, let’s get your cleaning station ready. You’ll need a few simple supplies to make the task much easier. Here’s what you need:
- White vinegar or lemon juice
- Small brush or toothbrush
- Microfiber cloth or paper towels
- Protective gloves (optional but recommended)
- Sandpaper or file for severe corrosion
The acids in vinegar or lemon juice are great for breaking down the corrosion. A small brush will help you reach into the tiny crevices of the contacts. And of course, don’t forget about a cloth for drying everything afterward.
Safety First: Disconnecting Your Garage Door Opener
Before you get your hands dirty, always turn off your garage door opener. This is not just a safety precaution; it ensures that you won’t activate the door while you’re working. Most garage door openers have a power button, but if you want to be extra cautious, you can unplug it from the wall.
Remember, it’s also a good time to remove any batteries from the remote. This way, you’re avoiding any accidental discharges or short-circuits.
Examining the Battery Contacts
Once you’ve got everything set up and powered down, take a close look at the battery contacts. You should see signs of corrosion, which often appears as a white, powdery substance clinging to the metal. If the contacts are severely corroded, you might even find a crusty buildup, almost like a crust on old bread.
Take your time with this examination. You don’t want to overlook any spots, especially the ones you can’t see at first glance. These areas can affect how well your remote interacts with your garage door opener.
Applying the Cleaning Solution
Now comes the fun part! Grab your white vinegar or lemon juice and apply it to the corroded areas. You can use a small cloth or your toothbrush to gently scrub at the corrosion. Picture yourself as a dentist cleaning plaque off teeth—the goal is to get as much off as you can without damaging the underlying metal.
You might need to apply the solution multiple times, especially if there’s a significant buildup. Let the solution sit for a minute or two to penetrate the corrosion. This little wait can save you a lot of scrubbing later on.
Scrubbing Away the Corrosion
After letting the solution do its magic, it’s time for the scrubbing. Use your brush to gently work away at the corrosion. If you’re finding it really stubborn, a little more pressure can help, but don’t go overboard—too much force can damage the contacts.
Once you’ve scrubbed away the corrosion, switch to a clean part of your cloth or use paper towels to wipe off any leftover residue. You want to leave the contacts as clean and dry as possible before moving onto the next step.
Dealing with Severe Corrosion
Sometimes, corrosion can be so bad that vinegar or lemon juice alone won’t cut it. If the corrosion has caused significant damage or left rough patches, grab some fine-grit sandpaper or a file. Gently sand down the corroded areas until they’re smooth and shiny. This process is a bit like polishing a piece of jewelry—you’re aiming to restore it to its former glory!
Be really careful during this step. You don’t want to accidentally scratch the surrounding areas or disrupt the metal integrity of the contacts. A light touch will often do the trick.
Drying and Reassembling
After you’ve successfully cleaned the battery contacts, it’s crucial to let them dry completely. Use a dry microfiber cloth to soak up any remaining moisture. Leaving the contacts damp could lead to faster corrosion in the future, so give them a good once-over!
Once everything is dry, reinsert the batteries into the remote. Make sure they’re seated correctly with the right polarity—think of it as putting in a puzzle piece. If they’re not aligned properly, your remote won’t work, and that opens up a whole new can of frustration.
Testing Your Garage Door Opener
Now that you’ve tackled the cleaning and reassembled your remote, it’s time for the ultimate test! Turn your garage door opener back on and give the remote a try. Press the button and see if the garage door responds.
Honestly, there’s a special satisfaction in seeing everything work smoothly after a bit of elbow grease. If the door still doesn’t budge, double-check your battery placement and ensure there are no other underlying issues at play — like needing to reset or re-sync your remote to the opener.
Preventing Future Corrosion
You might be wondering, what can I do to stop this problem from happening again? A few preventive measures can go a long way.
- Store batteries in a cool, dry place to avoid humidity.
- Periodically check the battery contacts for any signs of corrosion.
- Replace batteries at the first sign of corrosion or leaks.
Little actions like these can save you time and keep your garage door opener in great condition.
Cleaning corrosion from your garage door opener battery contacts isn’t just about fixing a problem; it’s about ensuring convenience and reliability in your daily life. By regularly maintaining your garage door opener remote, you’re setting yourself up for smoother operations and fewer headaches down the road.
So now you’re equipped with everything you need to tackle this task with confidence. Share this knowledge with friends or family who might be struggling with a stubborn garage door opener, and remember: a little care goes a long way!