Cleaning the internal components of your garage door opener can seem daunting. It’s not like you handle this kind of thing every day, right? But it really is simpler than you might think. Whether you have a LiftMaster, Chamberlain, Genie, or another brand, they all have similar internal mechanics that can benefit from a scrub. Plus, when the opener operates smoothly, you save time and avoid frustration. Trust me, it’s worth making this a part of your home maintenance.
Understanding Your Garage Door Opener
Let’s start with a basic understanding of how your garage door opener works. In the simplest terms, this machine uses a motor, which controls the door opening and closing mechanism through a series of gears and belts. It’s like the conductor of an orchestra, making sure everything works in harmony.
Most garage door openers feature a remote control for easy access. Depending on your model, the remote can either be a specific brand like Chamberlain or LiftMaster, or a universal model that works with various openers. Knowing the brand can help when you’re searching for online resources or replacement parts as you clean. Having the right tools can make all the difference.
Cleaning the internal components can improve the functionality of your opener and prolong its life. So, let’s dive into how you can tackle this task step by step!
Gathering Your Cleaning Supplies
Before you start, you’ll need the right supplies. Having everything on hand will make the process smoother. Here’s a short list of what you’ll need:
- A screwdriver (flathead and Phillips)
- Vacuum cleaner with a brush attachment
- Soft cloths or microfiber rags
- Compressed air canister (optional)
- Electrical contact cleaner
- Lubricant spray (like silicone spray)
You might be wondering, “Do I really need all that?” While you can clean with just a cloth and a bit of elbow grease, having the right tools ensures you’ll do a thorough job. Plus, using a vacuum cleaner to get rid of dust and dirt can save you from a lot of hassle later.
Safety First: Disconnecting the Power
Before you dive into cleaning, it’s crucial to ensure your safety. First things first—disconnect the power. This sounds daunting, but it’s an essential step. Think of it like turning off the stove before cleaning your kitchen.
Locate the power cord of your garage door opener and unplug it. If your model is hardwired, switch off the breaker that controls the opener. Taking this precaution helps you avoid any accidental activation while your hands are inside the unit. Trust me; you don’t want that surprise!
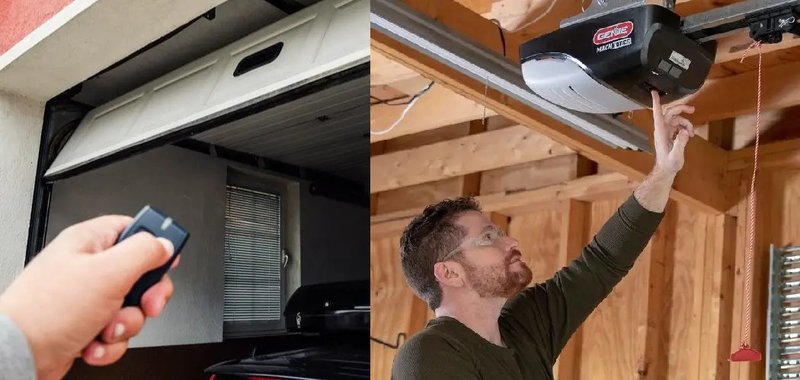
Opening Up the Garage Door Opener
Now that you’re powered down, it’s time to open up the garage door opener. Generally, this involves removing the outer cover, which is usually held on by screws. Use your screwdriver to unscrew them carefully. You’ll often find them on the back or sides of the unit.
Once the cover is off, take a moment to familiarize yourself with the internal components—like the motor and circuit board. Your opener isn’t just a box; it’s a mini machine that needs regular upkeep.
Removing Dust and Debris
With the cover off, you’ll most likely see some dust and dirt settled inside. It’s a common occurrence, especially if your garage is prone to collecting grime. Grab your vacuum cleaner with the brush attachment and gently remove any dust.
If you’re feeling extra thorough, a quick blast of compressed air can help to dislodge stubborn dirt from corners. Just keep the nozzle at a safe distance. Remember—you’re cleaning the components, not dislodging them!
Inspecting Internal Components for Damage
As you clean, take a close look at the internal components. Look for signs of wear or damage like frayed wires or burnt connectors. If you find any issues, it might be time to replace those parts. Doing so can significantly improve your garage door opener’s performance.
You don’t have to be an expert mechanic here. A good rule of thumb is to replace parts that look questionable. Ignoring them could lead to bigger issues down the line—nobody wants to deal with a malfunctioning garage door when they’re rushing out the door.
Cleaning the Moving Parts
The real magic happens with the moving parts. This includes the gears, belts, and pulleys. Use a soft cloth to wipe down these components. Avoid using too much cleaner, as residue can gunk up later.
Afterward, apply a light lubricant spray specifically designed for garage doors or similar equipment. It’s like giving your opener a little TLC, allowing it to operate more smoothly. Remember, a well-lubricated system helps minimize wear and tear over time.
Reassembling the Garage Door Opener
Once everything is clean and dry, it’s time to put the pieces back together. Start by placing the cover back on, aligning it properly and securing it with screws. Tighten them just enough so the cover fits snugly without causing any bulging.
Next, reconnect the power supply. This is your chance to plug in the opener or flip the breaker back on. You might be feeling a little anxious at this stage, but don’t worry; you’re almost done!
Testing the Garage Door Opener
Here comes the exciting part! With everything reassembled, it’s time to test the opener. Grab your remote and press the button to see if the garage door responds smoothly. Keep an eye (and an ear) out for any unusual noises.
If it operates as expected, you’ve done a fantastic job! If not, double-check your work. It could be as simple as needing to sync your remote again or adjusting a loose connection.
Creating a Cleaning Schedule
Maintaining your garage door opener shouldn’t just be a one-time deal. Just like regular car maintenance, aiming to clean your opener every six months can make a huge difference in its longevity.
Mark it on your calendar or set a reminder on your phone—whatever you need to make this a habit. Regular cleaning keeps dust from building up and helps ensure that everything works as it should.
Final Thoughts
Cleaning the internal components of your garage door opener might feel like a chore, but it’s really a worthwhile investment in your home. Not only does it improve performance, but it also extends the life of your opener.
By following these straightforward steps, you can tackle this task confidently. And who knows? You might find it’s more satisfying than it seems. Just imagine a smoothly operating garage door every time you come home. Now that’s what I call a win!