Now, if you’ve got a Craftsman, Chamberlain, or LiftMaster garage door opener, you might find yourself wondering how to replace those rollers. Luckily, the process is straightforward, and with a little time and effort, you can save on repair bills while boosting your garage door’s performance. So, let’s dive in.
Why Do You Need to Replace Garage Door Rollers?
Garage door rollers are crucial for smooth operation. They support the weight of the door and keep it aligned. If they wear down, you might notice your garage door making strange noises or struggling to open. In some cases, you might see physical damage— cracks or chips in the rollers can often lead to bigger problems.
Besides sounds and visible damage, let’s not forget safety. A malfunctioning garage door can unexpectedly fall, posing a danger to you and your family. Replacing the rollers can help ensure your garage door works safely and efficiently.
But it’s not just about safety; think about convenience, too. A well-functioning garage door saves you time and hassle. Imagine not having to wrestle with a door that refuses to budge, especially on a rainy day.
Identifying the Right Rollers for Your Garage Door
Before you start replacing garage door rollers, you’ll want to ensure you have the right ones. Rollers come in various materials—steel, nylon, and plastic—which each have their pros and cons. Steel rollers are durable but can be noisy, while nylon ones operate much more quietly and often last longer.
Here’s how to identify the right type of roller:
- Material: Determine if you prefer noisy steel or quieter nylon.
- Size: The most common roller sizes are 3 inches and 5 inches in diameter. Check your existing rollers to be sure.
- Ball Bearing: Look for number of ball bearings. More bearings usually mean smoother operation.
Once you know what you need, you can head to a home improvement store or shop online to get your replacement parts.
Gather Your Tools
Before you get started, you’ll want to gather a few essential tools. Think of it like preparing for an adventure—you need the right gear! Here’s a quick list:
- Screwdriver: A flat-head or Phillips screwdriver, depending on your garage door’s screws.
- Wrench: A socket or adjustable wrench for loosening bolts.
- Safety Gear: Gloves and goggles to protect yourself during the process.
Having everything on hand will save you from running around mid-project, which, let’s be honest, can be frustrating.
Preparing to Replace the Rollers
Safety first! Before you start taking anything apart, disconnect your garage door opener. Unplugging it will help prevent any accidental operation while you’re working.
Next, take a moment to assess your garage door’s condition. Is it balanced? If it’s sagging or off-track, you might need to address those issues first.
Once you’re certain everything is ready, you can proceed to remove the garage door. This means either lifting it manually if it’s light enough or using a support if necessary.
Removing Old Rollers
This is where the real fun begins! With your tools and safety gear on, it’s time to remove those old rollers. Start by loosening the screws that hold them in place. You might need to support the door with a sturdy prop if it doesn’t have a locking mechanism.
Here’s how to do it step-by-step:
1. Take out the garage door opener’s fasteners: Look for clamps that help hold the door in place. Loosen these but don’t completely remove them yet.
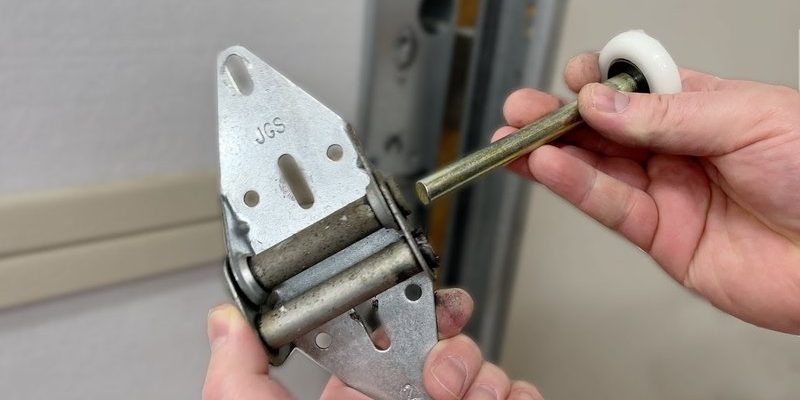
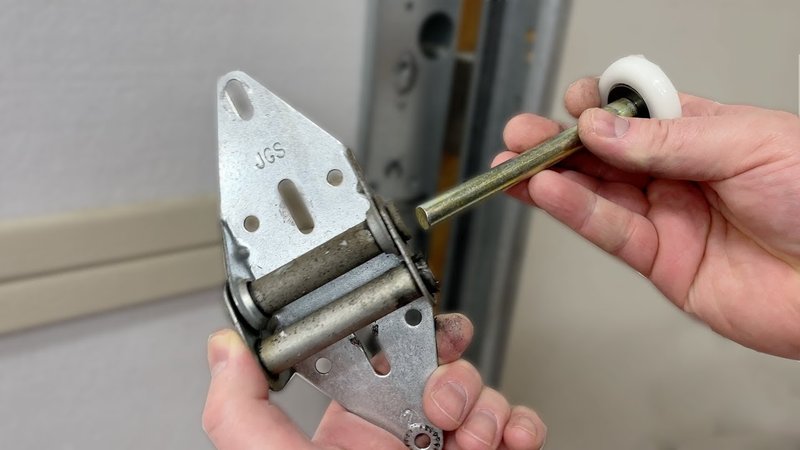
2. Slide the rollers out: Carefully slide each roller off the track and out.
3. Inspect the tracks: Before inserting the new rollers, check the tracks for any debris or damage. Clean them out if necessary.
Removing the rollers should be straightforward; however, if you encounter stubborn screws or bolts, a bit of penetrating oil can work wonders.
Installing New Rollers
Now comes the fun part—putting in those shiny new rollers! Here’s how to do it:
1. Align the new roller with the track: Make sure the roller fits snugly into the opening.
2. Fasten it securely: Use your screwdriver to tighten the screws firmly. Don’t overtighten, though. A little snug is enough!
3. Repeat for all rollers: Work your way down the door until all rollers are replaced.
You might want to step back and admire your work after this step—it’s already starting to look impressive!
Testing Your Garage Door
Once you’ve installed all new rollers, it’s time to test the door. This part is crucial.
1. Reconnect the garage door opener: Plug it back in, and make sure everything is safe.
2. Open and close the door: Use the remote to check how smoothly the door operates now. Listen for any unusual sounds.
You might be wondering what to do if it doesn’t operate smoothly. If you hear grinding noises or feel resistance, it could mean the rollers need adjusting or the door needs a little realigning.
Regular Maintenance for Your Garage Door Rollers
Replacing garage door rollers isn’t a one-time task. To keep everything running smoothly, regular maintenance is key. Here are a few tips:
- Inspect them regularly: Check for wear and tear at least twice a year.
- Clean the tracks: Remove dirt and grime to prevent future problems.
- Lubricate moving parts: Use a silicone-based lubricant to keep rollers moving smoothly.
Think of it like getting oil changes for your car. Regular check-ups can extend the life of your garage door and keep it functioning excellently.
What to Do If You Encounter Issues
Even with the best intentions, sometimes things don’t go as planned. If your garage door still misbehaves after replacing the rollers, you might be looking at other issues. These could include:
– Misalignment: Your door might be out of alignment.
– Mechanical failure: Other components, like the opener itself, may need a look.
– Weather factors: Humidity or temperature changes can affect how your door operates.
If you’re in over your head, don’t hesitate to call a professional. Sometimes, expert intervention is the best way forward.
Replacing garage door opener rollers sounds intimidating, but it can be a rewarding DIY project. With a little patience and the right tools, you’ll have your garage door rolling smoothly again. Plus, you’ll gain confidence in your ability to tackle future home repairs—who knew you were so handy?
Remember, regular maintenance is just as crucial as the replacement itself. Keep an eye (and ear) on your garage door to catch any issues early on. Happy repairing!