High-lift doors are designed for spaces with limited headroom, which means they often need specialized handling when installing a garage door opener. You might be considering a brand like Chamberlain or LiftMaster, which are popular for their reliability and ease of use. Let’s walk through the process together!
Understanding Your High-Lift Door
Before diving into installation, it’s essential to understand what a high-lift door is and how it operates. A high-lift door has tracks that allow the door to rise higher than a standard garage door. Picture it like a bird taking off—certain adjustments are needed to get that beautiful lift and glide.
These doors are great for maximizing space, especially in garages with taller vehicles or added storage needs. The mechanism usually includes a counterbalance system that helps it lift smoothly. Understanding these components will make it easier to install the opener since you’ll know what you’re working with.
Gathering Your Tools and Equipment
You don’t want to be halfway through and realize you’re missing a crucial tool. Here’s what you should collect before starting your installation:
- Toolbox: Hammer, screwdrivers (both flathead and Phillips), and a wrench set.
- Drill: A power drill with bits suitable for metal and wood.
- Measuring Tape: To ensure everything fits perfectly.
- Ladder: You’ll need this to reach higher parts of the installation.
- Garage Door Opener Kit: Make sure it’s compatible with high-lift doors. Brands like Chamberlain are known for compatibility.
Having everything on hand will make this process smoother and more enjoyable. Now, let’s get started!
Preparing the Garage Door Opener
Once you have your tools ready, it’s time to get your garage door opener ready for installation. If you bought a smart opener that connects with your phone, make sure you’ve downloaded the relevant app beforehand.
Check if your garage door opener comes with all necessary components, which typically include:
- Motor unit
- Rail and trolley assembly
- Wall console
- Remote control
Make a quick inventory list to ensure you don’t miss anything. Honestly, there’s nothing worse than realizing you need to make another trip to the hardware store mid-installation.
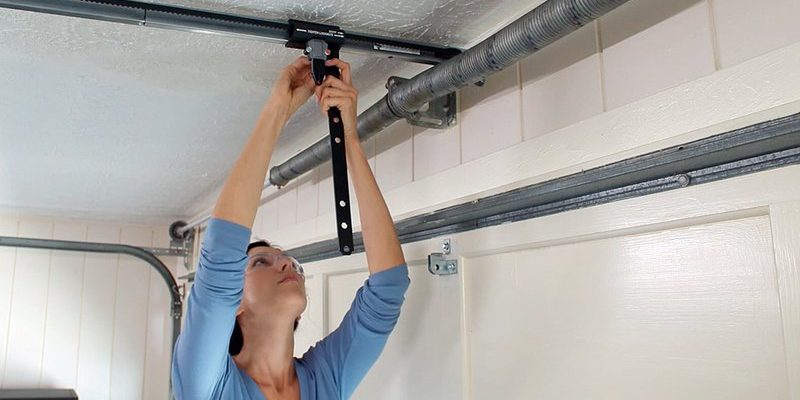
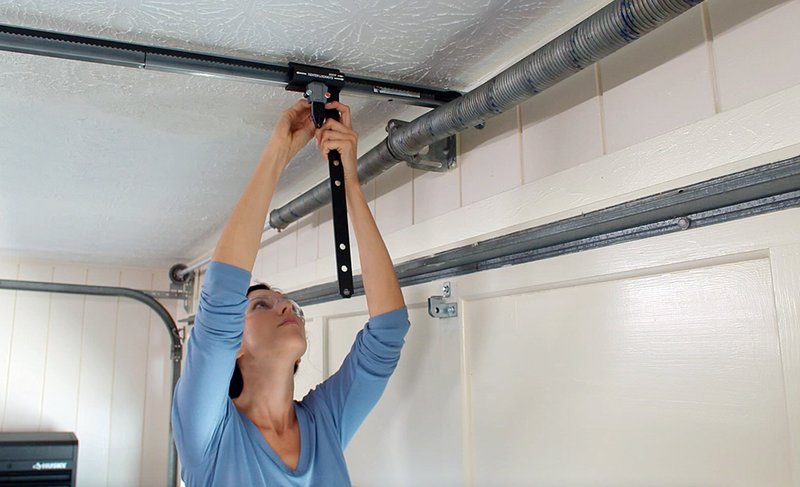
Mounting the Garage Door Opener
Now comes the exciting part: mounting the garage door opener itself! First, you’ll want to determine the proper height for the motor unit. This is typically around 7 feet from the floor. Make sure to mark the location with a pencil.
For high-lift installations, you’ll need to mount the opener on the wall rather than on the ceiling. This position ensures that the opener has the best leverage. Use your drill to install the mounting bracket, ensuring it’s level. This simple step can save you a ton of headaches later.
Connecting the Rail System
Once the motor is mounted, it’s time to attach the rail system. This is where the magic happens—the section of rail determines how the door moves up and down.
1. Align the rail: Connect the rail to the motor unit. Follow the manufacturer’s instructions carefully, as this can vary by brand.
2. Attach the trolley: You’ll slide the trolley along the rail, ensuring it’s securely in place.
3. Secure the rail to the wall: This will help maintain the system’s integrity during use.
Make sure everything feels tight and secure. You might be wondering how to check that—give it a little tug, but don’t go Hulk on it!
Wiring the Garage Door Opener
Now it’s time to wire your opener. This step can feel a bit intimidating, but remember to take it slow. Here’s what you need to do:
1. Connect to power: Plug the opener into a nearby outlet. If you’re using a smart opener, ensure there’s Wi-Fi availability close by.
2. Wire the wall console: This is the button you’ll press to open the door. Use the provided wires to connect it to the opener. Typically, this involves connecting red and white wires to their corresponding positive and negative terminals.
3. Safety sensors: Finally, connect the safety sensors that prevent the door from closing if there’s an obstruction. These usually mount on either side of the door opening.
Always double-check your wiring connections using the user manual. It’s like reading a recipe; sometimes missing one ingredient can lead to a disaster!
Testing the System
With everything connected, it’s time for a test run. Stand clear of the door and press the button on the wall console or remote. Watch the door as it engages the opener. Does it move smoothly, or does it seem to struggle? You might need to adjust the settings.
1. Adjust speed and force settings: Most openers have these settings that can be adjusted if the door is too slow or stops midway.
2. Test safety sensors: Place an object in the door’s path and ensure the door reverses when it encounters resistance.
Testing is crucial to ensure everything works as it should. You wouldn’t want your lofty garage door slamming down unexpectedly!
Syncing Your Remotes
Now that everything is up and running, it’s time to sync your remotes. This step lets you operate the door from your car or anywhere nearby.
1. Press “Learn” on the motor unit: This will put the opener in sync mode.
2. Press the button on your remote: Hold it until you see the opener’s lights blink. This means the remote is now paired.
You might have a universal remote, in which case, check the instructions specific to that model, as the steps can vary.
Troubleshooting Common Problems
Even the best-laid plans can hit snags. If your door won’t open or close properly, don’t panic. Here are some common troubleshooting tips:
- Check sensors: Make sure they aren’t obstructed and are aligned correctly.
- Reset the opener: Unplug and then plug it back in to reset the system.
- Inspect the remote batteries: A dead battery will stop communication. Replace it to see if that fixes the issue.
Most problems can be solved with some common sense and basic troubleshooting. If you’re still stuck, consult the user manual or reach out to customer support for help.
Final Adjustments and Safety Checks
Once everything seems to be working, do a final inspection. Look for loose bolts or cables and ensure the door moves smoothly without any hiccups.
Safety is crucial here. Make sure the safety features are all functional, as you don’t want any hazards lurking behind your shiny new door.
Open and close the door several times while monitoring how it operates. This will reassure you that it’s installed properly and safe for daily use.
Enjoying Your New Garage Door Opener
Congratulations! You’ve successfully installed a garage door opener on a high-lift door. Take a moment to admire your handiwork. That simple press of a button can save you time and hassle every day.
Remember, every time you come home, you’ll appreciate having an opener that suits your high-lift door’s special needs. If you have any more questions down the line, don’t hesitate to revisit the documentation or reach out for assistance.
By following these steps, you’ve ensured that your garage is not just functional but also more accessible and convenient. Enjoy the ease of using your new opener—you earned it!