Resetting a wall button can seem daunting, especially if you aren’t particularly tech-savvy. But think of it as giving your garage door opener a little tune-up, similar to how you might reboot a sluggish computer. With the right steps, you’ll have it running in no time—trust me!
In this guide, we’ll walk through how to reset your LiftMaster wall button, so you can get back to the important things in life, like grabbing that ice cream you stashed in your garage freezer. Let’s dive in!
Understanding Your LiftMaster Wall Button
Before diving into the reset process, it’s essential to know what you’re dealing with. The LiftMaster wall button is typically a simple device that communicates with your garage door opener via a low-frequency radio signal. When you press the button, it sends a signal to the opener, telling it to open or close the door.
Common issues that can prompt a reset include:
- Intermittent responses when pressing the button.
- Wall button completely unresponsive.
- Incompatibility after changing batteries in your remote.
Recognizing these signs beforehand will help you troubleshoot effectively. A quick reset can often solve these problems, ensuring you don’t have to deal with unnecessary hassle or frustration.
Preparing for the Reset
Before rushing into a reset, let’s make sure you’re fully prepared. First, ensure that you have access to the LiftMaster remote or the manual that came with your unit. You’d be surprised how often having a quick reference can save you time.
Next, check the power status of your garage door opener. Make sure it’s plugged in and that there’s no blown fuse or tripped circuit. It’s like making sure your coffee maker is plugged in before wondering why it’s not brewing your morning cup—sometimes the solution is simpler than it appears!
Finally, take a moment to gather any tools you may need. For this reset, all you typically need is your fingers! But if your wall button has a battery compartment, having a screwdriver handy is a smart call.
Steps to Reset the LiftMaster Wall Button
Now that you’re prepped and ready, here’s how to reset your LiftMaster wall button in just a few simple steps. This process is straightforward and designed for all levels of DIY enthusiasts.
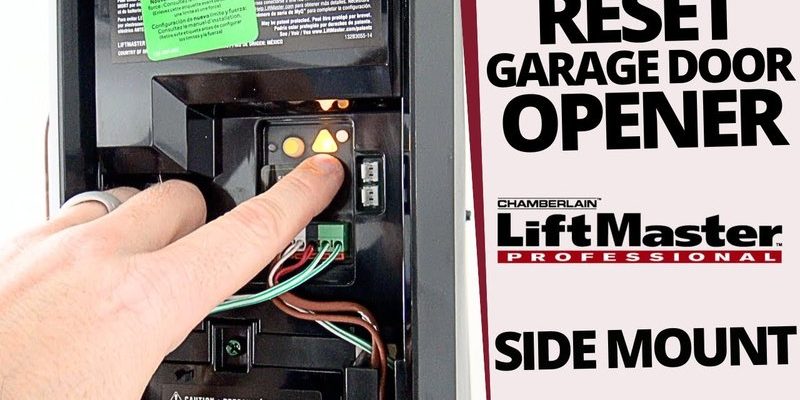
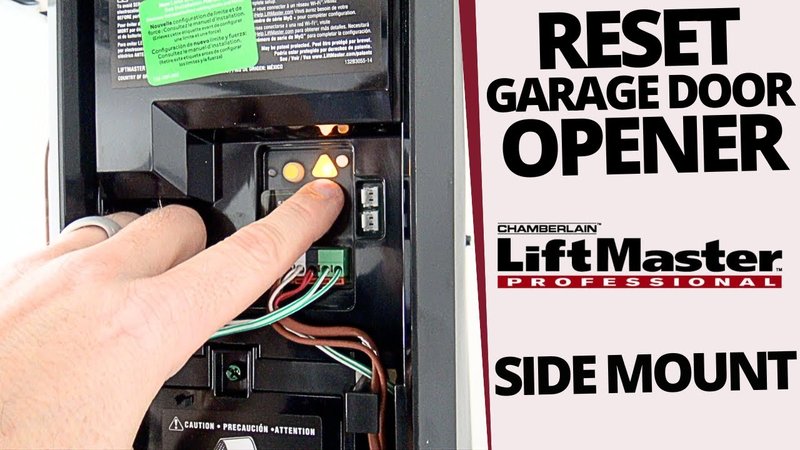
1. Locate the Reset Button: Your LiftMaster wall button should have a small reset button on it. Get familiar with the layout—this is the heart of the reset process.
2. Press and Hold: Once you’ve found the reset button, press and hold it for about 10 seconds. This action clears the existing code and prepares it for a new one. It’s like helping your garage door forget an annoying habit.
3. Test the Button: After releasing the button, press it again. If the light on your garage door opener blinks, then you’re on the right track! This temporary signaling indicates that the reset was successful.
4. Re-sync with Your Remote: If you have a remote, you’ll need to sync it with your wall button again. With the garage door closed, press the and hold the *”Learn”* button on the garage door opener until the light blinks, then press your remote button within 30 seconds to ensure both devices communicate properly.
Follow these steps, and you should be set!
Troubleshooting Common Issues
Sometimes, despite following every reset step carefully, your wall button might still not cooperate. If that’s the case, don’t stress! Here are a few troubleshooting tips to help you identify the problem.
– Insufficient Power: If the garage door opener isn’t receiving power, neither will your wall button. Check for loose connections and ensure it’s properly plugged in.
– Check the Wiring: If your sync did not work, the wiring might be loose or damaged. Inspect the wires connected to the wall button for any wear and tear. Sometimes, a simple reconnect is all it takes.
– Battery Issues: If you’ve recently changed batteries in your LiftMaster remote, it’s possible that the wall button settings could conflict. Consider resetting both devices again to help sync them up.
Why Resetting Matters
You might be wondering, “Why should I bother with all this hassle?” Here’s the thing: knowing how to reset your LiftMaster wall button is essential for maintaining a functional home. Over time, communication issues can develop between the opener and the button due to interference or power fluctuations.
Regularly resetting your wall button not only resolves immediate problems but also contributes to your garage system’s overall longevity. When everything’s in sync, it minimizes the risk of larger issues down the line.
Plus, let’s face it, there’s satisfaction in figuring out a tech issue by yourself!
Alternative Options to Consider
If you’ve followed the reset steps and your wall button still isn’t working, you may want to consider some alternatives. Sometimes, older models can be outdated, and newer technology provides improved connectivity and features.
– Universal Remotes: These remotes can often replace existing wall buttons and come pre-programmed to work with multiple brands, including LiftMaster.
– Smart Home Technology: Consider upgrading to smart garage door controls that allow you to open and close your garage door with a smartphone app. They often come with enhanced security features and notifications.
– Professional Help: If troubleshooting seems too overwhelming or if you think there’s a hardware issue beyond simple resets, don’t hesitate to call a professional. It’s okay to ask for help—sometimes a fresh set of eyes can pinpoint the issue quickly.
Final Thoughts
Resetting your LiftMaster wall button may seem complicated at first, but it truly isn’t. Think of it as hitting the refresh button on your device, helping clear out bugs. With just a few simple steps, you can restore functionality and avoid unnecessary expenses.
Keep your home tech running smoothly by maintaining your garage door opener and its components. By understanding how to reset it and knowing when to reach out for help, you’ll save time, stress, and of course, enjoy easy access to your garage once again.
Now, next time you press that wall button, you’ll know exactly how it works—and maybe even get a little smile when you see your garage door glide open just as you expected!