Understanding Your Garage Door Opener
First things first—let’s talk about what a garage door opener truly is. Essentially, it’s a motorized device designed to automatically open and close your garage door. They come equipped with a remote control, which lets you operate the door from a distance. Most garage door openers today use a chain, belt, or screw drive system to manage the door’s movement.
If you’re working with a finished ceiling, the type of opener can affect your installation. For instance, a belt drive opener is quieter and often preferred for garages integrated with living spaces. On the other hand, chain drive openers are generally more durable and suitable for detached garages. Think about your space and your preferences before committing!
Gathering Tools and Materials
Before you jump into installation, let’s make sure you have everything at your fingertips. Here are the essential tools and materials you will need:
- Garage door opener kit (includes motor unit, rail assembly, and remote)
- Stud finder
- Power drill
- Screwdriver
- Measuring tape
- Level
- Ladder
- Safety goggles
- Wrench set
It’s always smart to lay everything out in one area. This way, you won’t find yourself searching for that missing screwdriver halfway through the project. Trust me, it makes for a much smoother experience!
Determining the Installation Location
Location is crucial when it comes to installing your garage door opener. You’ll want to position it near the garage door, ideally above the door itself. Before you start drilling, take a moment to assess the ceiling. Keep in mind any overhead obstructions like light fixtures or plumbing.
To find the perfect spot, grab your measuring tape and confirm that the location you’ve chosen has at least 7 feet of clearance. This allows for the opener’s rail assembly, which will extend down toward the door. A clear space not only makes installation easier but also ensures that your garage door functions without hindrance.
Assembling the Garage Door Opener
Now it’s time to prep your opener for installation. Start by unpacking all components, according to your manufacturer’s instructions. Typically, the assembly involves connecting the motor unit to the rail and setting up the lifting mechanism.
Many models will involve a few clicks and clamps, making it easy even for a beginner. Here’s the thing: follow the manual closely to avoid missing any steps, as this can lead to complications down the line.
After fully assembling the opener, give everything a good visual check. You want to ensure that the parts are firmly locked in place, ensuring reliability during operation. Trust me; taking this extra moment can save you a headache later!
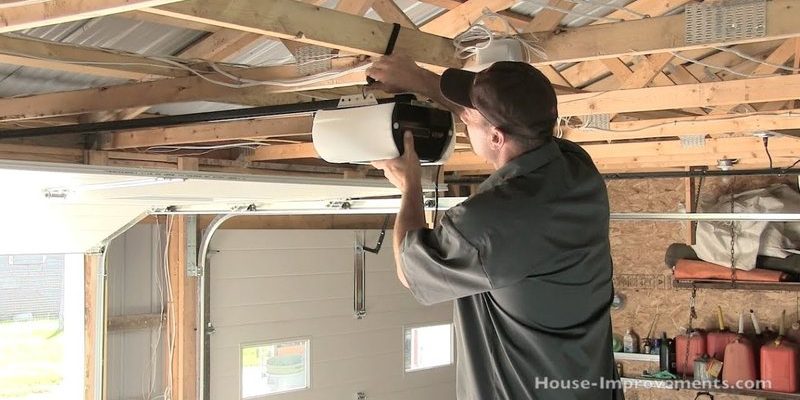
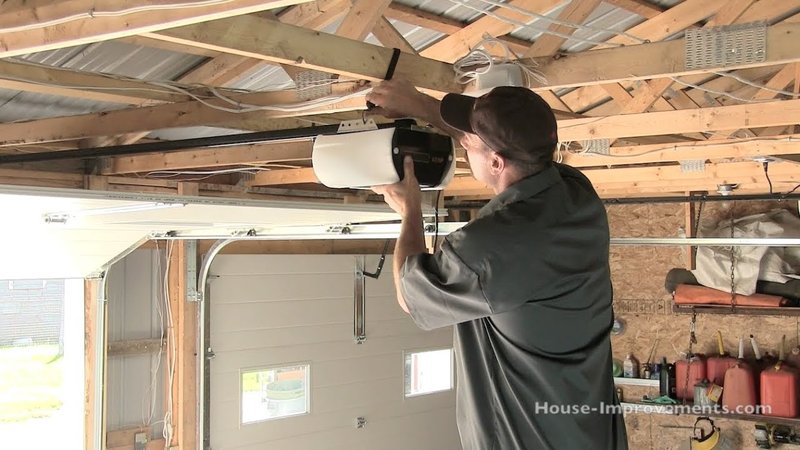
Mounting the Garage Door Opener
With the opener assembled, let’s move on to mounting it to the finished ceiling. Start by using your stud finder to locate the ceiling joists. These sturdy beams are crucial for supporting the weight of your opener. Mark their positions lightly on the ceiling with a pencil.
Once you’ve marked the location, position the opener so that it hangs at the right height—generally about 6-8 inches from the ceiling. Use your level to ensure it’s straight. Secure it to the ceiling using the included brackets, screws, and your trusty power drill.
It’s totally normal to feel a bit wobbly at this point! Don’t hesitate to double-check your work as you proceed. Remember, stability is key to long-lasting operation.
Connecting the Door Bracket
Now you’ll want to connect the door bracket. This is an essential step as it’s what physically links your opener to the door. Usually, the bracket will sit above or on the edge of the garage door itself.
Make sure to use a measuring tape again to position the bracket correctly. You’ll typically want it installed at about the center of the door’s top edge. Secure it with screws and ensure it’s tightly fastened. If you feel any give, tighten those screws—they’re critical!
This connection allows the opener to move the door up and down smoothly. A stable doorway makes the entire system function effectively.
Wiring Your Garage Door Opener
With your opener mounted and the bracket secured, it’s time to tackle wiring. This step can feel a bit intimidating, but don’t worry; it’s fairly straightforward. Most systems come with a clear wiring guide in the manual.
First, connect the power supply to your motor unit. Ensure the wire runs along the ceiling and is properly insulated. You might want to use cable clips to keep everything neat and tidy.
Next, connect the wires to the wall control panel, which usually mounts inside your garage near the door. This panel allows you to open the garage door from inside, so a convenient spot is key!
Take your time with this process. It’s beneficial to double-check your connections for any loose ends, ensuring everything is safe and secure before moving on.
Programming the Remote Control
Now that your opener is securely mounted and wired, let’s move on to programming the remote control. This is what makes your life easier. Follow the manufacturer’s instructions closely, as programming can differ slightly from brand to brand.
Typically, you’ll find a “Learn” button on the opener itself. Press this button, then within a minute, press the button on your remote. You should hear a beep or see a light flash, indicating that the sync was successful.
If your remote has multiple buttons, you can program each one to a different track, giving you flexible access. This is especially handy if you have more than one garage door or want family members to have access.
Testing the Garage Door Operation
Okay, the moment of truth is finally here—let’s test the garage door opener! Stand clear of the door and press your remote to see if it opens and closes smoothly. If it does, great job!
If you notice any hiccups, check the connections and ensure everything is bolted securely. Sometimes, a little adjustment can fine-tune the operation. If the door reverses when it’s nearly closed, you might need to adjust the force settings on your opener.
This testing step is crucial. The last thing you want is for a malfunction to cause injury or damage. Take your time and be thorough!
Final Thoughts on Your Garage Door Opener Installation
Congratulations! You’ve now successfully installed a garage door opener on a finished ceiling. This project not only adds convenience to your daily life but can also increase the value of your home. Plus, knowing how to install it yourself gives you confidence for future projects.
Always remember to read through your owner’s manual for maintenance tips and troubleshooting advice in the future. If you run into any issues, most brands offer reliable customer service to help out. So, the next time you slide into the driveway, you’ll appreciate that upgrade even more!