
For anyone with a garage door opener—like a Chamberlain or LiftMaster remote—adjusting these force settings is key to ensuring safe and efficient operation. Testing them might feel daunting, but it’s really more like checking to see if your car’s brakes are behaving correctly. Let me break it down for you in a straightforward way.
What Are Garage Door Opener Force Settings?
Garage door openers come equipped with force settings that determine how much power the opener uses to lift and lower the door. These settings help prevent damage to the door and surrounding objects. Imagine trying to lift a heavy box: if you push too hard, you risk injury, and if you don’t push enough, it doesn’t budge. That’s how your force settings work.
Most garage door systems have two main force settings—one for opening and one for closing the door. The opener knows how much force it should use based on the weight of your door. But sometimes, adjustments are necessary. Common reasons for needing adjustments include wear and tear, changes in temperature, or if you’ve installed a new door.
Why Testing Force Settings is Important
Testing the force settings on your garage door isn’t just about making sure it opens smoothly. It’s vital for your safety and that of anyone who might be near the door when it operates. If the force is too low, the door might not fully close or open, potentially trapping objects underneath or causing damage to your vehicle. On the other hand, if the force is too high, it could crush something—or worse, injure someone.
Here’s the thing: you don’t want to end up with a malfunctioning door that can lead to accidents, so regularly checking and adjusting these settings helps.
Tools You’ll Need for the Test
Before getting started, you’ll need a few simple tools. Thankfully, you won’t need anything fancy—just a few household items will do! Here’s a quick list:
- Owner’s manual: This will provide specific instructions and force setting guidelines for your garage door opener model.
- Flathead screwdriver: Used to make small adjustments to the force settings.
- Measuring tape: Handy if you want to check the height of the door when fully open or closed.
- Indicator cart or trash can: You can use these as obstacles to check if the door reverses correctly.
Having these tools on hand will streamline the testing process.
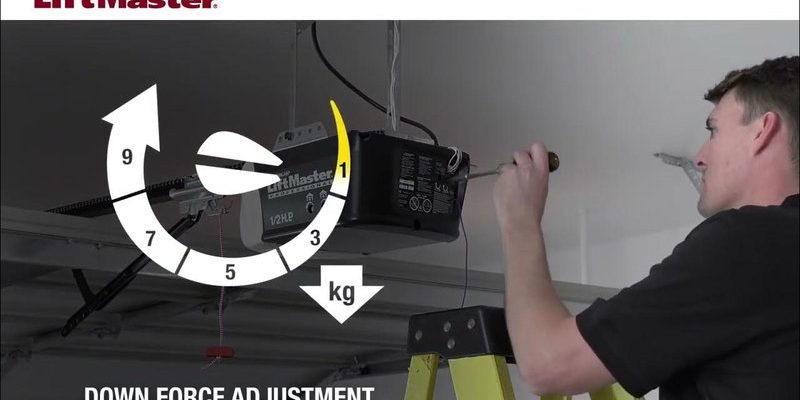
Step 1: Locate the Force Adjustment Screws
First things first, you’ve got to find those adjustment screws. Typically, they’re located on the back or side of the garage door opener unit. Each screw will be labeled for opening and closing, usually marked with a “+” (plus) for increasing the force and a “–” (minus) for decreasing it.
Check your owner’s manual if you have trouble locating them. Some systems might even require a little more digging, so don’t be afraid to get in there and look closely!
Step 2: Test the Door’s Functionality
Now that you’ve found your adjustment screws, let’s test the door’s function. Start by holding down the button on your remote. While it opens or closes, keep an eye out for any signs of struggle. Does the door pause, jerk, or make strange sounds? These could be indicators that your force settings need adjusting.
As the door begins its journey, pay attention to how it responds if it encounters an obstacle. If it doesn’t reverse or hesitates, you’ll need to tweak the settings. Here’s where our “indicator cart” or trash can comes in handy—place it under the door and test again.
Step 3: Adjust the Force Settings
If the door isn’t functioning properly, it’s adjustment time. Using your flathead screwdriver, turn the screw clockwise to increase the force or counterclockwise to decrease it. Remember, make minor adjustments—about a quarter turn at a time.
After each adjustment, test the door again by running it through its opening and closing cycle, observing its response to the obstacle you placed. It may take a few tries to get it just right, so patience is key here.
Step 4: Repeat and Fine-Tune
Much like learning to ride a bike, getting the right force setting is all about fine-tuning. Don’t worry if it doesn’t work perfectly the first time. Keep testing and adjusting until you feel a comfortable response from the door.
Remember to test the door in both directions. Sometimes, it might close smoothly, but struggle to open. Each side can have different needs, so ensure to adjust as necessary.
Common Problems You Might Encounter
As you go through this process, you might stumble upon a few hiccups. Here are some common issues and how to tackle them:
– Door Still Won’t Open: After adjustments, if the opener still struggles, check the batteries in your remote. Weak batteries can cause inconsistent communication.
– Door Closes Too Slowly: If the door is moving slower than usual, it might need a force adjustment upwards. However, be cautious not to overdo it!
– Unexpected Noises: Grinding or straining sounds may indicate that the door tracks are misaligned or that there’s debris. Give the tracks a good clean and check for obstructions.
Testing Your Garage Door’s Safety Features
Once you’ve got the force settings squared away, it’s essential to test the safety features of your garage door opener. Most systems include features like photoelectric sensors that stop the door if something is in the way. Test them by waving an object in the door’s path while it’s closing. If it reverses, you’re golden.
If it doesn’t—well, that’s a sign you need to check those sensors out or call a professional for further assistance.
Final Thoughts
Testing your garage door opener’s force settings is an easy way to enhance safety and functionality. Much like making sure your car’s brakes are working, regularly checking these will keep everything running smoothly. So grab your tools, follow these simple steps, and enjoy the peace of mind that comes with knowing your garage door is in tip-top shape. Just think of it as your door’s way of saying, “I’ve got this!”
If you ever feel unsure, don’t hesitate to reach out to a professional for help. Better safe than sorry, right? Keep your garage door a hassle-free part of your day!