If you own a garage door with an automatic opener, like one from Chamberlain or LiftMaster, you probably rely on it daily. The last thing you want is a surprise malfunction when you’re trying to head out for the day. So let’s dive into how to keep those tracks clean and ensure smooth operation, making the whole process as easy as pie—even if you claim you’re not handy.
Why Clean Your Garage Door Tracks?
Garage door tracks play a crucial role in the overall function of your door. When clean, they help your garage door glide smoothly up and down without any hiccups. Over time, dirt and grime accumulate, which can create quite a ruckus when you hit that remote button. Plus, a clean track can extend the life of your door, saving you money in the long run.
Here’s the thing: If your tracks are gummed up, your garage door might struggle while opening or closing, making barking noises or jerky movements. You definitely don’t want to deal with those issues—especially when all you want is a quick exit from your garage. Regular cleaning helps maintain your door’s performance and prevents wear and tear, so let’s get into how to do it right.
Tools You’ll Need
Before jumping into cleaning, gather some essential tools. You don’t need anything fancy, and you might already have most of these at home. Here’s a quick checklist to get you started:
- Vacuum cleaner (with brush attachment for tight spots)
- Soft cloths or rags
- Mild detergent or soap
- Lubricant (silicone-based is best)
- Brush (an old toothbrush works great)
Having these items at hand will make the cleaning process smooth and efficient. Honestly, you can write a cleaning script, but it’s just that simple! Now, let’s roll up our sleeves and get started.
Step 1: Disconnect Your Garage Door Opener
Safety first! Before you begin cleaning garage door tracks, it’s smart to disconnect your garage door opener. This prevents any accidental triggering while you’re working. Most openers have a simple release mechanism. Just pull the emergency release cord—usually a red handle hanging down—and your door will be free to move manually for cleaning.
This step isn’t just about safety; it’s about practicality too. You can have better access to the tracks without worrying about the motor kicking on. Plus, it allows you to test everything later when you reconnect the opener to see how smoothly the door operates.
Step 2: Inspect the Tracks
Before picking up any cleaning supplies, take a close look at the tracks. Look for signs of dirt buildup, rust, or any obstructions. You might be surprised by how much junk can accumulate there over time. Are there leaves, dirt, or little cans of paint? Spend a few moments analyzing what you see.
If you spot any severe damage like dents or warped sections, you may want to consider repairs before diving into cleaning. Identifying these issues now can save you from headaches later on. Just like your car, a little maintenance goes a long way!
Step 3: Remove Debris
Once you’ve examined the tracks, it’s time to remove any visible debris. Grab your vacuum cleaner and use it with the brush attachment to suck up any dust, dirt, or cobwebs that may have built up in those nooks and crannies. If there are larger pieces of junk stuck in the tracks, use your hands to remove them carefully.
Using your hands might feel gross, but this is essential for a thorough clean. Make sure you get into those corners; any leftover debris can cause issues later. Think of it as spring cleaning for your garage door.
Step 4: Clean with Soap and Water
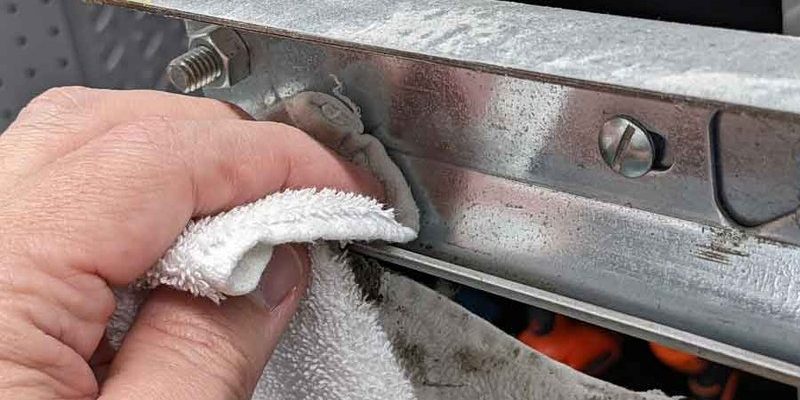
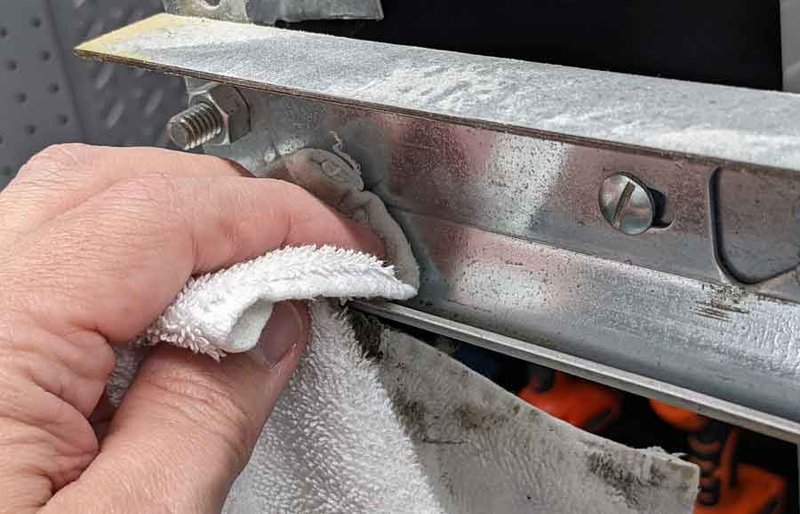
Now that you’ve removed the bulk of the debris, it’s time to give those tracks a good scrub. Mix a bit of mild detergent with water in a bucket. Dip your soft cloth or rag into the mixture, wring it out, and start wiping down the tracks.
For grimy spots, use an old brush or toothbrush to scrub gently. This helps to lift off stubborn dirt without damaging the tracks themselves. Let the soapy water do its magic! Once you’ve scrubbed the tracks clean, go over them with a damp cloth to remove any soap residue.
Step 5: Dry the Tracks
After cleaning, make sure the tracks are completely dry before moving on to lubrication. Leaving moisture can invite rust and dirt back to the scene. A dry cloth will help soak up any leftover moisture.
It’s funny how such a simple step makes a big difference. Trust me, you don’t want to set yourself up for a slippery situation later!
Step 6: Lubricate the Tracks
At this stage, your tracks should be clean and dry. This is where we add some magic: lubricating! Use a silicone-based lubricant—avoid heavy oils like WD-40, as they can attract dirt over time. Apply a light coat along the length of the tracks.
Run the garage door up and down a couple of times after lubricating. This allows that lubricant to spread evenly and ensures the door glides smoothly. You might just hear a satisfying whisper instead of a groaning noise as it opens and closes.
Common Problems and How to Fix Them
Despite your best efforts, you might still face issues with your garage door tracks. Let me explain a few common problems and how you can troubleshoot them effectively.
1. Sticking Door: If your garage door is still having trouble moving, double-check for leftover debris or that the tracks are properly aligned.
2. Noisy Operation: A garage door that squeaks can often suggest the tracks are dirty or that the lubrication isn’t enough. A quick clean and re-lube should help.
3. Misalignment: If your door isn’t aligning well with the tracks, you may need to adjust the track position slightly. This takes a gentle hand, so ensure you have the correct tools for tightening.
With these fixes, you’ll be back on track—literally!
Maintaining Clean Tracks Year-Round
Cleaning garage door tracks is not a one-and-done job. You’ll want to incorporate this step into your regular home maintenance routine. Aim to clean your tracks every few months or whenever you notice performance issues.
Think of it like washing your car: A little effort can keep everything looking and working like new. Do a quick visual check each month, and if it’s looking a bit grimy, don’t hesitate to give it a clean.
Final Thoughts on Smooth Garage Door Operation
While cleaning garage door tracks might not be a thrilling chore, keeping them clean is essential for smooth operation. Regular maintenance can save you from frustration and costly repairs down the line. After all, who wants to deal with a stuck garage door when you’re late for that meeting or a dinner date?
You’ve learned all the steps to keep your garage door tracks in top shape. Now, grab those tools and refresh your garage door system. When you approach these tasks methodically, they become less daunting and, dare I say, pretty satisfying. So next time you press that remote, you’ll be greeted with smooth operations, making all the time you spent well worth it!