If you have a Raynor garage door opener, you likely have a remote that helps you open and close the door at your convenience. The remote communicates with the circuit board, sending signals to tell your garage door what to do. This process might feel a little complex, but with the right instructions, you can program that remote like a pro. Let’s dive in!
Understanding Your Raynor Circuit Board
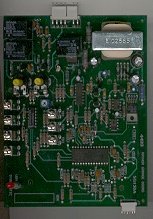
The Raynor Circuit Board is the brain of your garage door opener. Think of it as the control center, taking inputs from your remote and sending signals to the motor that runs your garage door. It’s fundamental for the opener to operate correctly, and knowing a bit about it can help you troubleshoot issues down the line.
First, it’s important to identify the various components of the circuit board. You’ll typically see buttons, LED lights, and sometimes even dip switches. Each part has a role. The buttons can be used to reset the system, while the LED lights provide feedback about its status—like whether your remote is successfully programmed or not.
You might be wondering about the typical problems that can pop up. If your remote doesn’t work, it might be due to a dead battery, but sometimes it’s a simple matter of needing to reprogram the device. Understanding how your circuit board operates will help demystify these common headaches.
Gathering the Right Tools
Before you start to program your Raynor Circuit Board, make sure you have everything you need in one place. This is like gathering your supplies before starting a DIY project. Here’s what you’ll need:
- A working Raynor remote – Make sure the battery is new, so you don’t hit any snags.
- The garage door opener – You’ll need to access the circuit board on the motor itself.
- Owner’s manual – If you have it on hand, it can be a lifesaver for specific instructions.
- A ladder – To reach the motor, if it’s mounted high up.
- A notepad – Jotting down any codes or steps can help keep you organized.
Having these tools ready will make the process seamless. Plus, if you come across any issues, having your manual nearby can save you a lot of head-scratching.
Accessing the Circuit Board
Now that you’re equipped, it’s time to access the circuit board. This is an essential step, as you can’t program anything if you don’t get to the controller first. Here’s how to do it:
1. Safety First: Make sure to unplug the garage door opener to avoid accidents while you’re working.
2. Locate the Motor: Your garage door opener will typically be mounted on the ceiling. Use a ladder to reach it, but ensure it’s stable and secure.
3. Remove the Cover: Depending on your model, you may need to unscrew or gently pry off the cover of the garage door opener to access the circuit board.
Once you have it open, you’ll see various components that might look confusing at first. But don’t worry; it will all make sense soon.
Programming the Remote
Now comes the fun part—programming your remote! Think of this step as teaching your remote how to communicate with the circuit board. The process may vary slightly depending on your model of Raynor opener, but here’s a general procedure you can follow:
1. Find the Programming Button: This button is usually located on the circuit board itself. Look for a button labeled “Learn” or something similar.
2. Press and Hold the Button: Press and hold the programming button until the LED light turns on—this indicates that the circuit board is in programming mode.
3. Activate the Remote: Press and hold the button on your remote that you want to program. The LED light on the circuit board may blink or turn off, confirming that the remote has been successfully programmed.
Congratulations! You just programmed your Raynor remote.
Troubleshooting Common Issues
Even with clear instructions, you may run into some common issues while programming your Raynor Circuit Board. Don’t worry! Most of these can be resolved with a few simple steps.
– Remote Not Responding: If the remote doesn’t seem to work after programming, ensure the battery is installed properly. Sometimes, it’s as simple as swapping in a fresh battery.
– Remote Not Pairing: If you’ve followed the steps but the remote still isn’t pairing, try resetting the circuit board. To do so, press the “Learn” button until it turns off.
– Interference: Sometimes, signals from other devices can interfere with your remote. Moving closer to the opener can make a difference.
Troubleshooting can feel frustrating, but remember, patience is key. Taking a methodical approach will help you find solutions faster.
Understanding Alternative Options
You might be considering whether to stick with your Raynor remote or explore other options. It’s a good idea to know what’s out there. Universal garage door remotes are one alternative. They can work with a range of brands, including Raynor, which provides flexibility if you own multiple properties or have different garage door openers.
However, keep in mind that if you switch to a universal remote, the programming process might differ slightly. Be sure to follow the instructions specific to the new remote you choose.
Another option is upgrading to a smart garage door opener, allowing you to control your garage door through an app on your phone. This can offer convenience and additional features, but it can also involve more complex programming.
Maintaining Your Garage Door System
Just like any other device, your garage door opener needs regular upkeep to function flawlessly. This includes checking the batteries in your remote every few months. Consistent maintenance can save you from headaches down the line.
Here are some quick tips for keeping everything running smoothly:
– Clean the Sensors: Dust and debris can build up and cause sensors to malfunction. Wiping them occasionally can help.
– Check the Tracks: Make sure there are no obstructions in the tracks. If you notice something, remove it promptly.
– Listen for Unusual Sounds: If you hear grinding or squeaking, it might be time to lubricate the moving parts.
By staying proactive, you can extend the life of your garage door opener and avoid inconvenient service calls.
In summary, programming your Raynor Circuit Board doesn’t have to be a hassle. By following these steps carefully, you can tackle it with confidence. Whether you’re troubleshooting or considering alternatives, being informed will help you make the best decisions for your garage door system. Happy programming!