Let’s break it down. Programming your Genie safety sensor is a bit like setting a timer on your oven—you just need to understand which buttons to push. In this article, we’ll cover everything you need to know about programming your Genie safety sensor, ensuring your door operates safely and smoothly every time you use it.
Understanding Your Genie Safety Sensors
Before jumping into programming, it’s important to know what safety sensors actually do. Installed on either side of your garage door, these sensors send signals to each other to create a beam of light across the doorway. If anything disrupts that beam, like a pet or a bicycle, the door will reverse and avoid potential harm. It’s an essential safety feature, especially for households with kids or pets.
Honestly, the last thing you want is a garage door closing unexpectedly. Think of the safety sensors as a friendly pair of watchful eyes, ensuring everything is clear before lowering the door. If you’ve noticed that your garage door won’t close properly or keeps reversing, it’s likely a signal that your sensors need some attention.
Gathering What You Need for Programming
Before you dive into programming, let’s gather a few essentials. The good news is you won’t need much—just a few simple tools and some patience. Here’s what you should have on hand:
- Step ladder—If your sensors are mounted high, you might need this to reach them.
- Owner’s manual—This guides you through model-specific nuances.
- Clean cloth—A bit of dust or debris can interfere with the sensors’ function.
- Flathead screwdriver—Optional, in case you need to make adjustments to the sensor mounts.
Taking a moment to prepare will save you time down the line. Plus, you’ll feel more confident knowing you have everything you need before jumping in.
Locating and Inspecting Your Safety Sensors
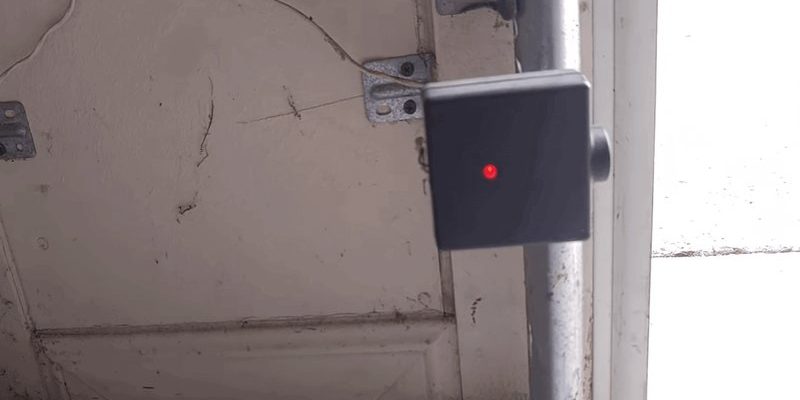
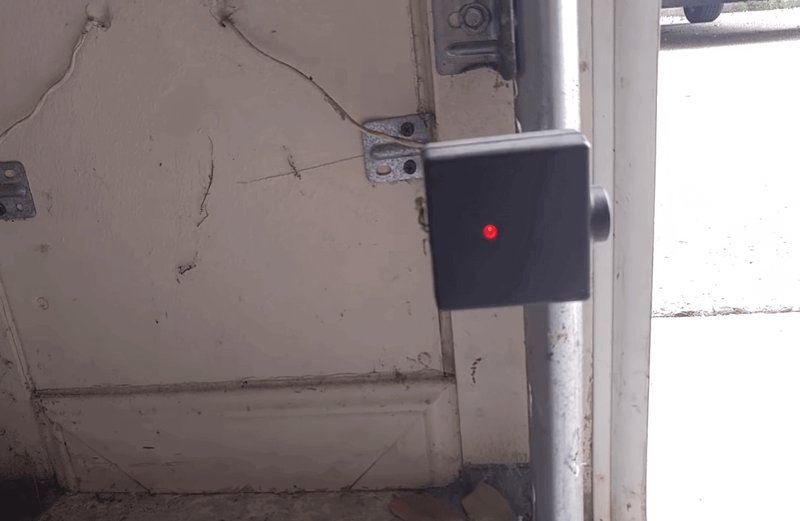
To get started, you’ll need to locate your Genie safety sensors. They’re easy to spot! Just look for two small boxes affixed to the wall on either side of the garage door. Once you’ve found them, give them a quick inspection. Here are a couple of things to keep an eye out for:
– Alignment: Make sure the sensors are pointed directly at each other. If they’re misaligned, the door won’t close. It’s like staring at someone with your eyes crossed—you’re not getting a clear connection.
– Cleanliness: Wipe the lenses gently with a clean cloth. Dust can interfere with the sensor’s ability to “see” the beam, just like a dirty window can obstruct your view.
If everything looks good, you’re ready to begin programming.
How to Program Your Genie Safety Sensor
Now comes the fun part: programming your Genie safety sensor. It’s a straightforward process, so here’s how to do it step-by-step:
1. Power Down the Opener: Begin by unplugging your garage door opener or turning off the power at the circuit breaker. This step is crucial for safety.
2. Reset the Sensors: Locate the “Learn” button on your opener (usually on the back or the side). Press and hold this button until the indicator light turns on and then off.
3. Reposition the Sensors: While holding the light button, reposition the sensors to ensure they’re facing each other directly.
4. Reconnect Power: Plug the opener back in or turn the power on at the circuit breaker. Once the opener powers back up, check to see if the sensors are responding.
5. Test the Door: Manually operate the garage door to see if everything is working effectively. If it continues to reverse, revisit the steps and ensure everything is properly aligned.
You might be wondering what to do if the door still isn’t cooperating. Don’t fret!
Troubleshooting Common Programming Issues
Sometimes, even the best-laid plans don’t go as expected. If your Genie safety sensors aren’t responding after programming, here are a few common issues to check:
– Alignment: Run a quick visual check. Are the sensors still lined up? Even a slight angle can cause a big issue.
– Obstructions: Ensure there’s nothing blocking the sensors. Remember that pesky dust I mentioned? It can cause problems!
– Wiring: If the sensors are hardwired, inspect the wires for any breaks or damage. A simple disconnection could prevent the sensors from functioning entirely.
– Power Supply: Make sure that your garage door opener is receiving power. It’s easy to overlook a blown fuse or a tripped circuit.
If you’ve checked these issues and still face problems, consult your owner’s manual or contact a professional.
Why Programming Your Genie Safety Sensor Matters
You might be thinking, “Why go through all this trouble?” The short answer is safety. Properly functioning safety sensors protect your family, pets, and belongings. A garage door that closes when it shouldn’t can cause serious injury or damage, leading to both physical and financial repercussions.
Furthermore, taking the time to program your Genie safety sensor ensures that your garage door system works smoothly and effectively. This isn’t just a task on your to-do list—it’s part of keeping your home safe.
Programming your Genie safety sensor might seem like a daunting task at first, but as we’ve walked through, it’s a relatively straightforward process. By keeping these steps, tools, and troubleshooting tips in mind, you can ensure that your garage door operates safely for years to come.
Remember, a little maintenance can go a long way in preventing headaches down the road. So enjoy the peace of mind that comes with a well-programmed safety sensor, and rest easy knowing your garage will safely keep watch. If you encounter further issues, don’t hesitate to reach out to a professional. You’re doing great, and soon you’ll be a Genie sensor programming whiz!