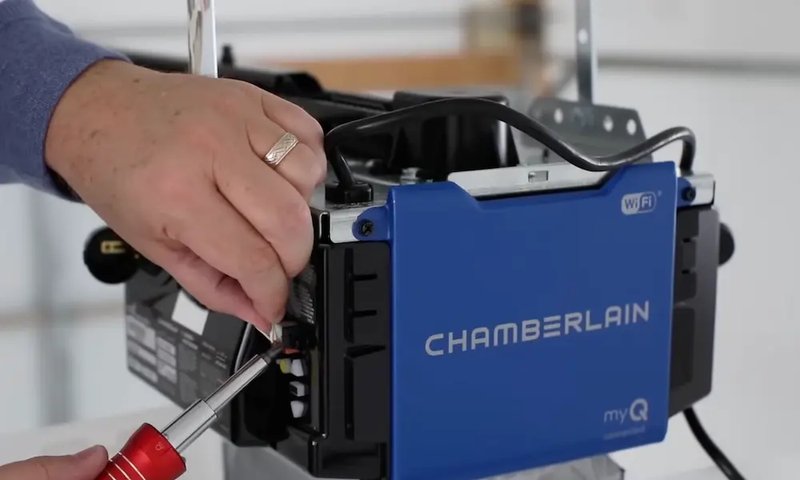
Think of the Chamberlain motor unit as the brain of your garage door system. It needs the right signals from your remote to tell the door when to open or close. Just like teaching your dog new tricks, you need to show your remote and motor how to communicate. In this guide, we’ll dive deep into how to program your Chamberlain motor unit so you can have your garage door working effortlessly and efficiently.
Understanding the Chamberlain Motor Unit Components
Before diving straight into programming, let’s chat about the main components involved. Understanding these can make the whole process smoother.
First up, the motor unit itself is the part that actually lifts and lowers your garage door. It typically hangs from your garage ceiling and includes features like a power head and a gear assembly. The power head drives the door up and down, while the gear assembly helps manage the movement.
Next, you have the remote control. It sends signals to the motor unit—a bit like how a conductor leads an orchestra. Each button on the remote has a specific function. In many cases, you’ll find options for opening, closing, and even stopping the door mid-operation. Some Chamberlain remotes also come with safety features that prevent the door from closing when something is in the way.
The last piece of the puzzle is the wall control panel. This typically resides inside your garage and provides a manual control option for the door. Programming can often be initiated from here too. So, let’s get to the fun part: programming your Chamberlain motor!
Step 1: Prepare for Programming
To start programming your Chamberlain motor unit, gather your tools. You won’t need much—just your remote, a ladder (if your motor is high up), and maybe a flashlight if it’s a bit dim where you’re working. It’s important to ensure the garage door is closed before starting. This means we’re creating a safe environment for the programming process.
Once you have your tools, locate the learn button on the motor unit. This button is often hidden behind the light cover at the back of the unit. You might need to remove the cover by gently squeezing it. Just remember, this is where the magic happens!
Tip: If your motor is one of the older models, refer to the model’s user manual for specifics on button locations. Each model is slightly different!
Step 2: Sync the Remote with the Motor Unit
Now that you’re ready, let’s pair the remote with the motor unit. Here’s how you can do that step by step:
- Press and Hold the Learn Button: Once you’ve located the learn button on the motor unit, press and hold it until you see the indicator light turn on and then off (usually 6 seconds). This means the unit is now in programming mode.
- Press the Remote Button: Within 30 seconds of pressing the learn button, take your remote and press any button. If the remote is programmed successfully, the light on the motor unit should blink once or stay lit temporarily.
- Test the Remote: Now, press the button again on the remote to test if the door opens or closes. If it doesn’t work the first time, don’t panic! Repeat the process. Sometimes it just takes a couple of tries.
This step sets the foundation for smooth operation. If it still doesn’t sync, you might want to check the remote’s battery or inspect for any physical damage.
Step 3: Programming Additional Remotes
Have more than one remote? No problem! Chamberlain motor units can typically handle multiple remotes, just like a TV can record different shows at once. The steps are similar to what we just covered:
- Press and hold the learn button on the motor until the light turns on and off.
- Press the button on the new remote you want to program. Wait for that confirming blink from the motor unit.
- Test the remote to ensure it works.
Repeat this process for as many remotes as you’d like to program. Remember, the motor unit can take up to 8 different remote controls. It’s like welcoming all your friends to the party!
Troubleshooting Common Programming Issues
Even with the best instructions, sometimes things just don’t go as planned—don’t worry, that happens to everyone. If your remote won’t program, here are a few troubleshooting steps to consider:
1. Check the Battery: A weak battery is often the culprit. Open your remote and replace the battery if necessary. Sometimes, a low battery just can’t muster the power needed for communication.
2. Reset the Motor Unit: If the programming still fails, consider resetting the motor unit. To do this, hold down the learn button until the light goes out, which erases all programmed remotes. Then, you can start fresh.
3. Inspect the Wiring: Make sure that everything is connected properly. Loose wires or connections can interfere with the programming process.
Final Thoughts on Programming Your Chamberlain Motor
Programming your Chamberlain motor unit doesn’t have to be a headache. With a little patience and some easy steps, you can have your remotes syncing up in no time. This process is not just important for convenience; it also ensures your home remains secure and functional.
Always remember to keep the user manual handy. It’s your best friend for quick references and troubleshooting in case you run into any hiccups. And hey, if you ever find yourself stuck, don’t hesitate to reach out to Chamberlain’s support or check their online resources. After all, every good conductor needs a little help sometimes! Now go ahead and enjoy the ease of operating your garage door with a simple click of a button.
