
Liftmaster keypads provide a convenient way to enter your garage. With the touch of a few buttons, you can unlock the door without fumbling for your remote or keys. Plus, if you’re like me, you probably enjoy the ease of just punching in a code and walking right in. In this guide, I’ll walk you through the entire process of programming your Liftmaster keypad, step by step, so you can feel confident doing it yourself!
Get Familiar with Your Liftmaster Keypad
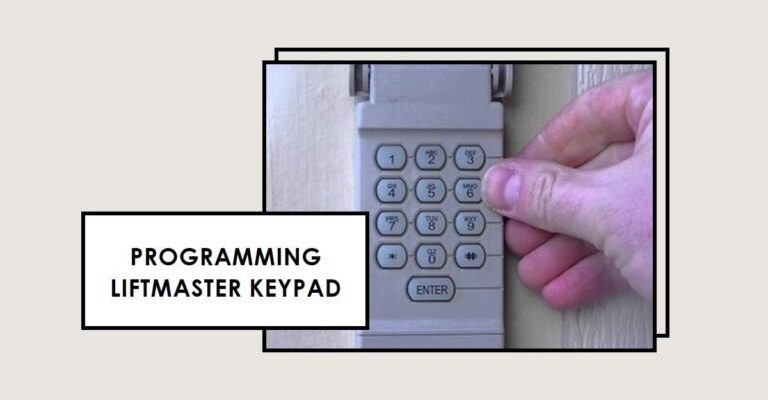
Before diving into programming, let’s make sure you understand what you’re working with. Liftmaster keypads come in several models, each with slightly different features and programming steps. Most commonly, you’ll find either a battery-powered standalone keypad or a wireless keypad that connects with your garage door opener.
Battery-Powered vs. Wireless Keypads: Battery-powered keypads usually sit outside your garage and are designed for ease of use. They may require you to replace the batteries from time to time, but you won’t have to worry about power running to them. Wireless keypads connect to your existing Liftmaster garage door opener without any wires and are generally easy to install.
Make sure you have your *particular model’s manual* handy. It includes the specific instructions you’ll need, and sometimes even small differences will require slightly different steps. Knowing your model will save you a ton of trial and error.
Gather What You Need
Before you start programming, it’s a good idea to gather a few supplies. You won’t need much, but having these items ready will help you move through the process smoothly. Here’s a simple list to get you going:
- Your Liftmaster keypad
- A ladder (if your keypad is mounted high)
- Your garage door opener’s model number
- A Phillips screwdriver (if needed for mounting)
- A working code you plan to program
Now, you might wonder why having a working code is important. Well, if you’re replacing an older keypad, this is usually the point where you’ll overwrite the old code with a new one. It’s like changing the locks on your house after moving in to ensure no one else has access. You’ll want to make sure you set a code that’s memorable but not too obvious for your peace of mind.
How to Program Your Liftmaster Keypad
Let’s get to the good stuff—programming the keypad. It’s easier than it sounds, and I promise you can handle it. Here’s a simplified, step-by-step guide to program your Liftmaster keypad:
1. Find the Learn Button: This tiny button is usually located on the back or side of your garage door opener. Depending on the model, you might need to use a ladder to access it.
2. Press the Learn Button: Give the Learn button a tap. You should see a light above it turn on, indicating that it’s ready to sync with your keypad.
3. Enter Your Desired Code into the Keypad: Now, head over to your keypad and enter the code you’ve decided on. This could be a four-digit code that you can easily remember, but be creative—a mix of significant numbers works well.
4. Press the Enter Button: After typing in your code, hit the Enter button. Wait for the confirmation light on the garage door opener to blink or turn off. That means your code is successfully programmed!
5. Test Your Code: Make sure to test the code by entering it into the keypad. If the garage door opens or closes, you’ve done it right! If it doesn’t work, try the steps again, ensuring every digit is correct.
Troubleshooting Common Issues
Sometimes, even the most straightforward tasks can have hiccups. If your keypad doesn’t seem to be working after programming, don’t panic. Let’s look at a couple of common problems and their solutions:
– The Keypad Won’t Sync: If your keypad doesn’t sync with your garage door opener, check that the Learn button was pressed long enough. You want to keep it pressed until the lights indicate it’s ready. Also, make sure you’re using the correct code format.
– The Code Isn’t Opening the Door: Double-check the code you entered on the keypad. It’s easy to accidentally press the wrong buttons! If everything seems correct and it still doesn’t work, reset your keypad and try programming it again.
Sometimes, just giving the keypad a new battery can solve many issues as well. If you still have problems, reaching out to Liftmaster customer support can provide additional guidance.
Considerations for Keypad Security
After programming, security should be at the forefront of your mind. You wouldn’t want just anyone to have access to your garage. Here are a few quick tips for keeping your keypad secure:
- Change the Code Regularly: It’s a good idea to change your code every 6-12 months or after having guests over.
- Avoid Using Obvious Codes: Stay away from easily guessable codes like birthdays or simple patterns. Think of something unique.
- Look for a Keypad with Rolling Codes: Some Liftmaster models have rolling code technology, which changes the access code each time you use it, boosting security significantly.
By being smart about your garage keypad security, you can enjoy the convenience it provides while keeping your home safe.
Programming your Liftmaster keypad doesn’t have to be a daunting task. With the right approach and these simple steps, you’ll have your keypad set up in no time. Remember, it’s all about giving yourself easy access to your garage, while ensuring security stays intact.
Now that you have the confidence to tackle programming your keypad, you’re well on your way to enjoying a seamless entry into your garage. If challenges arise, don’t hesitate to troubleshoot or consult the manual. Happy programming!